A Western Road Trip - Part 3: Sioux Falls & the Badlands of South Dakota
“The Master of Suspense presents a 3000-mile chase across America!” — North by Northwest Tagline
“Design is thinking made visual.” — Saul Bass
Thanks to both of our professions, my husband and I are significant movie buffs. We knew that stopping in Sioux Falls, SD was a requirement.
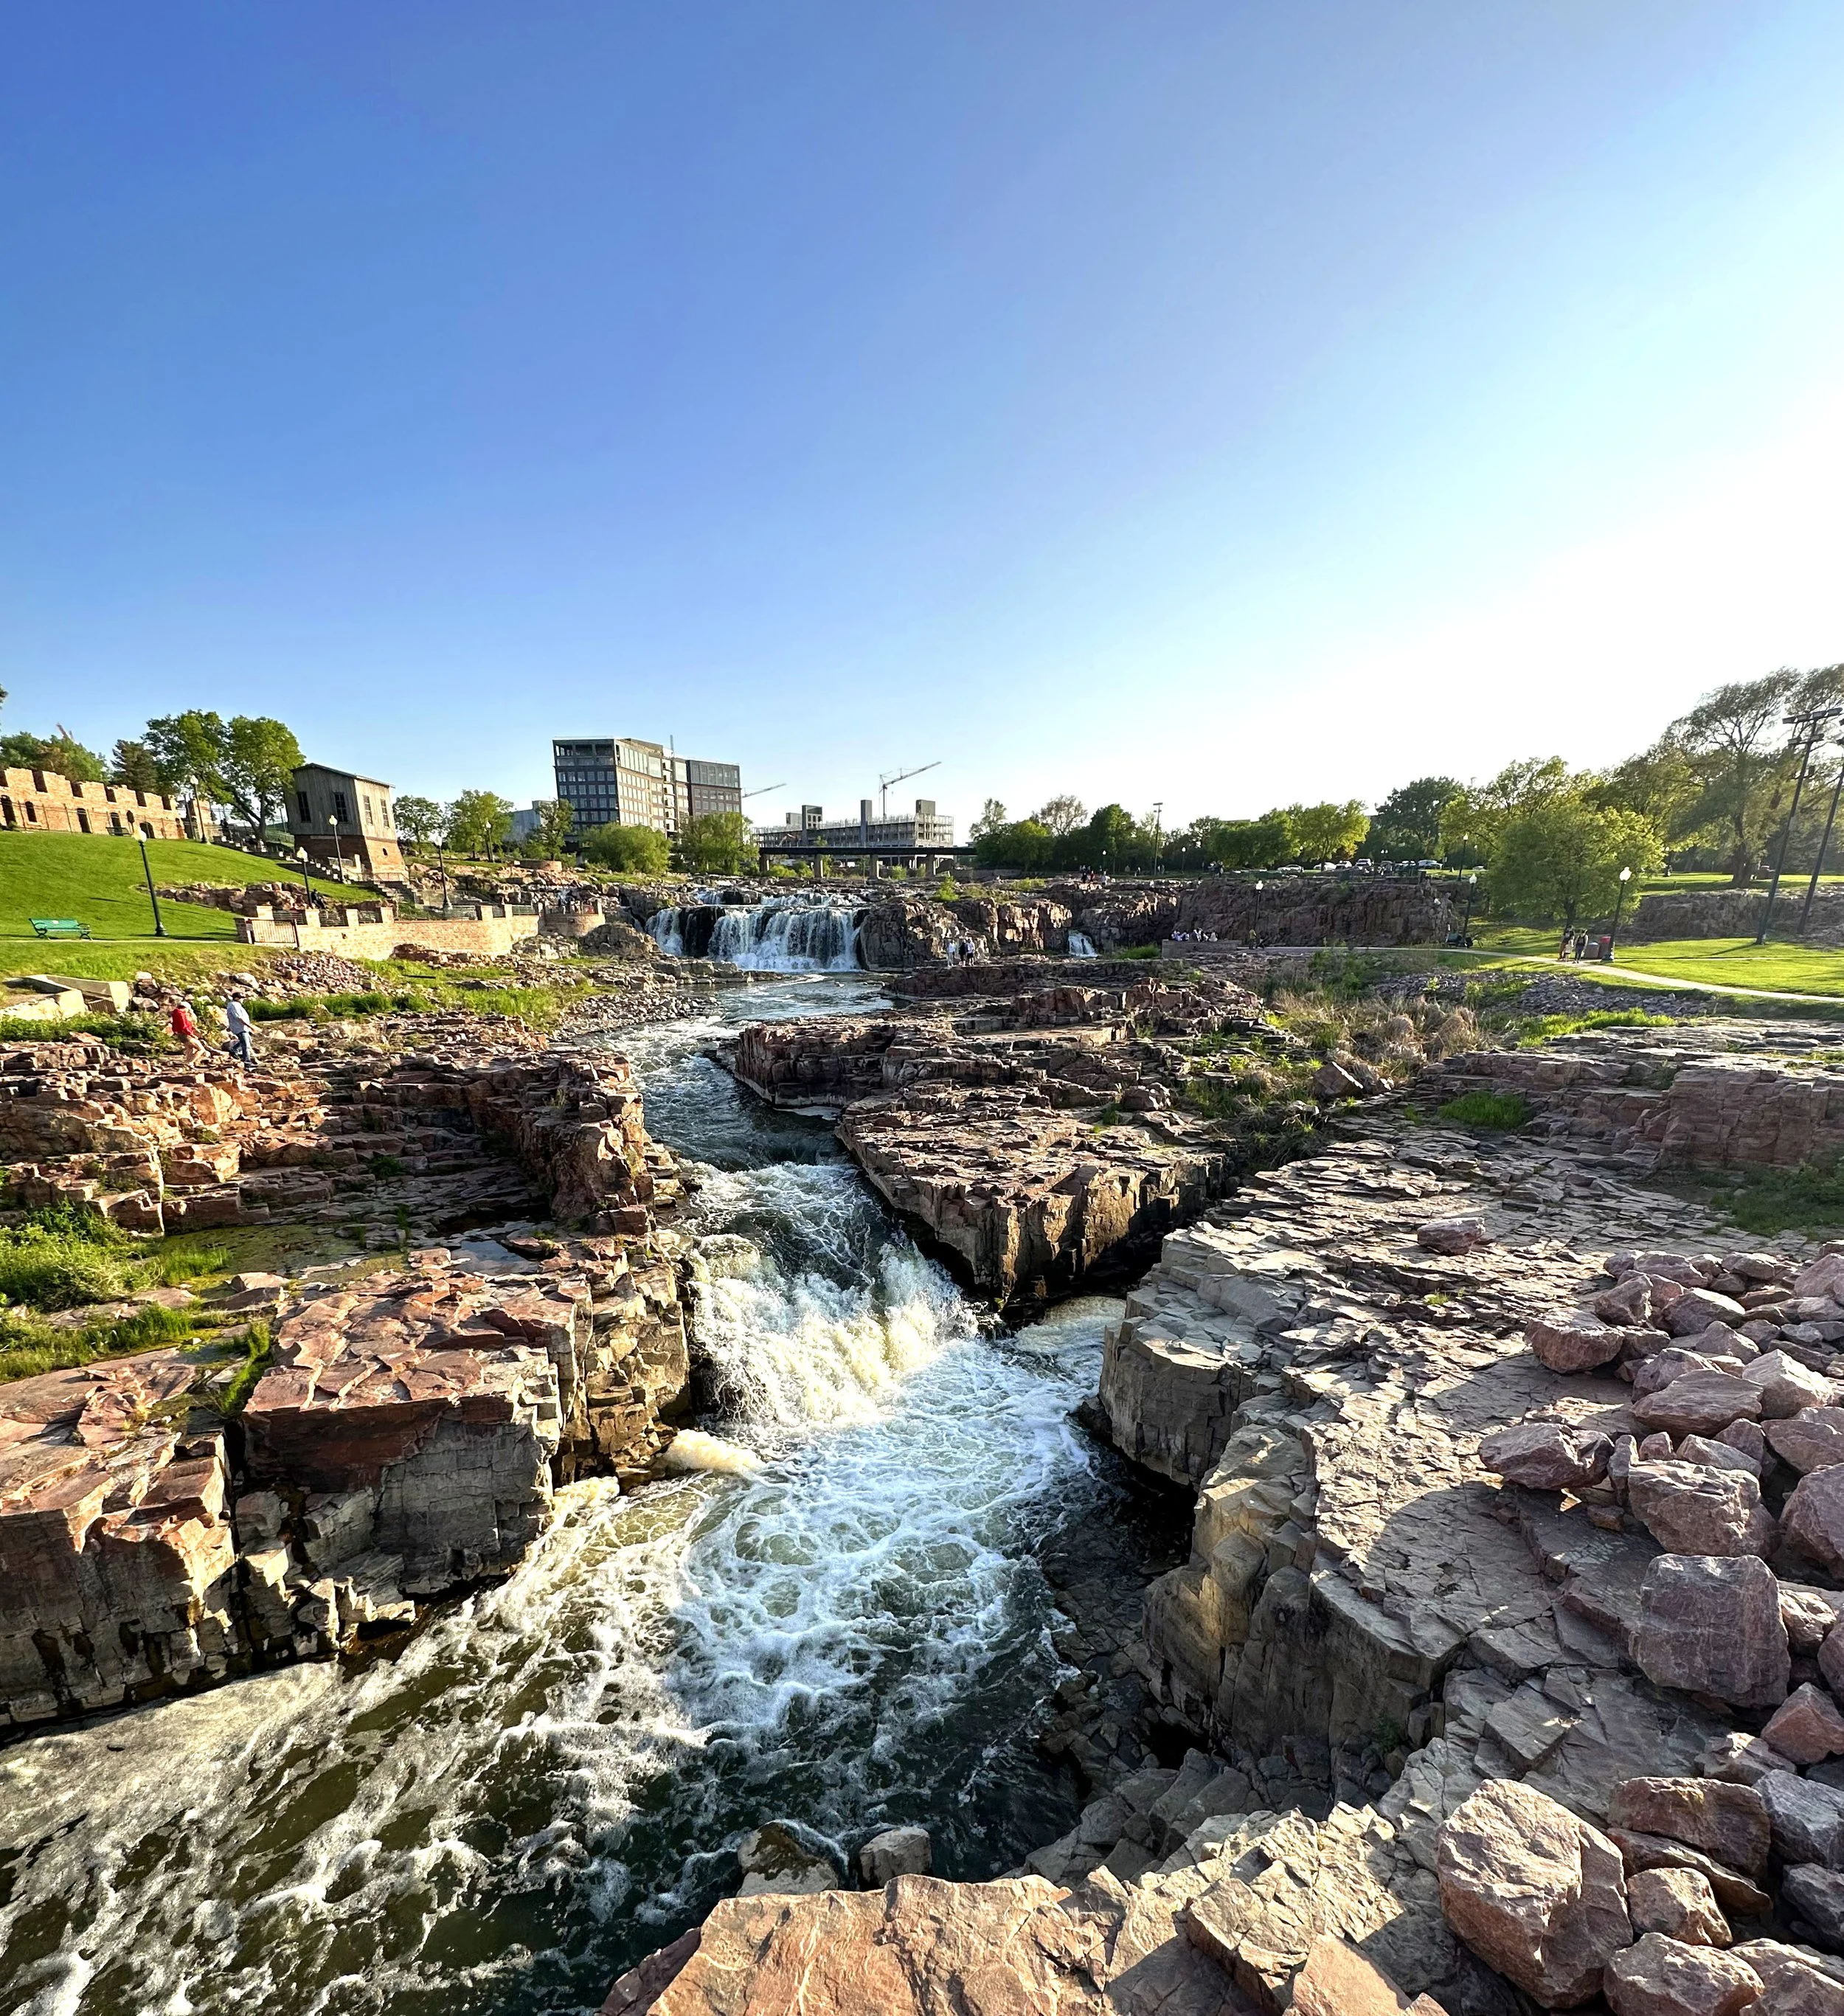
Sioux Falls is a beautiful place. And, much flatter than we expected! The city, named after the Sioux people, was built around the Sioux waterfall located on the Big Sioux River. One of the most striking aspects of this town, and the area surrounding it, is the pink quartzite (called Sioux quartzite) that makes up much of the area! The buildings and waterfall’s rocks were a beautiful vivid pink!
SIOUX QUARTZITE:
I was very excited to take a sample of Sioux quartzite - it’s a beautiful bright pink and would make a great addition to the pigments used in my film: Sundays.
Sioux quartzite is a type of rock that is found primarily around Sioux Falls, South Dakota. It’s a form of quartzite which is a metamorphic rock that was originally formed from sandstone. A metamorphic rock is a rock that started out as another type of rock and changed from their earlier form to something new over millions of years. This can be done by being subjected to high heat, pressure and/or hot mineral-rich fluids. Some other examples, in addition to quartzite, of metamorphic rocks include granite, marble, anthracite coal and slate.
Sioux quartzite is unique regarding it’s age and formation. It was formed around 1.7 billion years ago during the Proterzoic era. It originated as sedimentary sand deposits from an ancient sea. Over time, the grains were cemented together and underwent intense pressure and heat. This caused the sandstone to turn into quartzite. It is most notable because of the distinct horizontal layering which indicates the original deposition of the sand grains.
It’s also incredibly hard and, as I mentioned above, was mined to create the decorative stone and foundations for many of the buildings in the area. Even the roads in eastern South Dakota had a pink tint to them!
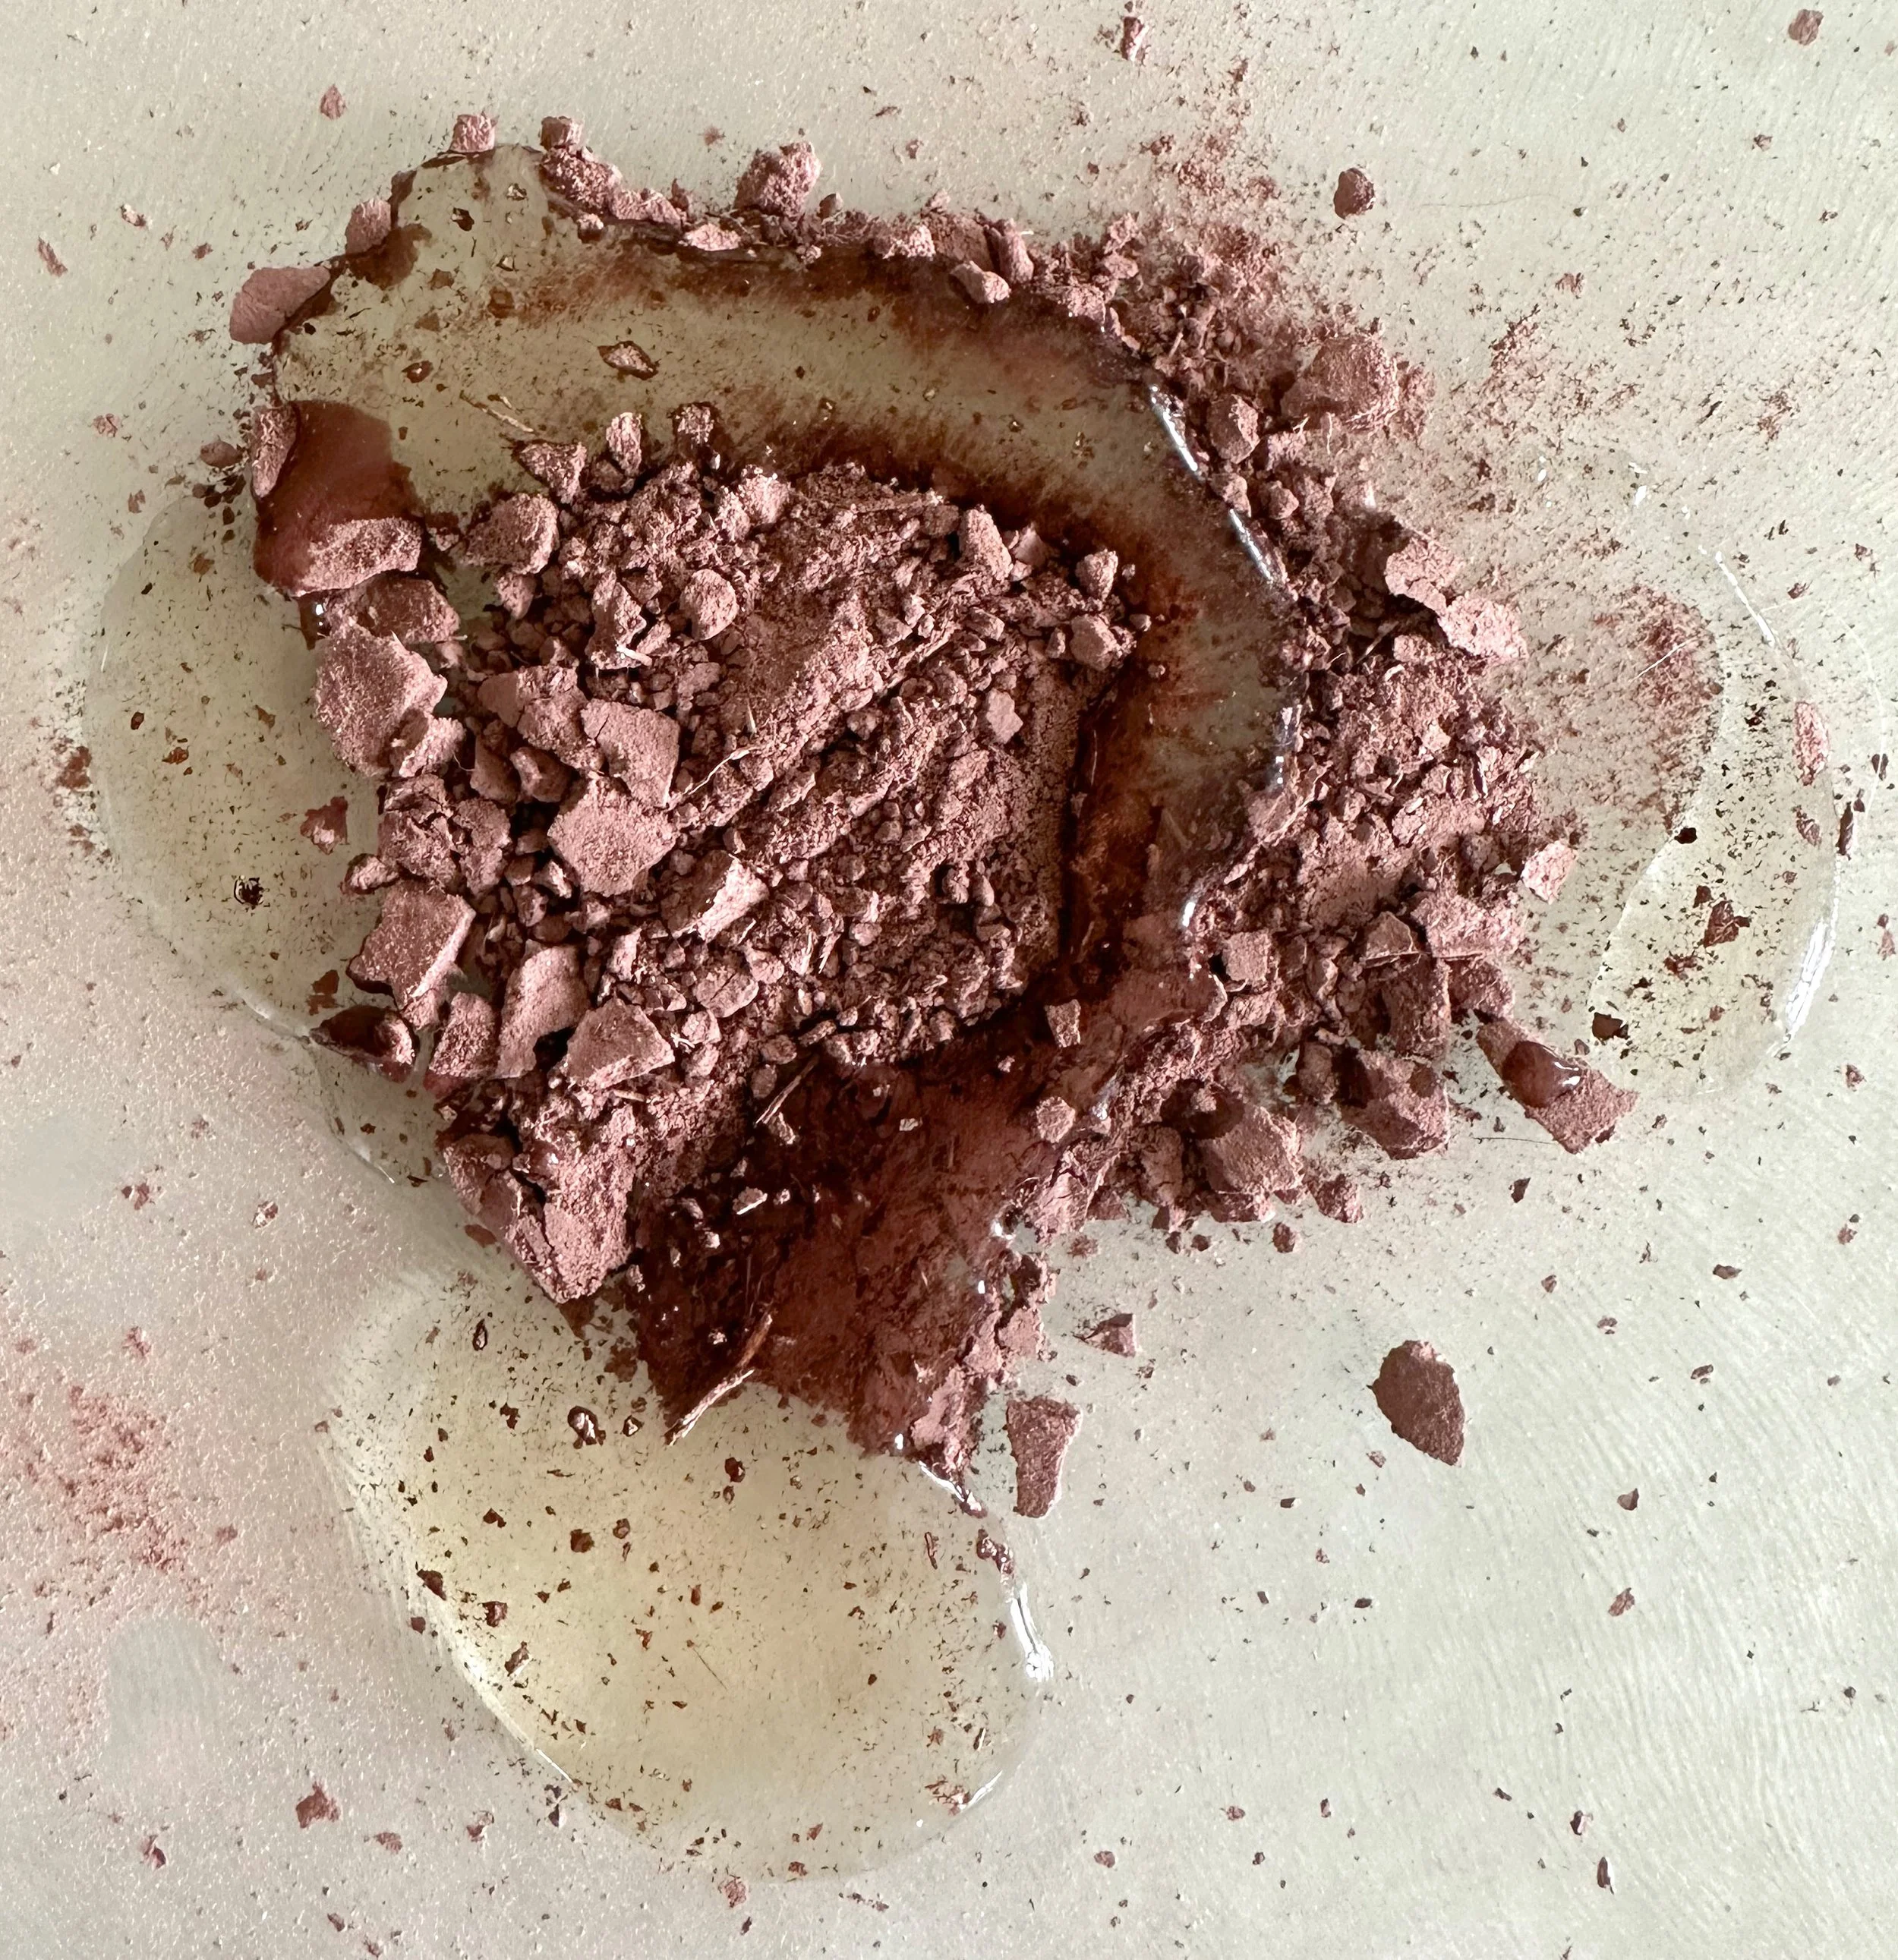
Here is a photo of the refined Sioux quartzite sample with my favorite binder: gum arabic. To learn more about binders, check out my post on Making Paint with Eggshells.
ROADTRIP WANDERLUST:
South Dakota was an incredibly fun state to drive through. There are a lot of fun, touristy places to check out like:
the Corn Palace: it is the last one standing, too!
the Mitchell Prehistoric Indian Village: this is a small museum, but really worth the trip! You are able to see an active prehistoric dig site, too.
Al’s Oasis: the pie is really amazing.
Wall Drug: I expected this to be over-hyped, but it was a lot cooler than I expected it to be!

BADLANDS NATIONAL PARK:
This really was the trip of a lifetime. We got to see so, so many beautiful places.
Looking back on the trip, my favorite place to visit was definitely the Badlands. The Badlands National Park was created over millions of years through erosion and deposition. It was a shocking, desolate place filled with an immense amount of wildlife from bison to sheep to prarie dogs. I highly recommend paying attention to where you walk - there are rattlesnakes afoot!
We had the opportunity to hike here for a few miles. It was amazing how little there is, yet how much there was to see and experience. The horizontal layers of color are absolutely gorgeous.
Pro-Tip: This place will absolutely dehydrate you. Bring plenty of water and sunscreen!!!!! It doesn’t feel like it because you’re in such a northern state within the US, but it is very dry and there is little escape from the sun.
And, a note: I wanted to take a sample of the sedimentary soil found in the Badlands but it’s important to be respectful of the park’s rules. Visitors are not allowed to take soil, rocks or other objects from the Badlands National Park.
Instead of taking soil directly from the park, I took a small sample on Bigfoot Road once we left the confines of the National Park area.

THE HOTEL ALEX JOHNSON:
We ended this day of traveling in Rapid City, South Dakota. I surprised Ben with a hotel stay at the Hotel Alex Johnson. We were both excited to visit Rapid City just to see it, being the film buffs we are!
The Hotel Alex Johnson was completed and opened in 1928 and became a place for celebrities and presidents to visit consistently. In fact, they have a wall of photos showcasing the prominent people that have visited. This includes Franklin D. Roosevelt, Elton John, Peter Fonda, Ozzy Ozzbourne, Joan Rivers, Gene Simmons, Franklin D. Roosevelt, and of course: Alfred Hitchcock!
It’s also supposedly haunted by a ‘lady in white’ as well as the ghost of Alex Johnson!
We were most excited to stay at the Hotel Alex Johnson because it plays a significant role in the 1959 film: “North by Northwest". The film stars Cary Grant, is directed by Alfred Hitchcock and has a gorgeous animated title sequence by Saul Bass (more on him later!).
It is a fantastic film but also shows how differently we view things now. The film follows Roger Thornhill (Cary Grant) as he is mistaken for someone else. The film starts in New York and ends with a showdown on Mount Rushmore. In the beginning of the film, Roger is kidnapped by mysterious agents that believe he is a government agent named George Kaplan that they want to kill. He is forced to drink a bottle of whiskey and then get in a car and drive across the NY waterfront coastline. The goal is to make his death look like an accident due to drinking and driving. The ‘joke’ of the film is that Roger is so adept at drinking that he is still functional. He is eventually pulled over and ends up receiving…. wait for it….. a $50.00 fine for intoxication! That’s it!
It’s truly a remarkable film and the title sequence is a dead giveaway for that!
It was designed and animated by Saul Bass: a native NYC’er, graphic designer and filmmaker known for his title sequences and poster designs. He also created the title sequences for “Vertigo”, “Anatomy of a Murder”, “Psycho” and more. Out of his poster designs, the Shining’s is my favorite. He was truly a remarkable designer and animator.
Just a note: As a woman working in the film and animation industry, an animation professor and a co-lead for Women in Animation’s NYC chapter, I feel the need to clarify something. I have a love-hate relationship with Alfred Hitchcock. He was truly a brilliant filmmaker and, as one myself, I have so much to learn from him. But, he was also a horrific misogynist. There are a lot of artists, animators, authors. musicians and filmmakers I have looked up to that fit well within the category of ‘monster’. I am currently devouring a book about this called “Monster: A Fan’s Dilemma” by Claire Dederer. If you feel pulled in two directions, like I do, it’s a great read.

Now, on to creating pigments using the Sioux quartzite and Badlands soil and rock samples.
COLLECTING YOUR MATERIALS:
Just about anything can become paint, even rocks and dirt!
Dirt will create the color you already see. Rocks, however; can be a bit more tricky! Some of the most beautifully colored rocks are not ‘pigment rich’. This means that, when broken up into a dust, they produce a fairly boring color. But, there is a quick test you can do to determine if a rock will give you an interesting color. Take the rock and drag it across cement, asphalt or even another rock. If it leaves a mark, it can be ground into pigment. The mark’s color s is a good indicator on what you can expect once it’s ground up, too!
On this part of the trip, I was able to collect a subtle pink soil/rocks from Sioux Falls as well as a tan/brown from a Bigfoot Road near the Badlands National Park.
MATERIAL PREP:
If you are working with rocks, they will need to be broken up into small pieces: gravel size or smaller. This can be done with a hammer. Once they are broken up, you can use a mortar and pestle to turn them into a rough powder. Or, you can use a blender, like I did!
Once the pigment is ground up, siphon the powder through a mesh strainer. This will help remove any larger chunks of dirt or rock that were not ground up. Set this aside so you can make more pigment later.
Now that these steps are complete, we can create a mineral pigment.
NOTE: I recommend doing this outdoors - it creates a lot of dust!

SUPPLIES NEEDED:
You will need to have an extra set of utensils that you will not longer use for cooking food or food consumption when making dyes and pigments.
I recommend collecting the following:
a mortar and pestle
a Magic Bullet Blender or similar
funnels
measuring spoons
glass bowls
coffee filters
a hair tie
mesh strainer
various small jars to hold the final mixture (plastic or glass)
palette knife
glass cutting board (the Dollar Store has a great selection of these!)
glass muller
It’s best to use supplies made out of environmentally neutral materials like stainless steel and glass for the best results and the most accurate color.
MATERIALS NEEDED:
dirt or rocks (a few tablespoons, ground up into a powder)
a binder of your choice (I used gum arabic to create a watercolor binder)
water

MINERAL PIGMENT PROCESS:
If you haven’t done so already, make sure to grind up the rocks, minerals or dirt into a fine dust using the mortar and pestle or a blender.
Siphon the dust through a fine mesh strainer to remove any large pieces that remain. Save these large pieces just in case you need to make more in the future. We only want to keep the finest particles of dust / pigment for the next steps.
Fill a jar with water and add the dust to it. Stir. The finest particles will float in the water. The heavier particles, that you wouldn’t want to use, will sink to the bottom.
Add a coffee filter to the top of another, empty jar.
Begin slowly pouring the water mixed with your pigment into the coffee filter. The coffee filter will help separate the water (and filter it, which is interesting to see!) from the fine particles of pigment floating in it!
Continue to add the mixture of water and dirt/rock dust to the coffee filter until there is no water left and only a sludge of sediment remains at the bottom.
For the remaining sediment: you can store this for later use. It will need to be dried and ground again to be effective as a pigment.
Carefully remove the coffee filter and lay the contents out to dry in the sun. This will take quite a few hours, or even days to complete.
PRO TIP: Use a hair tie or rubber band to hold the coffee filter in place. This will help keep the coffee filter holding your pigment from slipping into the jar of filtered water!

TURNING OUR PIGMENT INTO PAINT:
Once our pigment is dried, we can either add a binder to it and turn it into useable paint or we can save it as a refined, dry pigment for later use. I did both of these!
If you’re interested in creating a paint using your pigment, you will need:
1 part pigment
2 parts binder (I used gum arabic to create a watercolor paint)
I prefer to blend the pigment with a palette knife, slowly mixing the two together until the correct consistency is met. Larger pieces of pigment can be broken down with the muller, too.
Your finished pigments can be stored in a recycled makeup compac, watercolor trays, or other small jars.
NOTE: if you are impatient, like I am, you can put your refined pigment (still on the coffee filter) onto an old baking sheet. Then, put it in the oven at a low setting. I have an old stove from 1974, so the lowest I can go is about 200(ish). It took about a half hour to full dry out. Make sure that you don’t use the baking sheet for any food, just in case. It’s the pigment baking sheet now!
Both of these pigments are truly beautiful and will be a unique addition to my film’s color palette! I can’t wait to use them.