Black Eyed Susan Ink / Dye
“A flower blossoms for its own joy.” — Oscar Wilde
We are coming up on our third anniversary of living in Stony Point! We closed on our house July 30th 2020.
I knew immediately that I would want to do some landscaping - we had 0 plantlife other than grass and a few decorative trees on the property. After a few years of work, our yard is blooming!

Black-eyed Susans (Rudbeckia hirta) were one of our first editions in Spring of 2021! It took about two years for them to really thrive, but now our yard is teaming with them. They are a perennial that likes full sun. That’s perfect as our yard is almost 100% full sun!
A few fun facts about Black-eyed Susans:
They symbolize justice and encouragement.
Their genus name: Rudbeckia honors a Swedish scientist named Olaus Rudbeck who discovered the lymphatic system.
They are ‘pioneer plants’. This means that they will be the first grow in areas damaged by fire or natural disasters.
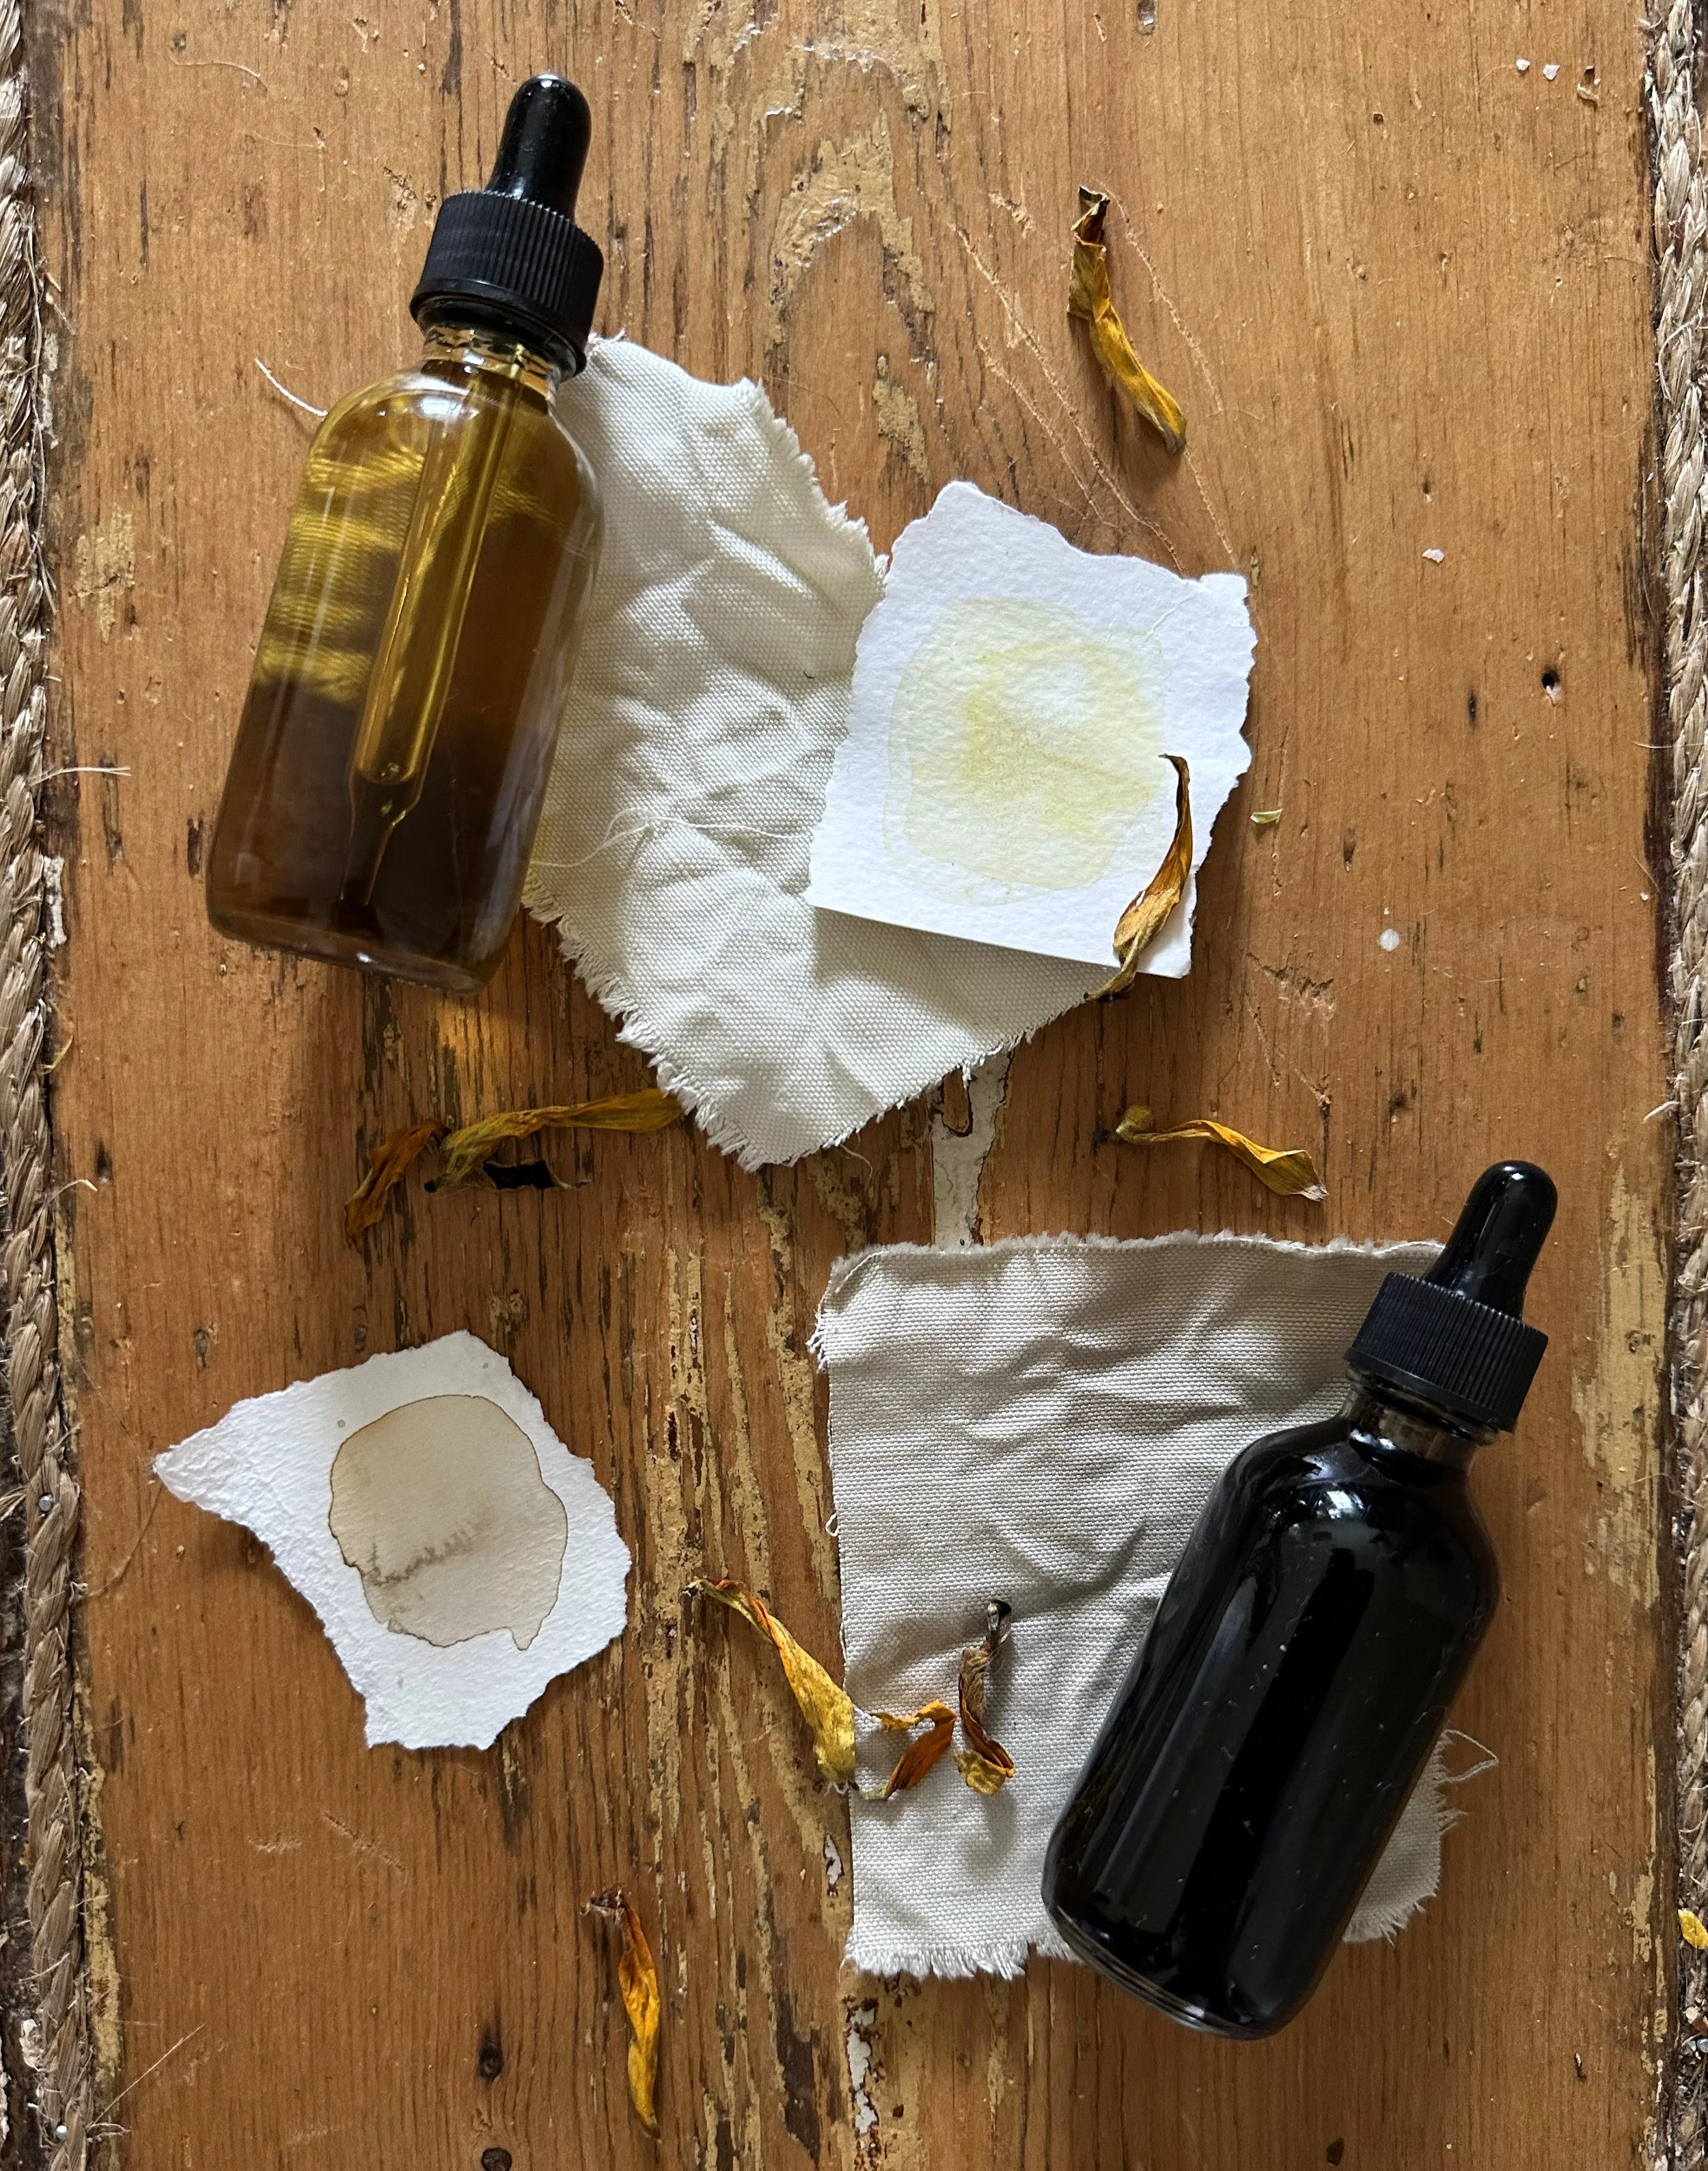
From my research I concluded that they make a very simple and soft color ranging from yellow to green. It seems to be a fun plant to experiment with, but is not a plant that is known for its excessive pigment extraction.
I knew it wouldn’t be the most exciting color in my collection, but I figured I would test it out!

COLLECTING AND PREPPING INGREDIENTS:
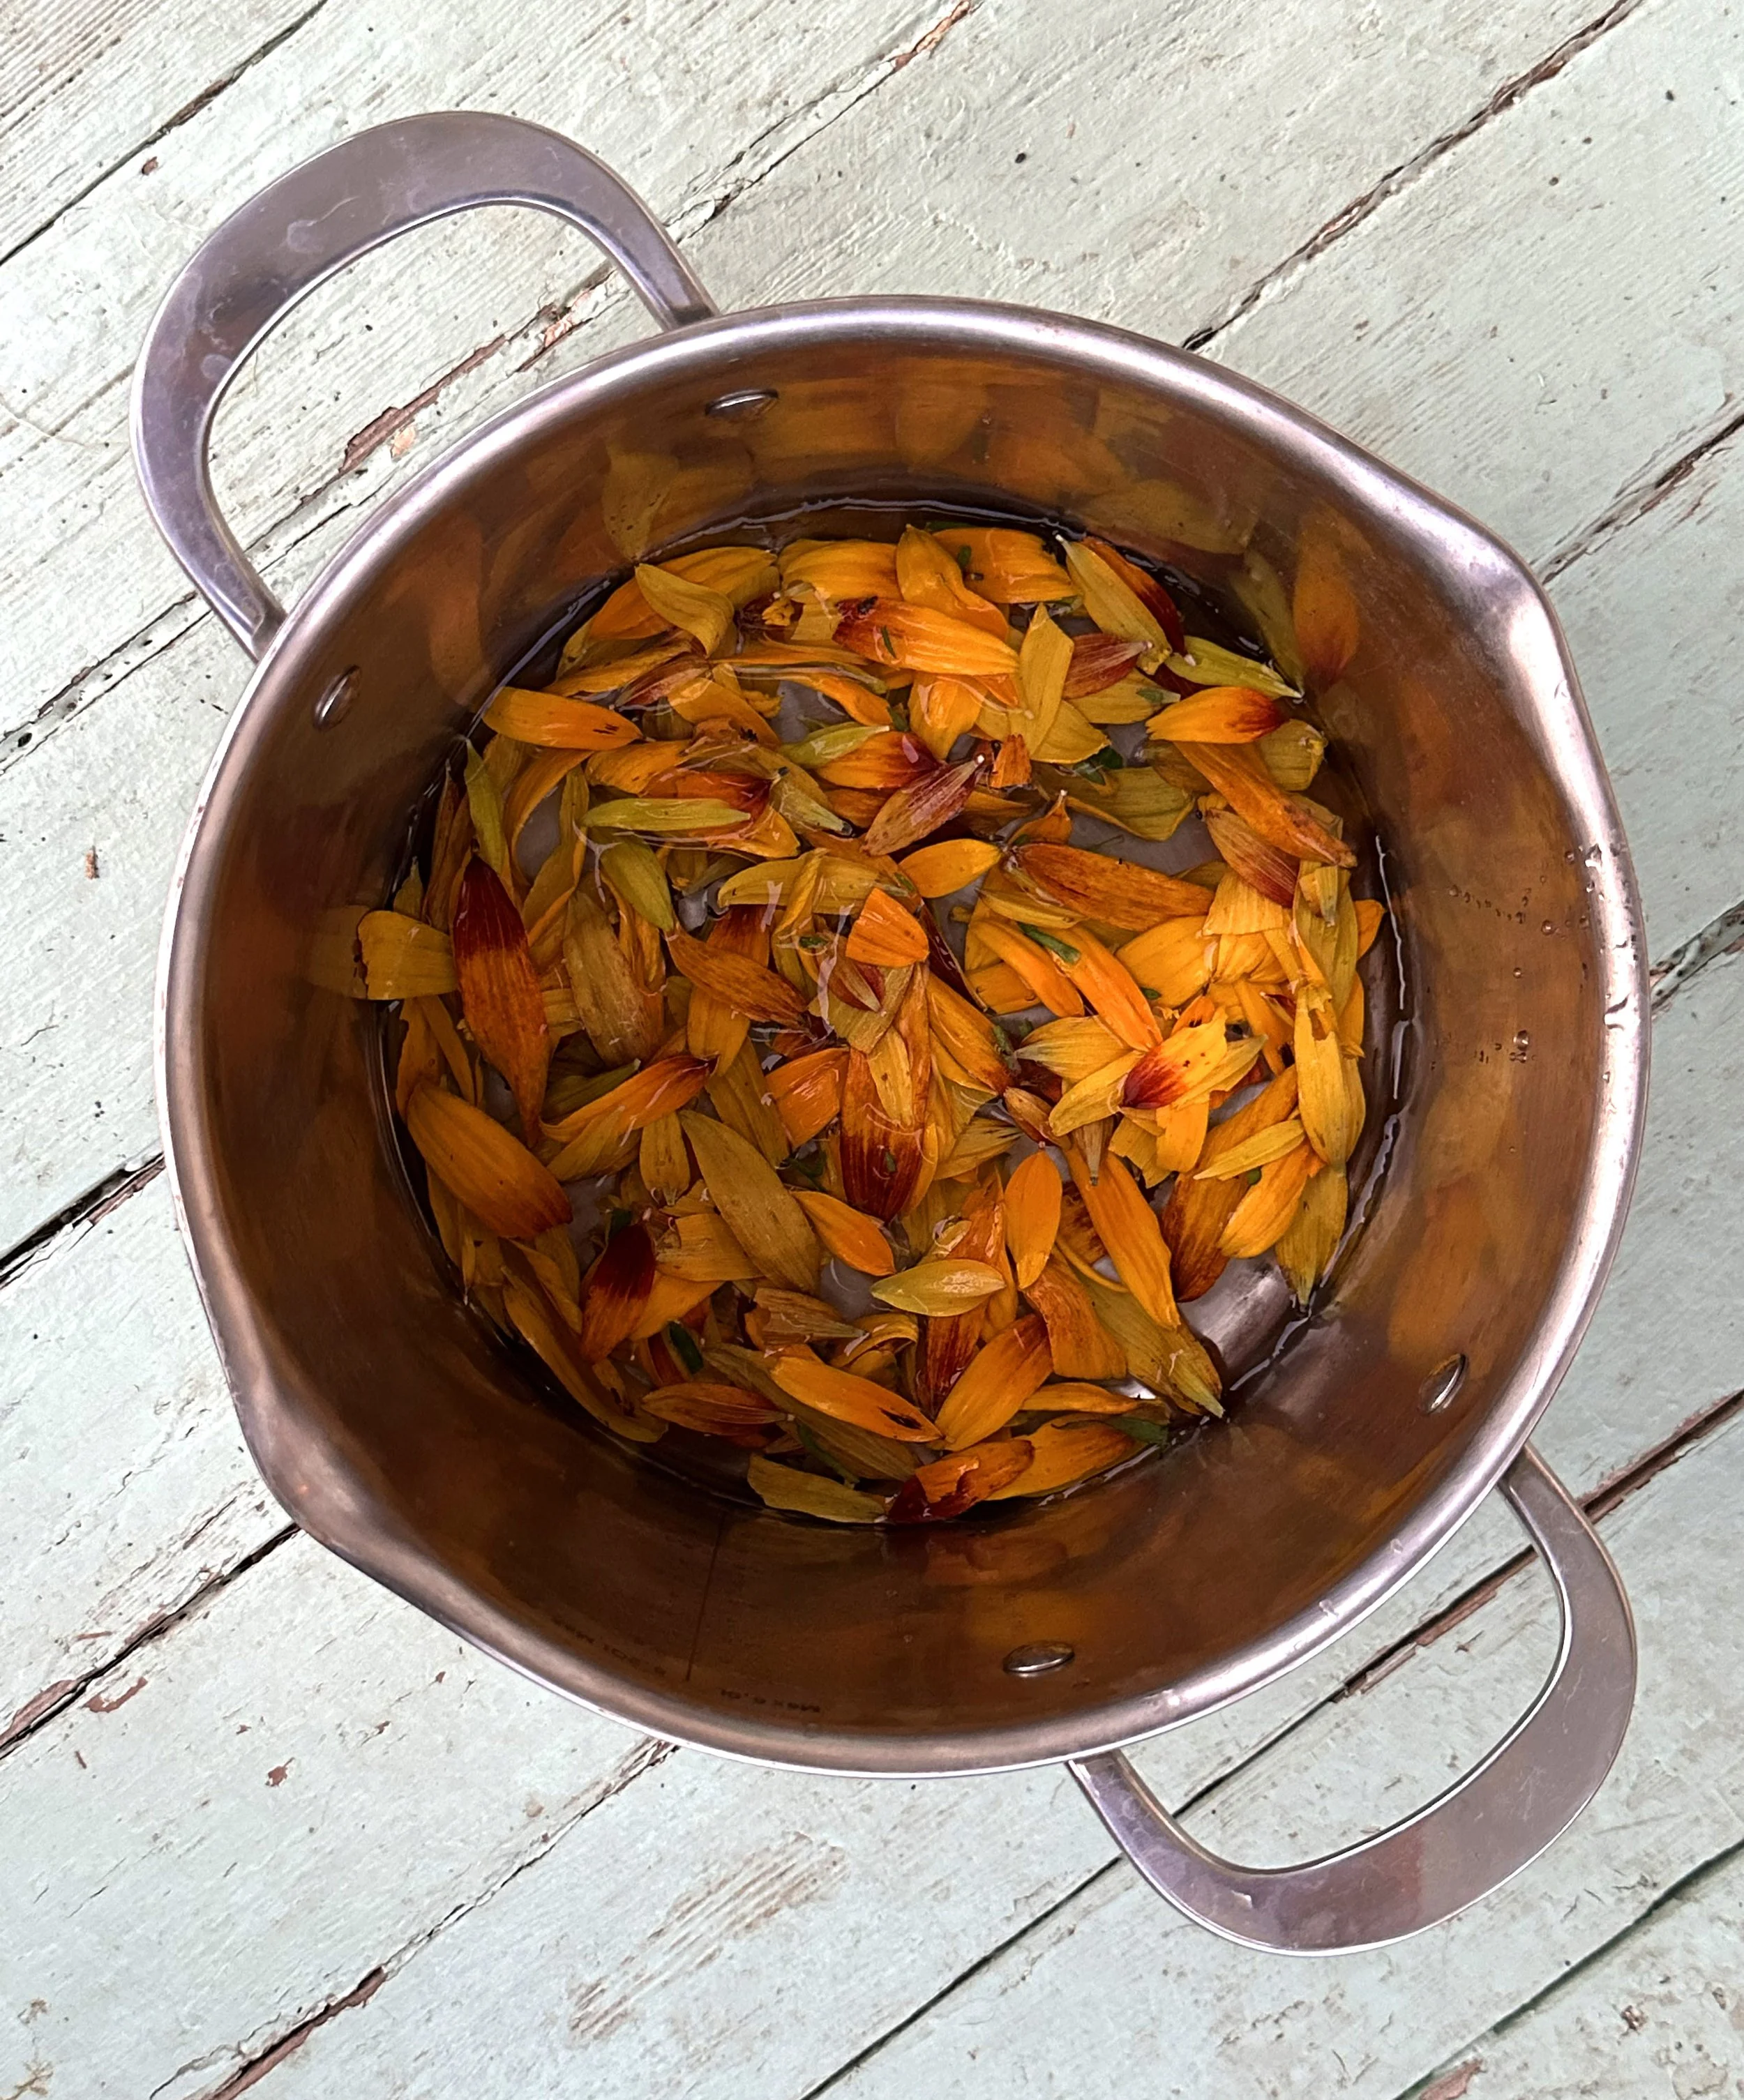
Only the flower heads are needed for this ink/dye. Black-eyed Susans have a very robust stalk, I recommend using scissors and cutting the flower heads off. If you try to pull them, the full plant can uproot. This can kill the plant.
SUPPLIES NEEDED:
You will need to have an extra set of utensils that you will no longer use for cooking food or food consumption when making dye. It’s still best practice to have two sets of supplies: for cooking and for ‘other’.
I recommend collecting the following:
12 qt pot with lid
measuring cups
measuring spoons
funnels
mesh strainer
various glass jars to store dye liquid
pH strips.
stainless steel tongs
large spoon
paper and fabric strips for testing
It’s best to use supplies made out of environmentally neutral materials like stainless steel and glass for the best results and most accurate color.
For pH strips, I recommend these.
MATERIALS NEEDED:
Black-eyed Susan flower heads. I recommend between 1-3 cups of petals total.
1 quart of water
OPTIONAL: wintergreen oil, clove oil or whole cloves
OPTIONAL: alum or iron mordants
OPTIONAL: gum arabic (if this will be used as an ink or watercolor)
A NOTE ON MORDANTS:
Adding alum will help adhere the dye to fabrics moreso, but isn’t necessary. Iron is a great mordant to add if you want to ‘sadden’ the color.
For more on mordants/color modifiers, check out this post on creating dyes with turmeric.
PROCESS:
add the Black-eyed Susan flower heads / petals to 1 quart of water.
simmer for up to 60 minutes. Make sure to stir every 10-15 minutes.
once the desired color is reached, take the mixture off heat.
leave the mixture overnight so that the color can continue to strengthen. I added a piece of fabric to see how the color would absorb over a long dye period.
the next day: strain all contents into a bowl. If you would like to experiment with mordants, split the contents into two separate bowls.
OPTIONAL: In bowl #1: leave as is. Or, add 1 tsp or more of alum. This will not do anything to the dye color, but will make the dye a little more colorfast / lightfast as it is used on fabric, paper and more.
In bowl #2: add a small (and I do mean small!) pinch of iron to start. Stir this in. Continue adding small amounts of iron until the desired color is achieved. A small amount of iron will “sadden” the color. For Black-eyed Susans, the color will become more of a khaki brown. The more you add, the grayer it will get.
add gum arabic if this will be used as an ink or watercolor. I recommend 2-3 drops per 2 oz. bottle, but it’s up to you!
the dye/watercolor/ink is ready for use! Use it now, or store it later!
REMINDER: if you choose to store it for later, make sure to sterilize your containers and add 1 drop of wintergreen or clove oil per oz. Or, you can add 1-2 whole cloves per oz to reduce mold growth.
As expected, it wasn’t the most exciting color to make. With that said, it still has a place with my film: Sundays. And, it was a fun, free experiement!