Pink Ink Experiments With Avocado

Quote taken from Gary From Teen Mom
It seems perfect (at least to me, a Millennial) that avocados can make the most beautiful shade of Millennial pink out there! And, as an added bonus, you have to eat them to make it! My go-to is absolutely avocado toast…probably because I was born in the 1980s.
But don’t worry, I still have my 401K, my car, my kidneys and my house! If you don’t remember what I’m jokingly referencing here then let this article from 2017 jog your memory: https://archive.curbed.com/2018/5/15/17345156/avocado-toast-millennials-cant-afford-homes-tim-gurner
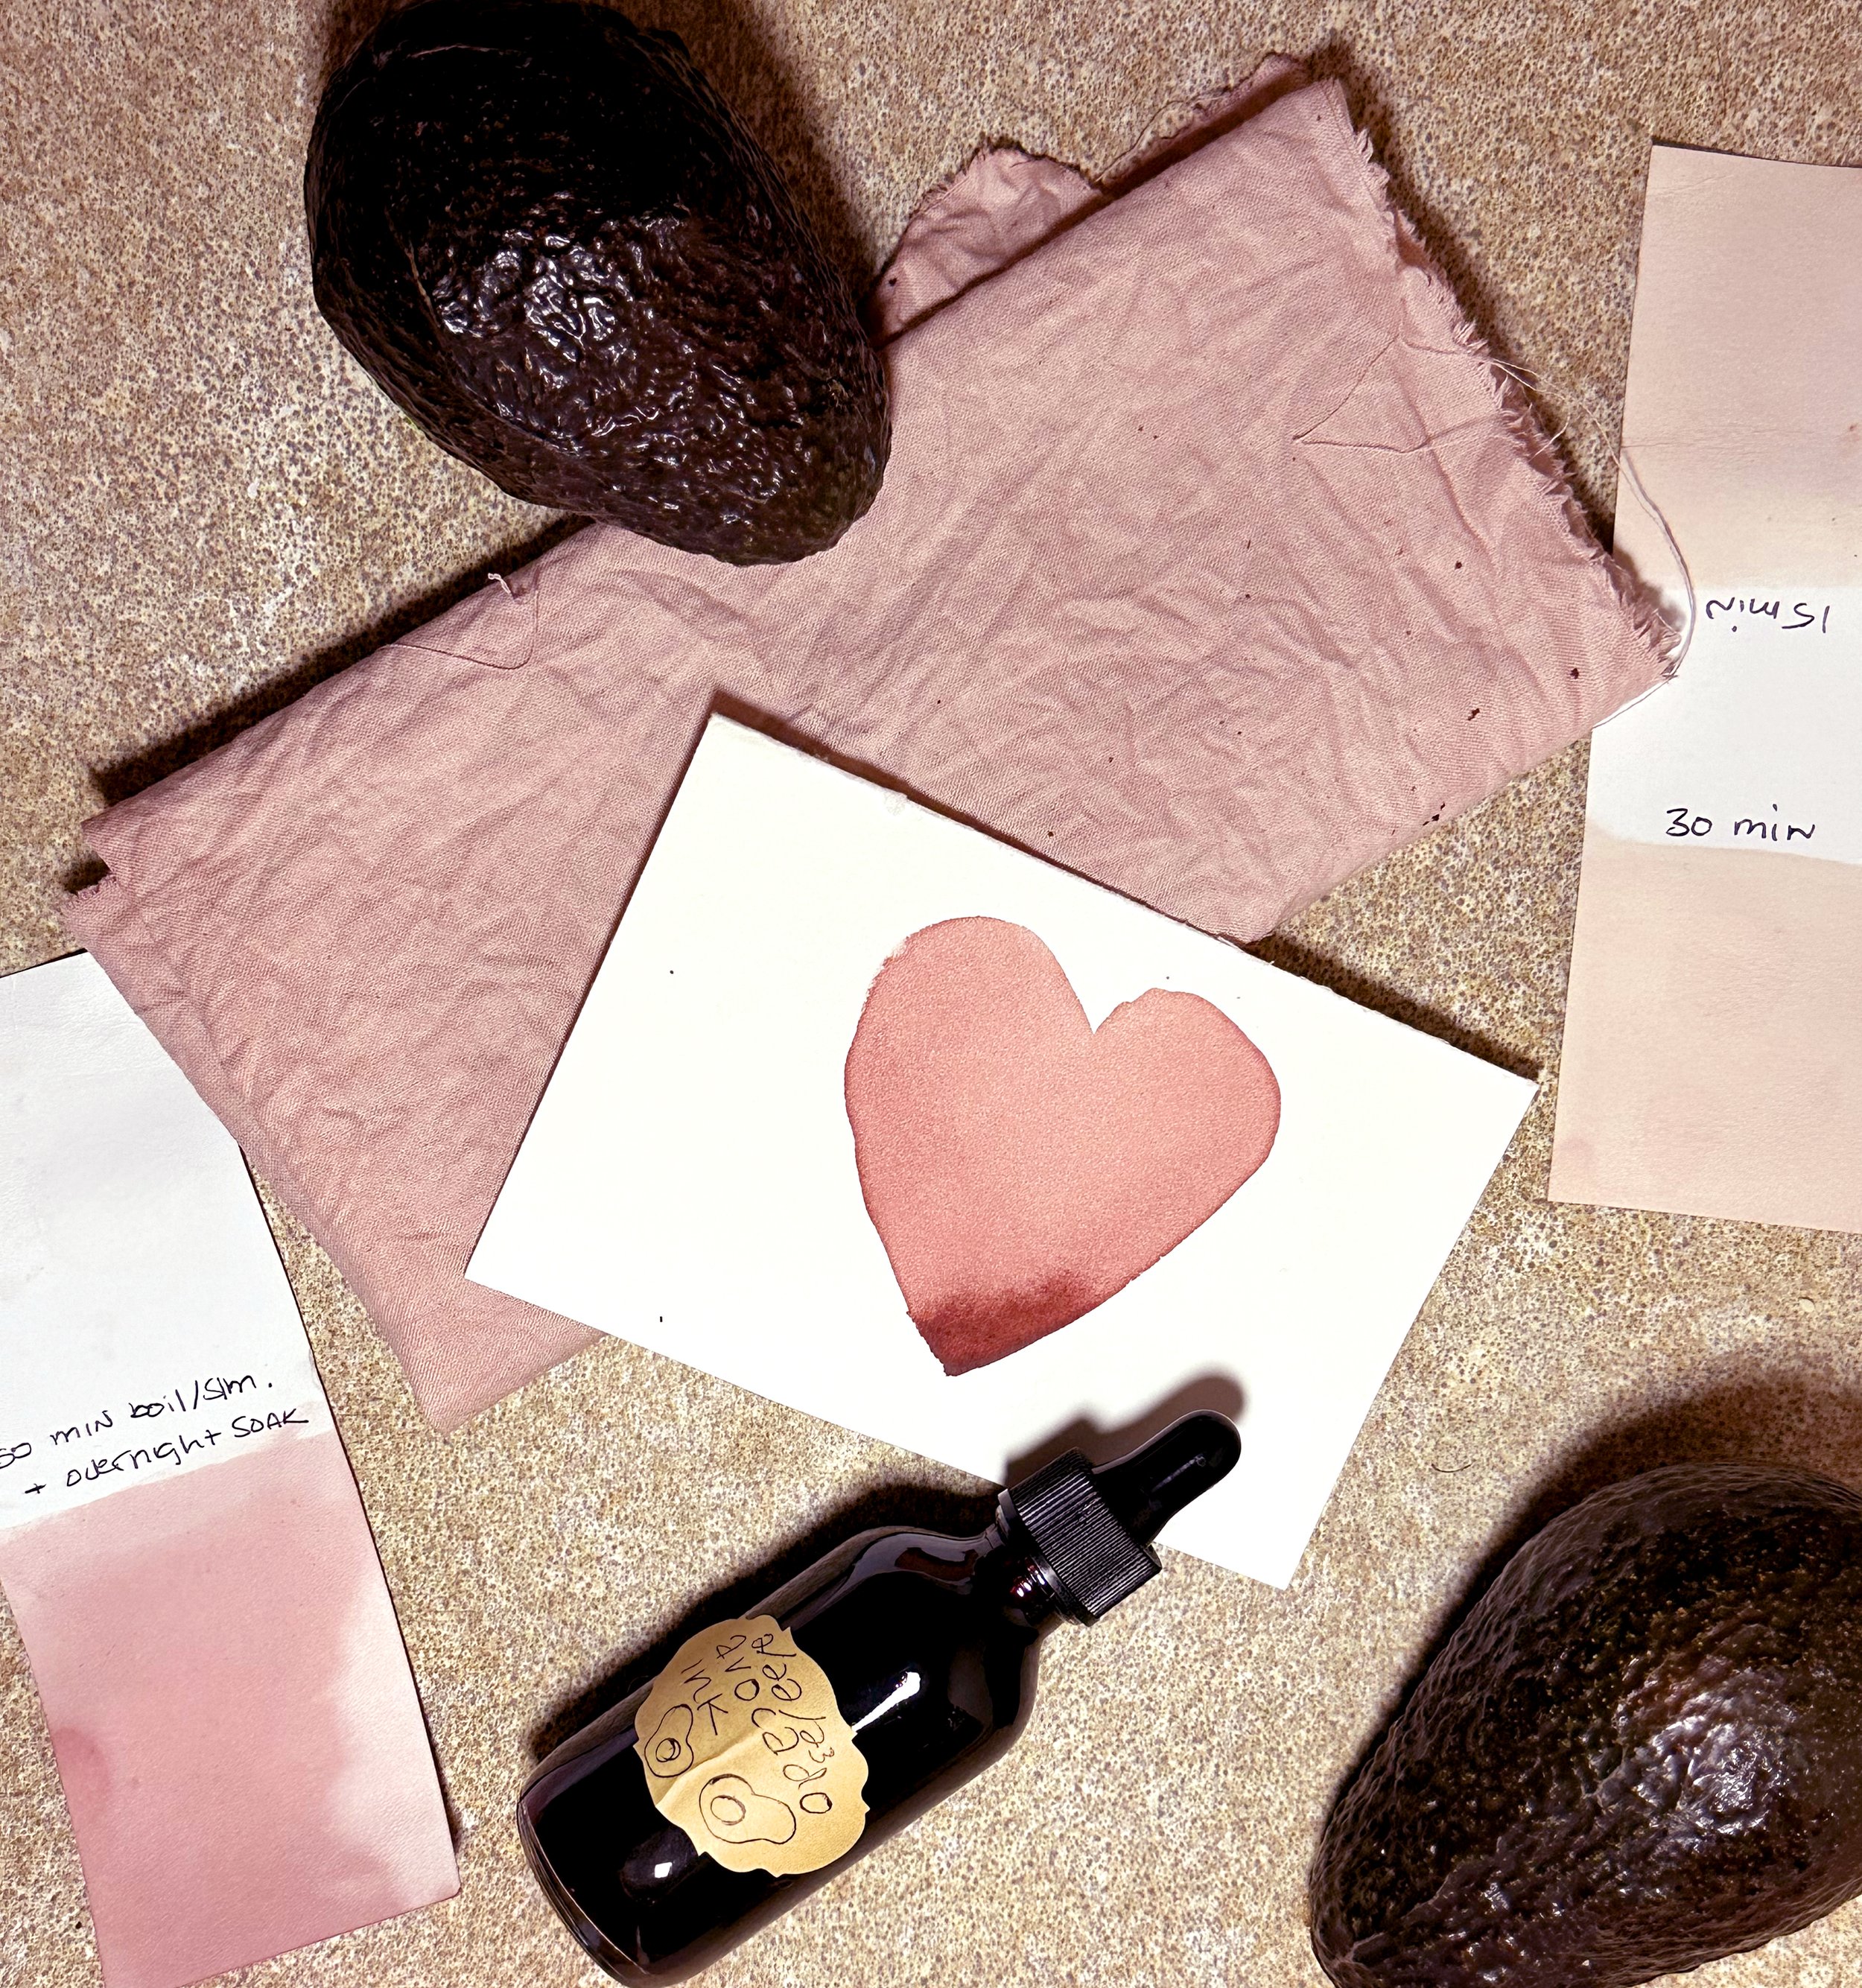
This was my first attempt at making avocado dye. I am pretty happy with the overall color and result, too!
COLLECTING INGREDIENTS:
The best part is getting started because… you have to eat some avocados!
Then, save the skin and pits. I cleaned mine to remove any flesh left and then froze them in a Ziplock bag until I accumulated enough to use.
SUPPLIES NEEDED:
You will need to have an extra set of utensils that you will no longer use for cooking food or food consumption when making dye. This recipe for avocado dye uses nontoxic household ingredients but it’s still best practice to have two sets of supplies: for cooking and for ‘other’.
I recommend collecting the following:
12 qt pot with lid
measuring cups
measuring spoons
funnels
mesh strainer
various glass jars to store dye liquid
pH strips.
stainless steel tongs
large spoon
paper and fabric strips for testing
It’s best to use supplies made out of environmentally neutral materials like stainless steel and glass for the best results and brightest pink.
For pH strips, I recommend these.
COLOR MODIFIERS:
A color modifier changes the pH balance of the dye / ink you’re creating. This can lead to some interesting results.
Popular color modifiers are alum, iron, lemon juice, baking soda and vinegar. You may be familiar with modifiers without realizing it from doing a common family-fun tradition: dying Easter eggs! The vinegar’s acidity helps brighten the colors so that they really stands out on an egg.
I noticed that many of the recipes for avocado dye called for either baking soda or soda ash. This makes a lot of sense considering baking soda becomes soda ash when heat is applied to it. You can create soda ash by cooking baking soda in your oven on a low temperature for about an hour.
Baking soda is used to modify or brighten a color. But, since soda ash is much more basic (a pH scale of 10.9-11.6) while baking soda has a pH of 8.5, much more baking soda needs to be added to match the pH level of soda ash.
It’s also a good idea to double check the pH of the water you’re using. Distilled water works best, but you can use tap. My tap water was a pH of 6 which meant that I would have to add even more baking soda to accommodate for the lower pH level (tap water can be 6-8.5, distilled is usually 7). I learned that my tap water was a pH of 6 because our house is closer to the water treatment plant. I googled this and it is actually walking distance at less than a mile away. As water travels to your house, it picks up minerals along the way which will make it a higher pH. This also diagnosed my hair issue: my hair has become extremely dry since moving here and doesn’t maintain moisture effectively. I’ve had to make some huge adjustments to my hair care because our water is… a pH of 6! It’s lack of minerality has been stripping my hair of anything I put in it every time I wash it!
I have to add a special thanks to my life-long friend Melissa (an environmental scientist/biologist) who helped me with the ratio of baking soda vs. soda ash for my recipe and who also helped me figure out my hair issue! I’m very lucky that I bumped into her Freshman year (knocking her over, by the way) and invited her to grab lunch with me!
PRESERVING A NATURAL DYE:
Avocado dye is made from materials that will naturally decompose over time. Eventually, unused dye will start to grow mold because of this. Wintergreen oil, clove oil or a few whole cloves added to the finished product will help slow the decaying process.
To make your dye last even longer, I recommend keeping the dye in lidded glass jars not plastic. Plastic is porous and will allow some air in which will allow mold to form more easily. I also recommend boiling your glass jars and their lids to sanitize them before storing your unused dye in them.
If you really want it to last do everything I mentioned above and then store it in the fridge.
GUM ARABIC:
Gum arabic is an additive that can increase the brilliancy of the dye and adds a greater depth to the color. If you’re using your avocado dye like watercolor or ink, like I will be, it’s a great addition because it will slow it down by making it more viscous. It will also reduce bleeding across the page.
MATERIALS NEEDED:
skin and pits from 5-6 avocados, cleaned
1-2 tsp of soda ash OR 5+ tsp of baking soda
2 quarts of water
wintergreen oil, clove oil or whole cloves
gum arabic (if this will be used as an ink or watercolor)
PROCESS:
chop the avocado pits. This will help bring out more tannins and make your dye color brighter.
add the avocado pits and peels to the water along with some of the baking soda or soda ash.
let the mixture heat up and simmer for 10-15 minutes. Test the contents with a pH strip. If needed, add more baking soda or soda ash until the pH level is between 10-11. Make sure to keep the pot covered when you’re not checking on it.
simmer for up to 60 minutes. Make sure to stir every 10-15 minutes. At each 10-15 minute mark, test the pH level and do a quick paper or fabric test to see the color result.
once the desired color is reached, take the mixture off heat.
leave the mixture overnight so that the color can continue to strengthen. I added a piece of fabric to see how the color would absorb over a long dye period.
the next day: remove all of the pits and skins along with any dye tests you were creating. Strain all contents into a large bowl.
add gum arabic if this will be used as an ink or watercolor. I recommend 2-3 drops per 2 oz. bottle, but it’s up to you!
the dye/watercolor/ink is ready for use! Use it now, or store it later!
REMINDER: if you choose to store it for later, make sure to sterilize your containers and add 1 drop of wintergreen or clove oil per oz. Or, you can add 1-2 whole cloves per oz to reduce mold growth.
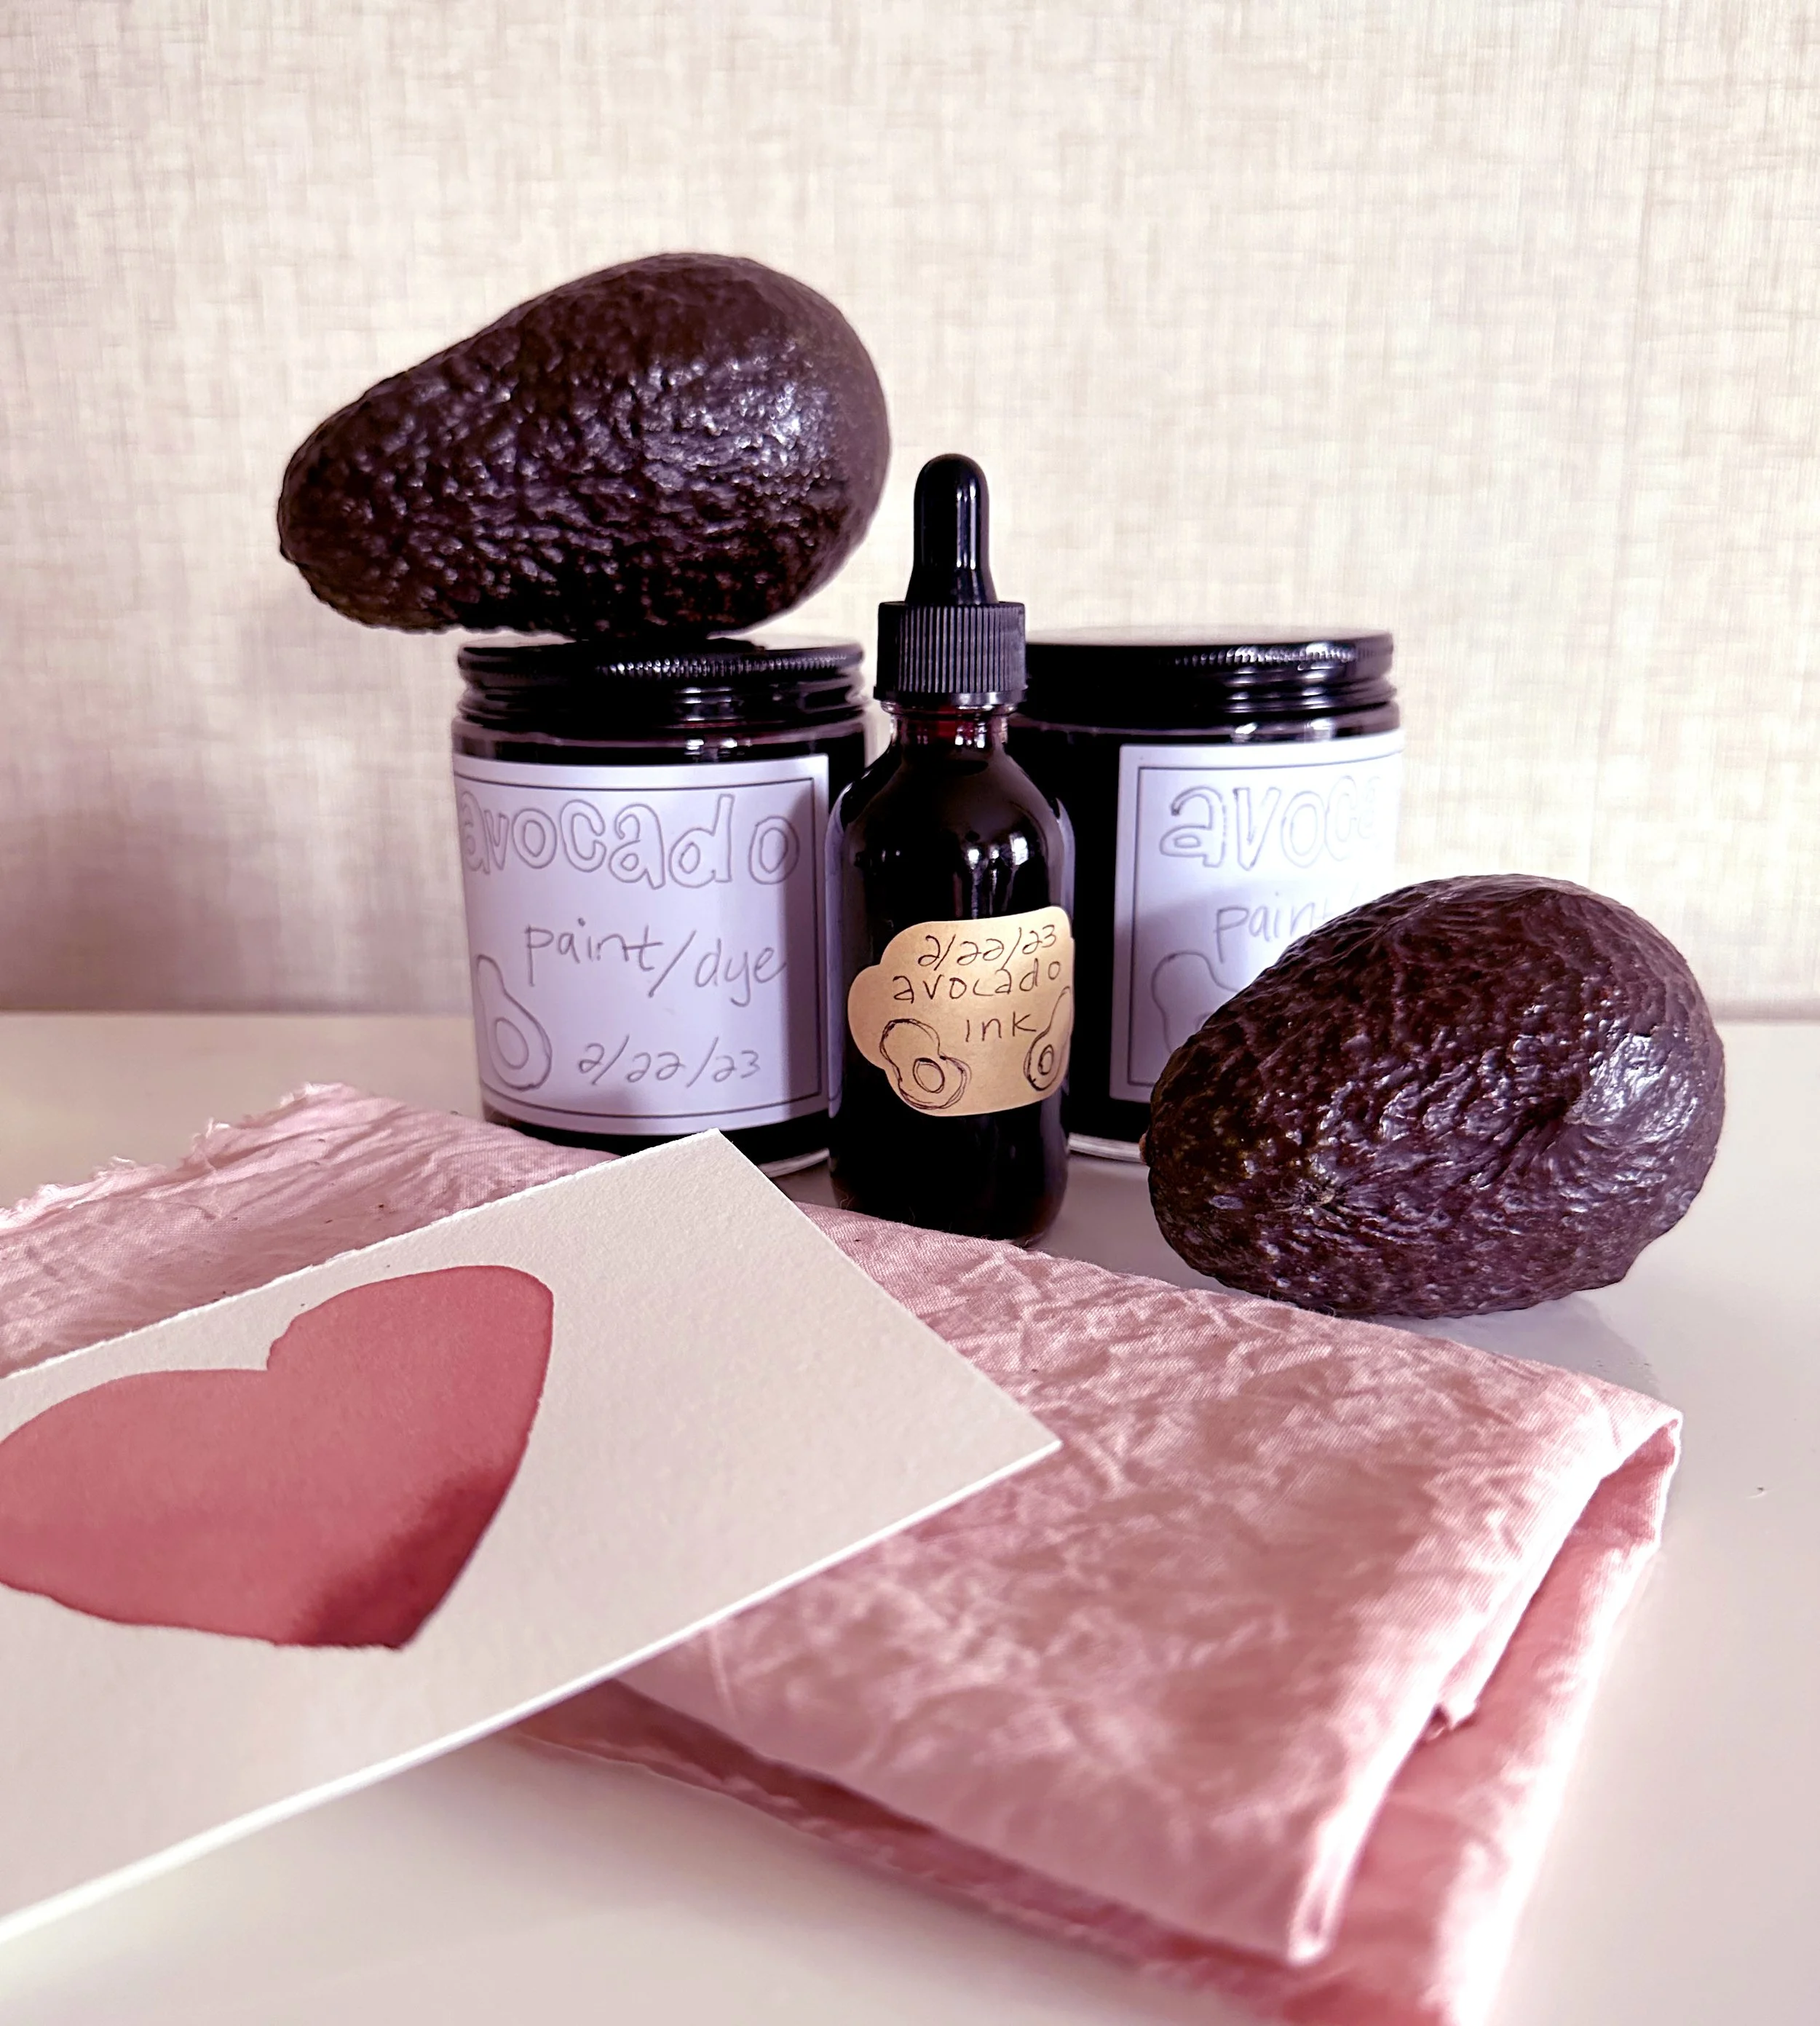
I am looking forward to painting with this color in my next film: Sundays!
A note: I was not the only one to make a correlation between Millennial pink and avocados! Here’s a great article on Maria Elena Pombo’s company: Fragmentario!