pH Tests With Red Cabbage
Cabbage: a familiar kitchen vegetable about as large and as wise as a man’s head. - Ambrose Bierce

Red cabbage is quite a magical vegetable. It’s also a favorite treat for our chickens!
Usually our hens need to test out a new vegetable or fruit, but not with red cabbage. They descended on it with terrifying furousity. Imagine my surprise when, an few hours later, they had filled their coop, run and my yard with neon-blue poop. WTF!
This is all thanks to a key chemical component in red cabbage: anthocyanin. Anthocyanin is what gives many black, red, blue and purple fruits, flowers and vegetables their striking color.
And, it’s very good for you! As a member of the antioxidant family, it can reduce or lower the risk of several diseases and cancers.
But, how did a purple-colored ‘red’ cabbage turn chicken poop bright blue?!
Anthocyanin has a very colorful reaction to different pH levels. When exposed to an acid it will become pink or red. When exposed to a base it will become a shade of blue or teal! Chickens, whose poop is filled with ammonia (a base at a of pH 11-13) will produce some atomic, radioactive colored shit after eating their favorite treat.

I love the fractal patterns found in nature. The fractals formed by the leaves of this red cabbage are particularly spectacular!
SUPPLIES NEEDED:
You will need to have an extra set of utensils that you will no longer use for cooking food or food consumption when making dye. This recipe uses nontoxic household ingredients (except the ferrous sulfate) but it’s still best practice to have two sets of supplies: for cooking and for ‘other’.
I recommend collecting the following:
12 qt pot with lid
measuring cups
measuring spoons
mesh strainer
various glass jars to store dye liquid
pH strips.
stainless steel tongs
large spoon
paper and fabric strips for testing
It’s best to use supplies made out of environmentally neutral materials like stainless steel and glass for the best control over the results.
For pH strips, I recommend these.
If you plan in advance, you can save any extra clippings for red cabbage (like the wilted exterior leaves) in a Ziploc bag in the freezer until you’re ready to use them. That’s what I did!
You’re ready to make red cabbage dye / ink / watercolor once you’ve collected about 2-3 cups worth of it.

I recommend making an unadulterated version of the red cabbage dye / ink / watercolor first. This way you can get a sense of the natural color first and can decide what needs to be added next.
MATERIALS NEEDED:
2-3 cups of red cabbage leaves, coarsely chopped
2 quarts of water (or less for a darker color)
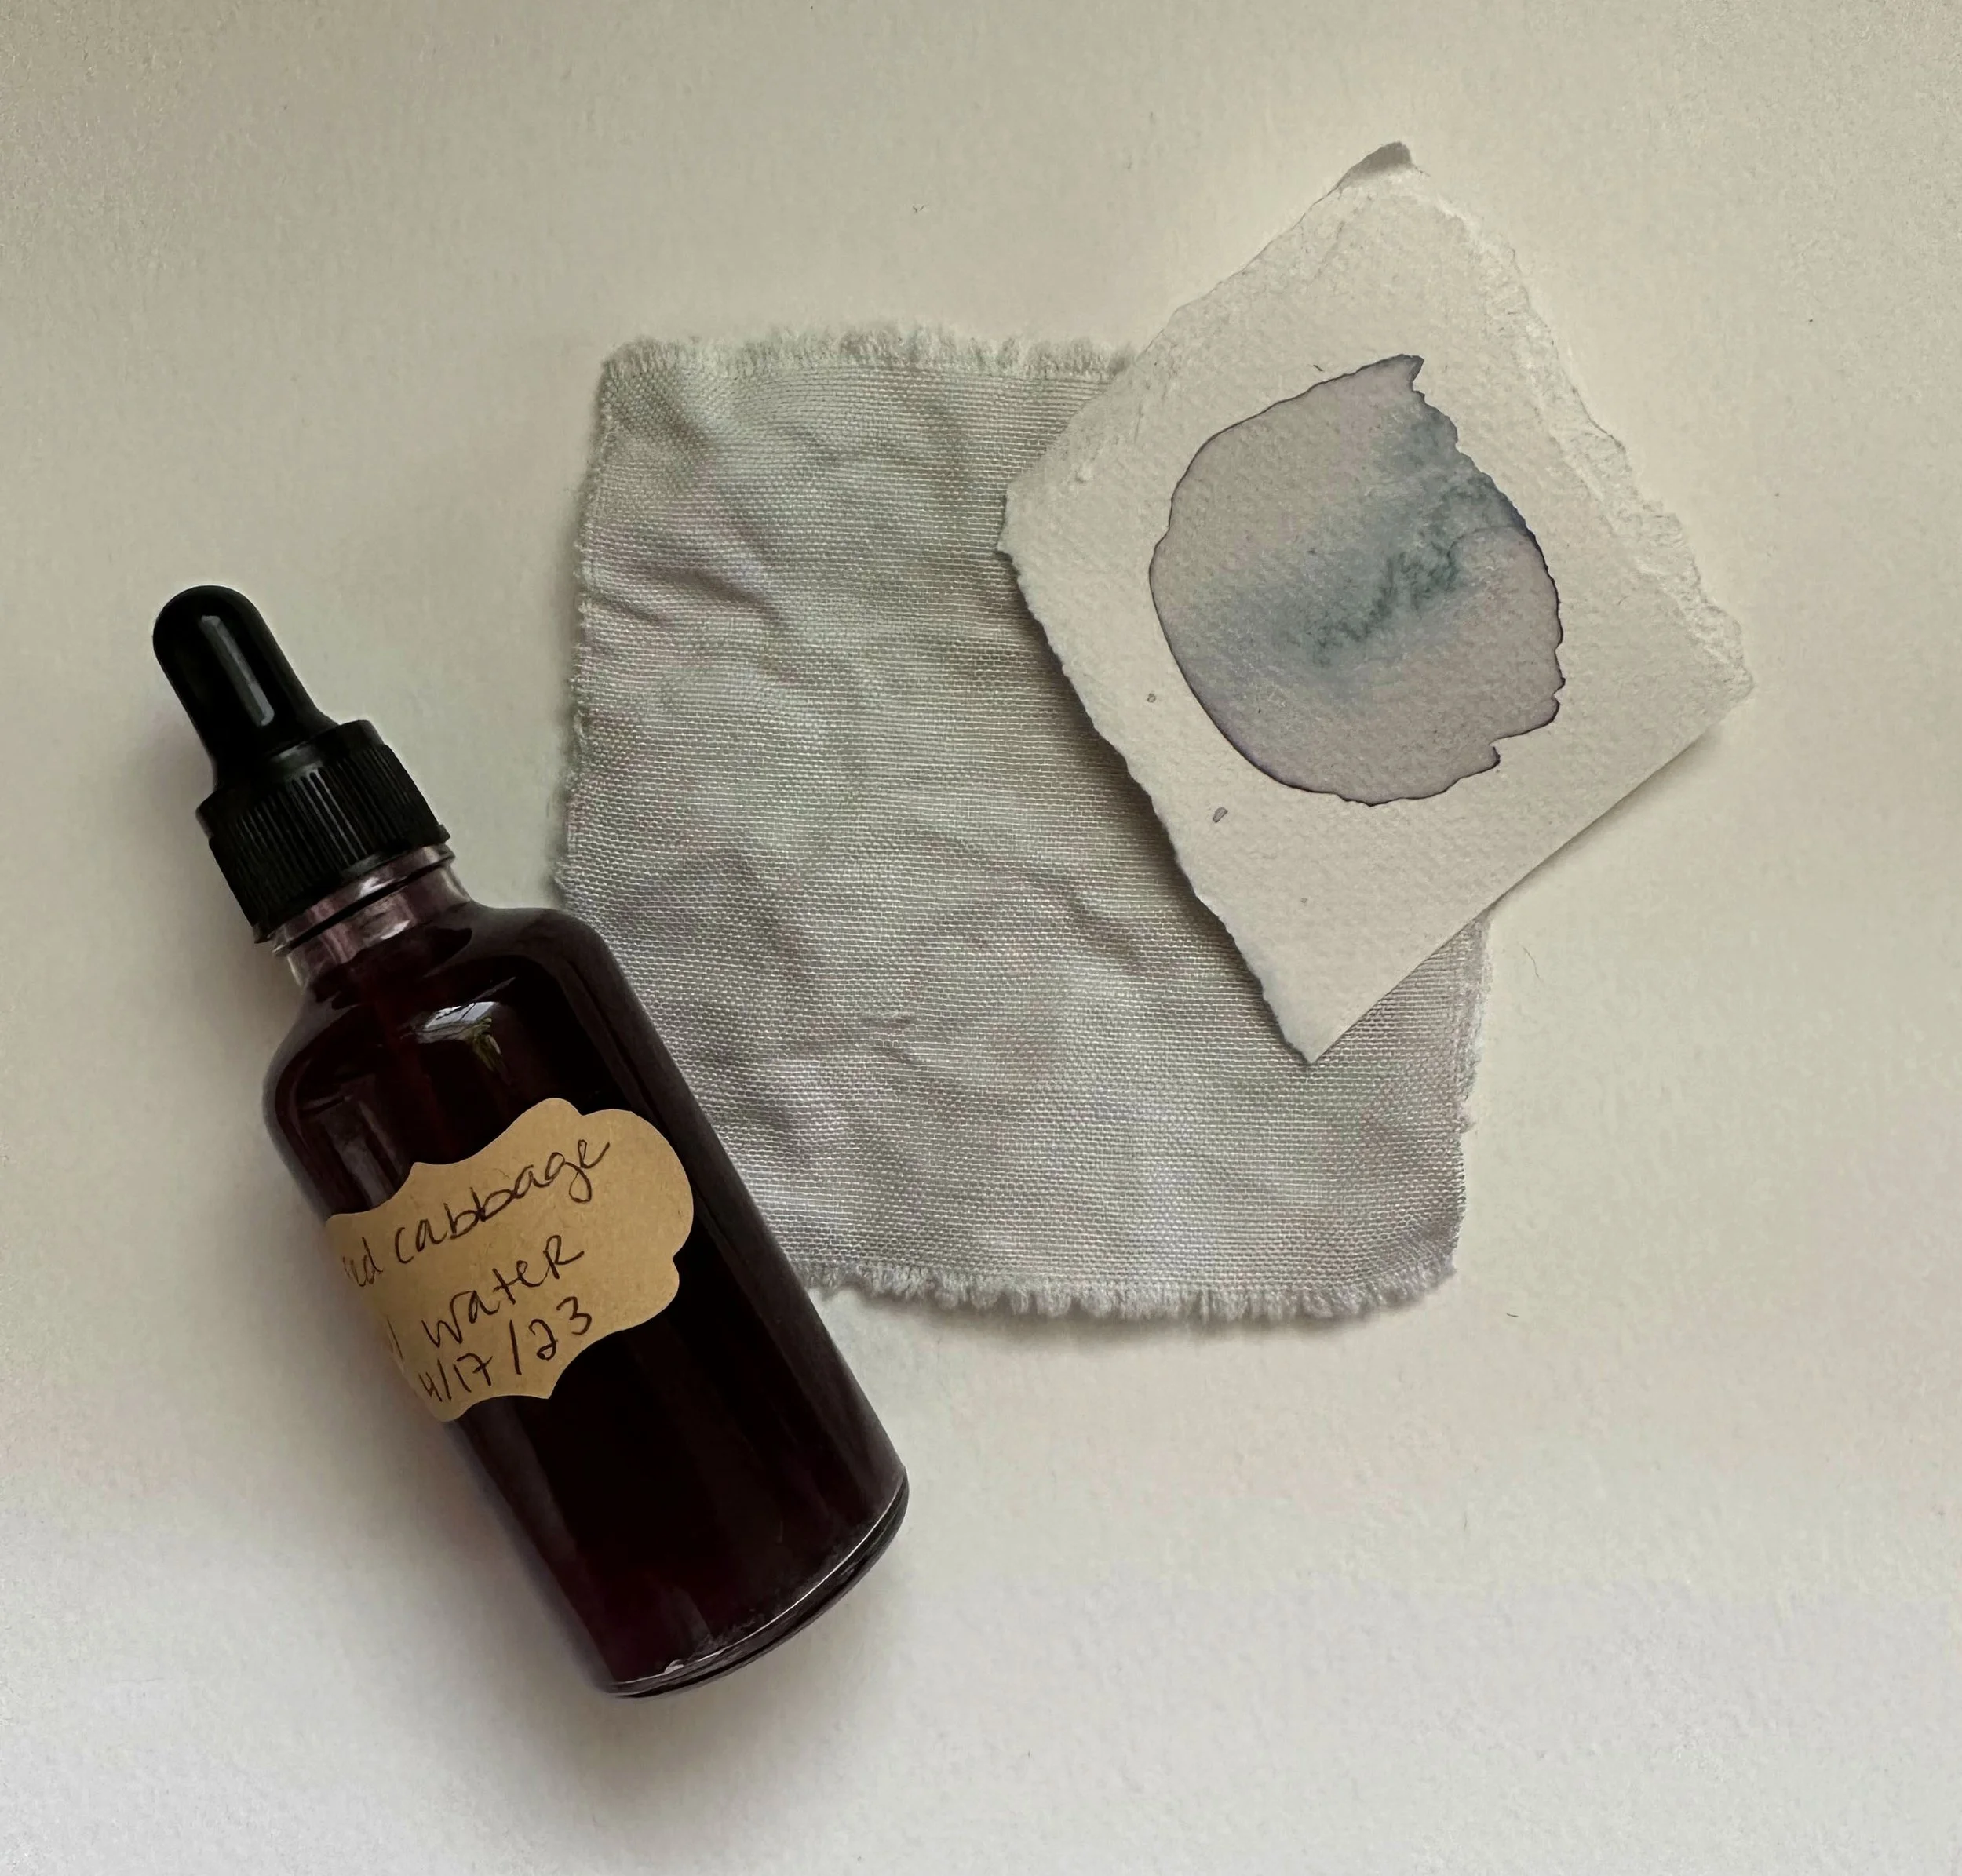
The process outlined below creates this beautiful blue-violet color if your water’s pH is 6.5 like mine was!
PROCESS:
before starting, do a pH test of your water supply. This will drastically affect the final result your color will be. Knowing what your water’s standard pH is will also help you add vinegar and baking soda as needed, too.
coarsely chop the red cabbage leaves and add to the water.
simmer the red cabbage in the water for 60 minutes. Make sure to stir every 10-5 minutes.
once the desired color is reached, take the mixture off heat.
leave the mixture overnight so that the color can continue to strengthen. I added a piece of fabric to see how the color would absorb over a long dye period.
the next day: strain the red cabbage leaves from the colored water.
Of this is the color you’re going for, then skip to the bottom for details on how to bottle it and preserve it for later use!
If you’re interested in dividing the neutral solution and testing out how the anthocyanin changes with an acid or base, separate the colored water into several different glass containers and follow the steps below:
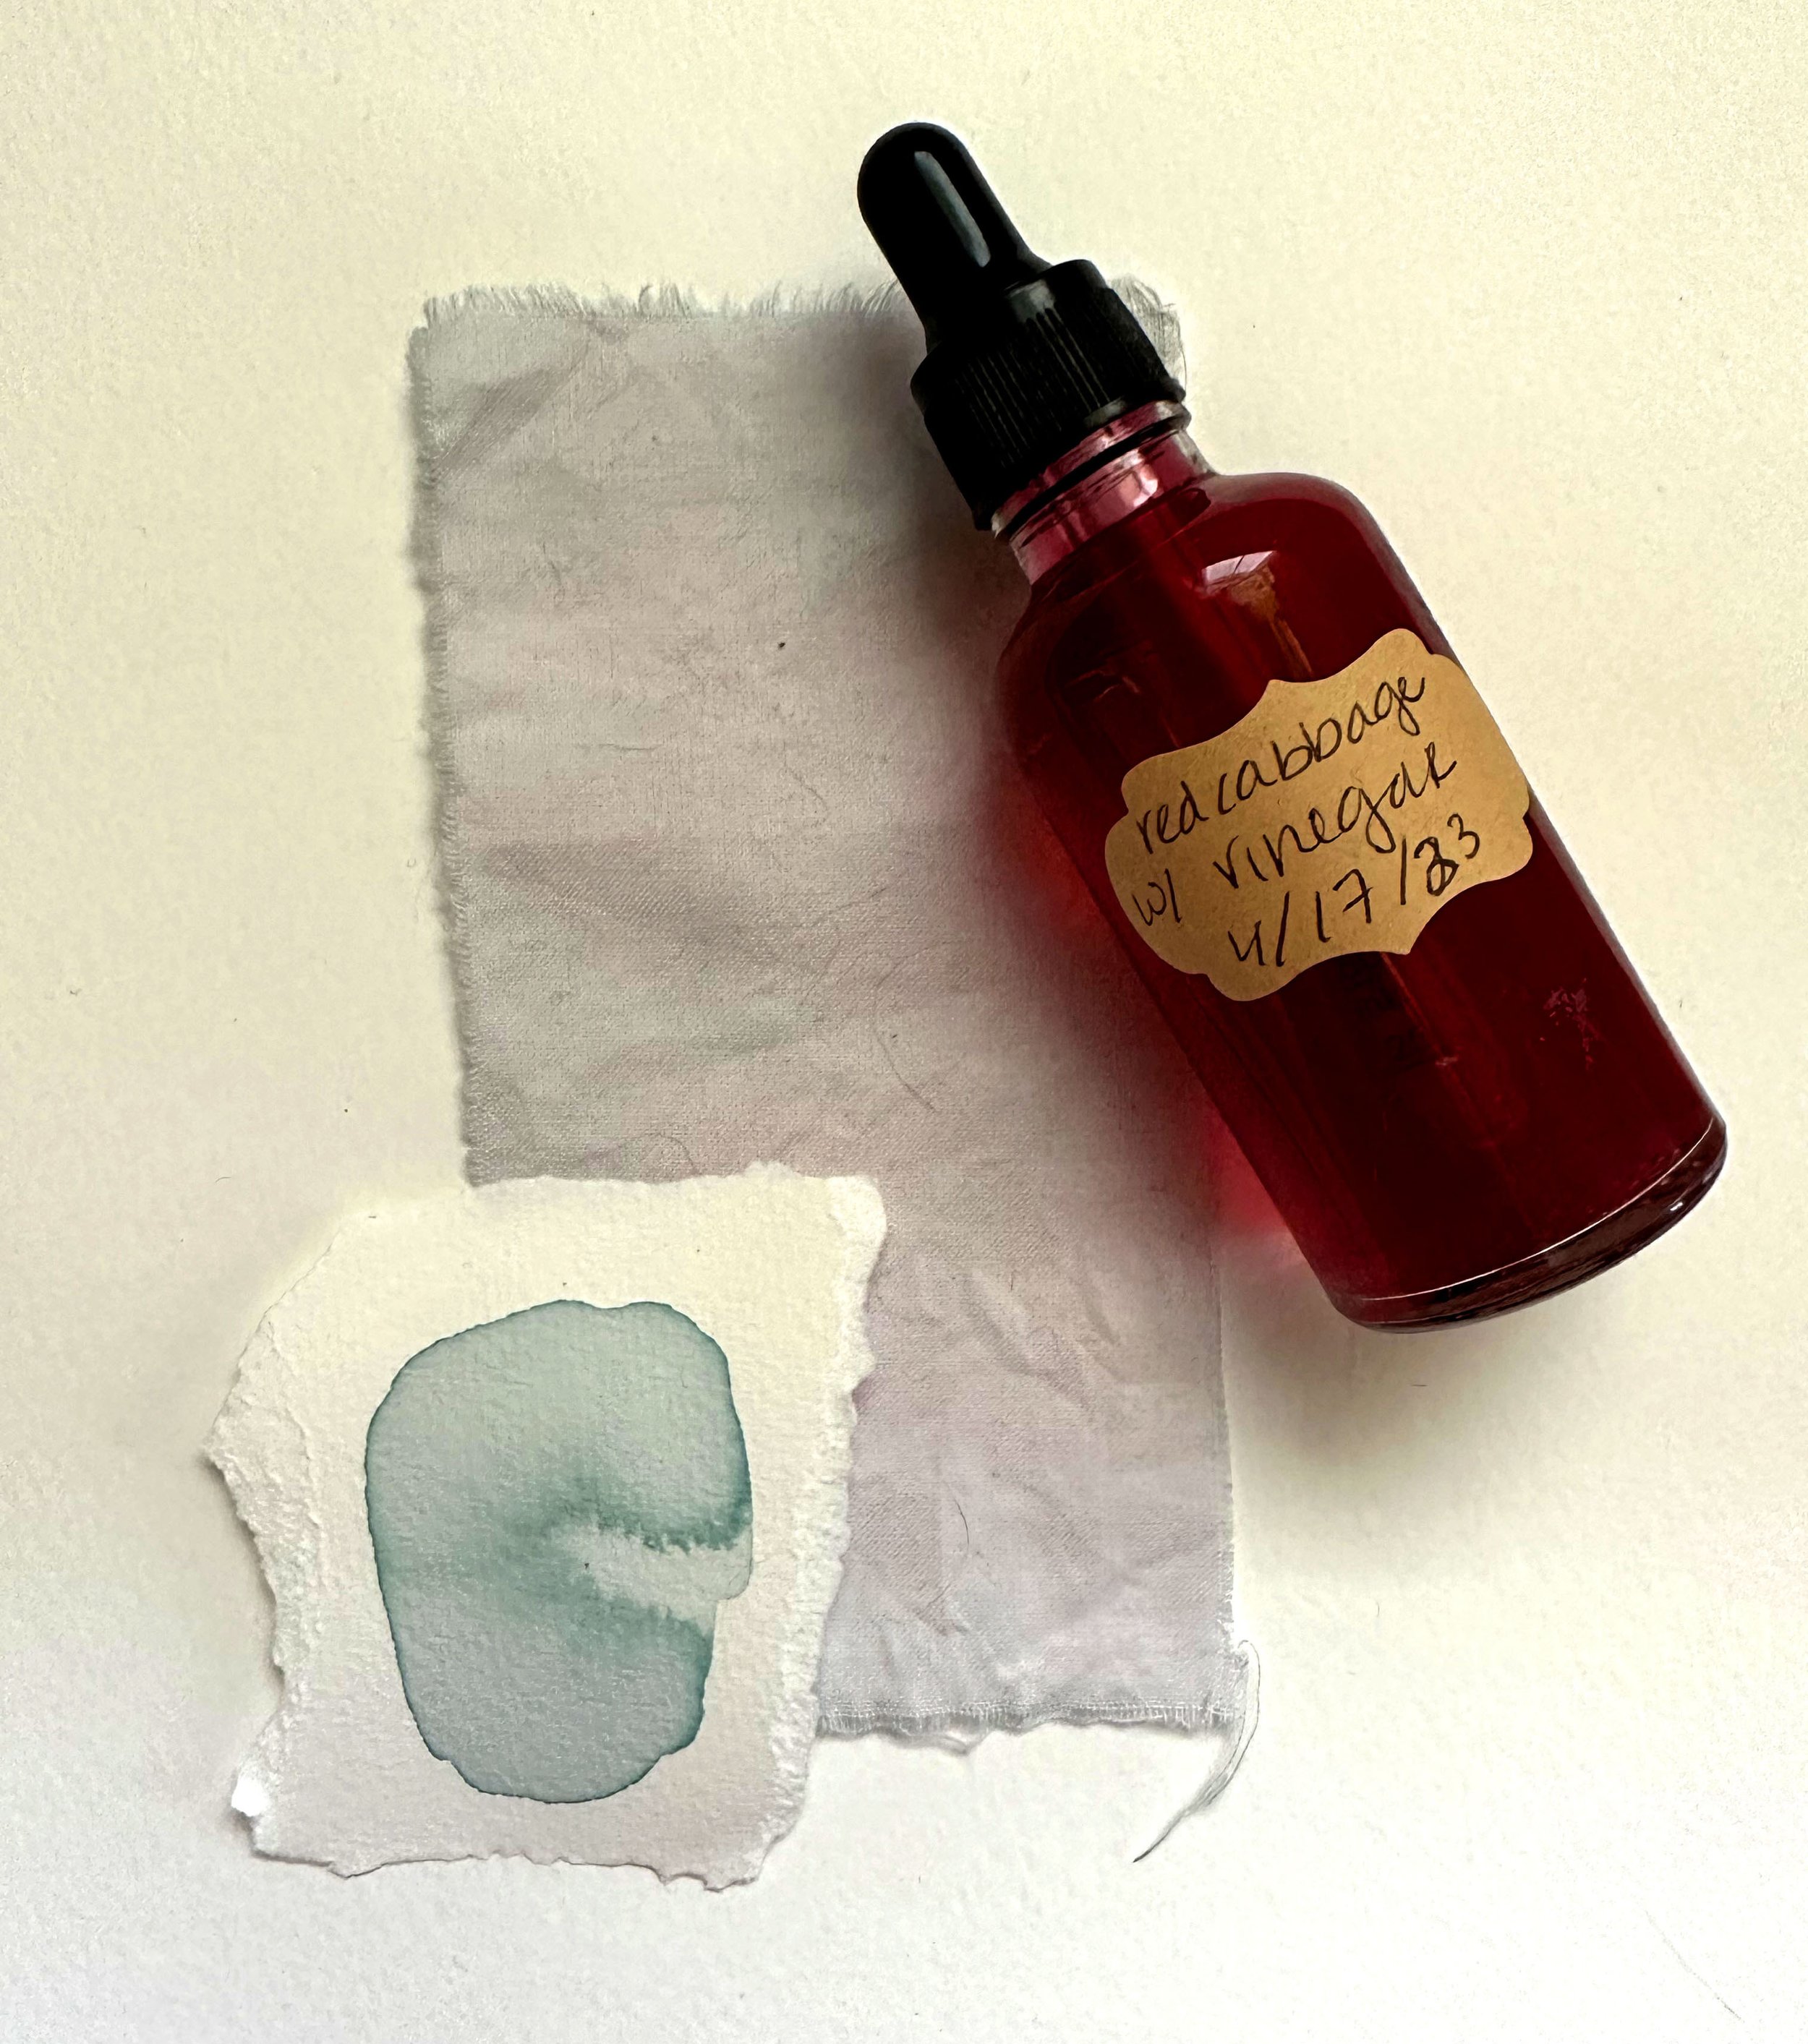
I had some… unexpected results with this one! This is why it’s always a good idea to test how the finished product will look on the materials you plan to use. I like to do a fabric swatch to see what this can look like if I use it later as a dye. I also do a test on acid-free watercolor paper to test to see what changes occur when the color dries.
In this case, I am certainly glad that I did this! The vinegar (added to adjust the pH of 1-3) completely evaporated / neutralized on the acid-free watercolor paper. The organic cotton retained some of the pink pigment, but the edges turned a similar blue to the watercolor paper result.
I believe that this can be adjusted by adding a popular mordant: alum as well as the vinegar. Alum is an acidic mordant and could allow the pink color to ‘bite’ into the material and retain it’s shocking color. I am putting this idea in my back pocket for future testing!
For an explanation regarding mordants, please check out my post on turmeric found here.
MATERIALS NEEDED:
strained, neutral red cabbage water
vinegar
measuring spoons
glass container
PROCESS:
Add the pigmented cabbage water to the glass jar.
For a smaller jar, start with a 1/4 tsp measuring spoon and slowly add vinegar to the jar. After adding the vinegar, stir or shake it into the jar to mix thoroughly.
Keep adding vinegar until you are happy with the color. A pH of 1 will be bright red, indicating high acid. A pH of 2-4 will be various shades of pink to lavender.
I really cannot stress how beautiful this is to watch. I have said this many times while making ink: it really feels like alchemy.

This one was a beautiful surprise! I expected to get a color closer to the teal family but instead I got this magnificent olive green.
MATERIALS NEEDED:
strained, neutral red cabbage water
baking soda
measuring spoons
glass container
PROCESS:
Add the pigmented cabbage water to the glass jar.
For a smaller jar, start with a 1/4 tsp measuring spoon and slowly add baking soda to the jar. After adding the baking soda, stir or shake it into the jar to mix thoroughly.
Keep adding baking until you are happy with the color. A pH of 7-10 will be various shades of purple to blue. A pH of 11-14 will range from green to yellow!
My final result, the olive green, has a pH of 13.

I find iron to be such an interesting color modifier / mordant. It reacts to a color by ‘saddening’ it. I cover more on how this works and what ‘saddening’ a color is in my post about turmeric!
I am very happy with the rich, chocolaty brown of this result and cannot wait to use it for my film.
MATERIALS NEEDED:
strained, neutral red cabbage water
ferrous sulfate
measuring spoons
glass container
PROCESS:
Add the pigmented cabbage water to the glass jar.
For a smaller jar, start with a 1/4 tsp measuring spoon and slowly add ferrous sulfate powder to the jar. After adding the ferrous sulfate, stir or shake it into the jar to mix thoroughly.
Keep adding ferrous sulfate until you are happy with the color. I did not do a pH test for this but keep in mind that ferrous sulfate has a pH of 3.7, meaning it’s fairly acidic.
NOTE: I also added a bit of baking soda to this before adding the ferrous sulfate to try to even it out. I didn’t want to make a red clay brown.
FINISHING STEPS:
Your dye/watercolor/ink is ready for use! Use it now, or store it for later!
But, if you do choose to store it for later, makes sure to sterilize your containers and add 1 drop of wintergreen oil or clove oil per oz. Or, you can add 1-2 whole cloves per oz to reduce mold growth.
For something like red cabbage, I also recommend boiling the jars you plan to store the final product in. This will also help discourage mold growth.
If you’d like to turn this into an ink, adding 1 drop of gum arabic per oz. will help aid the spreadability and overall pliability of the ink across paper.
This was a very fun test! If you’d like to learn more about red cabbage and pH check out these resources:
Cabbage Dyes: Are They All They’re Cracked Up To Be? by Cry the Bird