A Western Roadtrip - Part 1: Texas and Oklahoma
“The crust of the earth is a vast museum.” — Charles Darwin
It has been years since we went on a ‘new to us’ vacation!
Our first attempt was 2020-2021. We planned to ring in the new year (2021) in Las Vegas. Then, we would rent a car and explore Nevada, Utah, Arizona and western California. This trip was directly inspired by my dad (who passed in 2019). He loved Spaghetti Westerns, cowboys, John Wayne, and the TV show Gunsmoke. While we were on this trip, we planned to bring some of my dad’s ashes and sprinkle them on Gunsmoke’s abandoned set in western California as well as around the town of Olancha, CA where one of our favorite movies: Tremors, was filmed.
Thanks to the pandemic, this trip was cancelled.
Then, we tried again in 2022! This time, we wanted to fly to Portland, OR to visit our friends. Then, we would rent a car and explore Oregon, Washington, Idaho, Montana, Wyoming, South Dakota, North Dakota, Wisconsin, Minnesota, and Michigan before ending our trip in Toledo, Ohio for my cousin’s wedding. During this same summer, we decided to buy another house so that I can start raising my own goats, sheep, and expand to breeding poultry. But, that didn’t work out (the house was a mess and not as described) and we backed out a few days before closing - about 15 days before my cousin’s wedding. Needless to say, we didn’t make it to the wedding, didn’t get our farm and didn’t get to go on this trip!
Third time’s a charm… I guess! For this attempt, we decided to start in Dallas, TX and visit our cousins there. Then, we would rent a car and drive to Oklahoma, Kansas, Nebraska, Iowa, South Dakota, Wyoming and eventually end our trip in Denver, Colorado! During this trip through 8 states, we planned to make a stop in Deadwood, SD. The goal was to check out the sights and to see the gravesite of my favorite frontierswoman: Calamity Jane. At her gravesite, we planned to execute one of our original ideas by sprinkling some of my dad’s ashes where she and Wild Bill Hickock were laid to rest.
These plans were made before I began my film: “Sundays”. But, as I was researching pigment and ink creation, I realized that many of these areas had unique soil and rock colors that would be an excellent addition to my film’s natural color palette!
Here are some numbers from our trip:
8 states visited
2,532 miles driven
14 pigment samples collected
42.3 hours spent driving
11 major cities seen
6 friends / family visited
4 audiobooks completed
unknown miles hiked
Day 1 and Day 2 were spent in Texas and Oklahoma.
We started our trip in Dallas, visiting Ben’s cousins Brook and Melissa. We also met up with my cousin Billy and his wife Leeann.
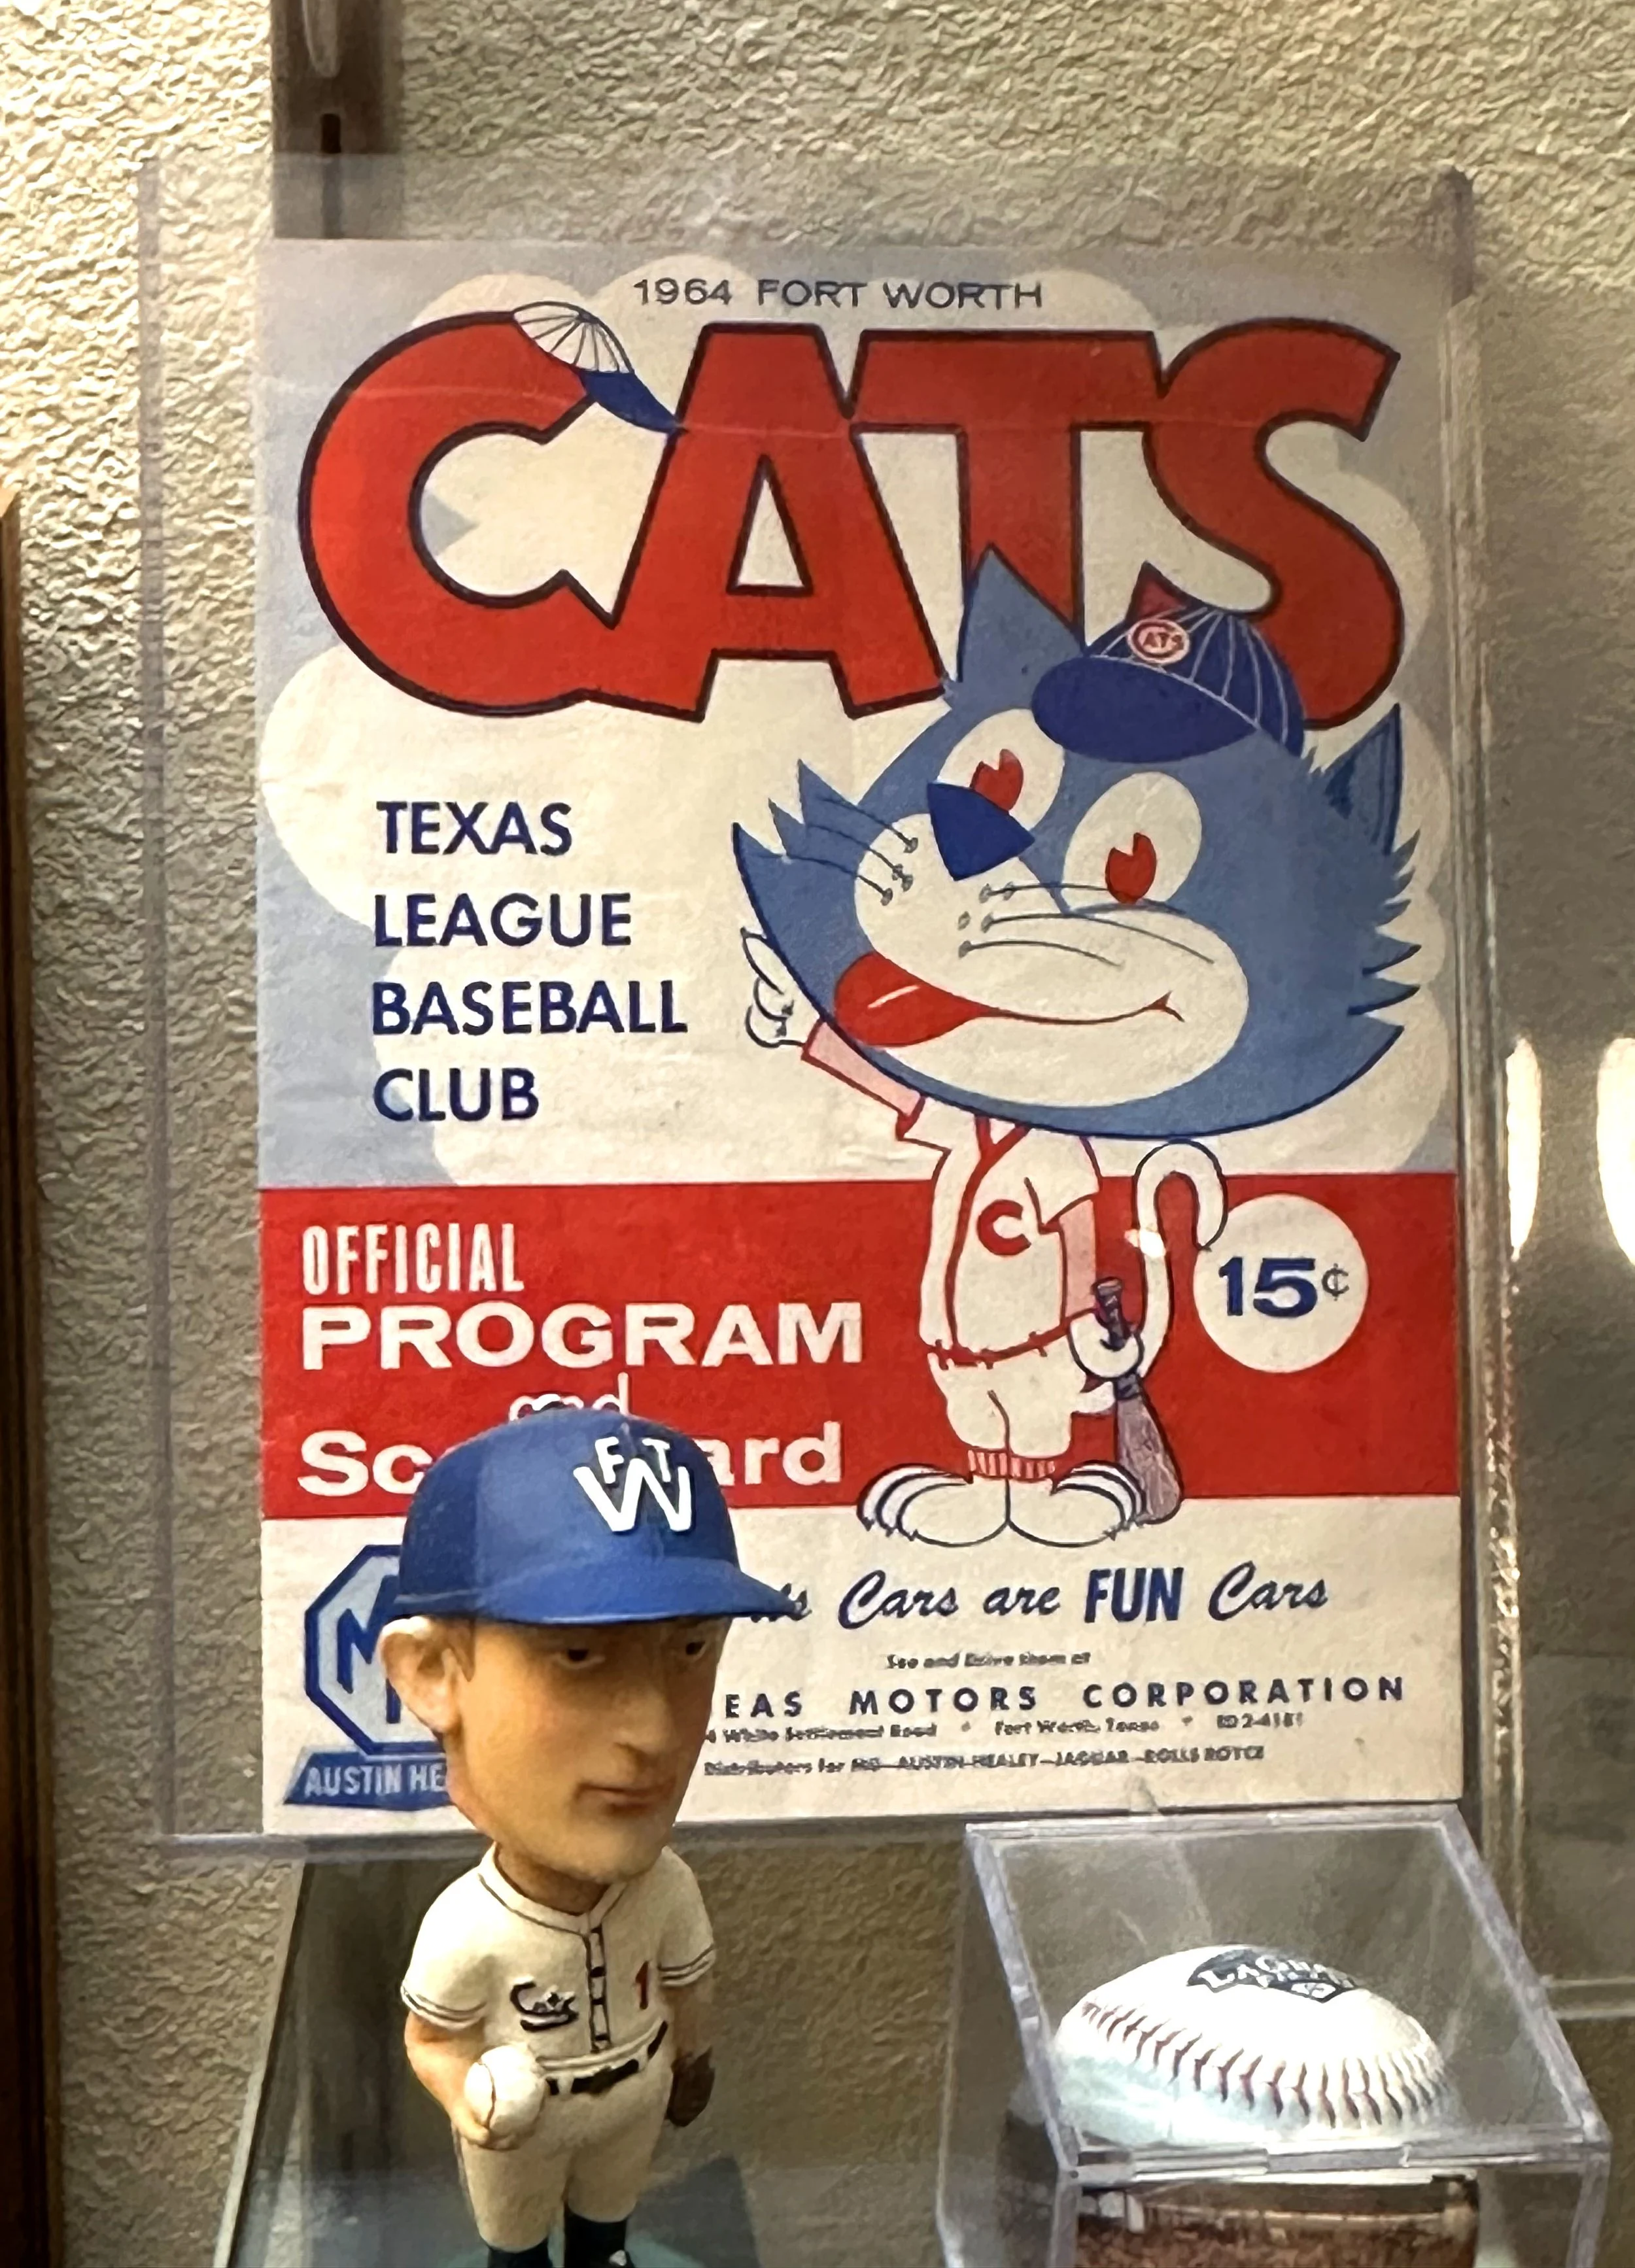
We got to check out downtown Dallas, ate some amazing Texas BBQ at Pecan Lodge and saw the historic Fort Worth Stockyards.
I was especially taken with the Fort Worth Cats. It’s too bad that they don’t exist anymore. If they did, I may have been able to find it in my heart to like baseball. Maybe.
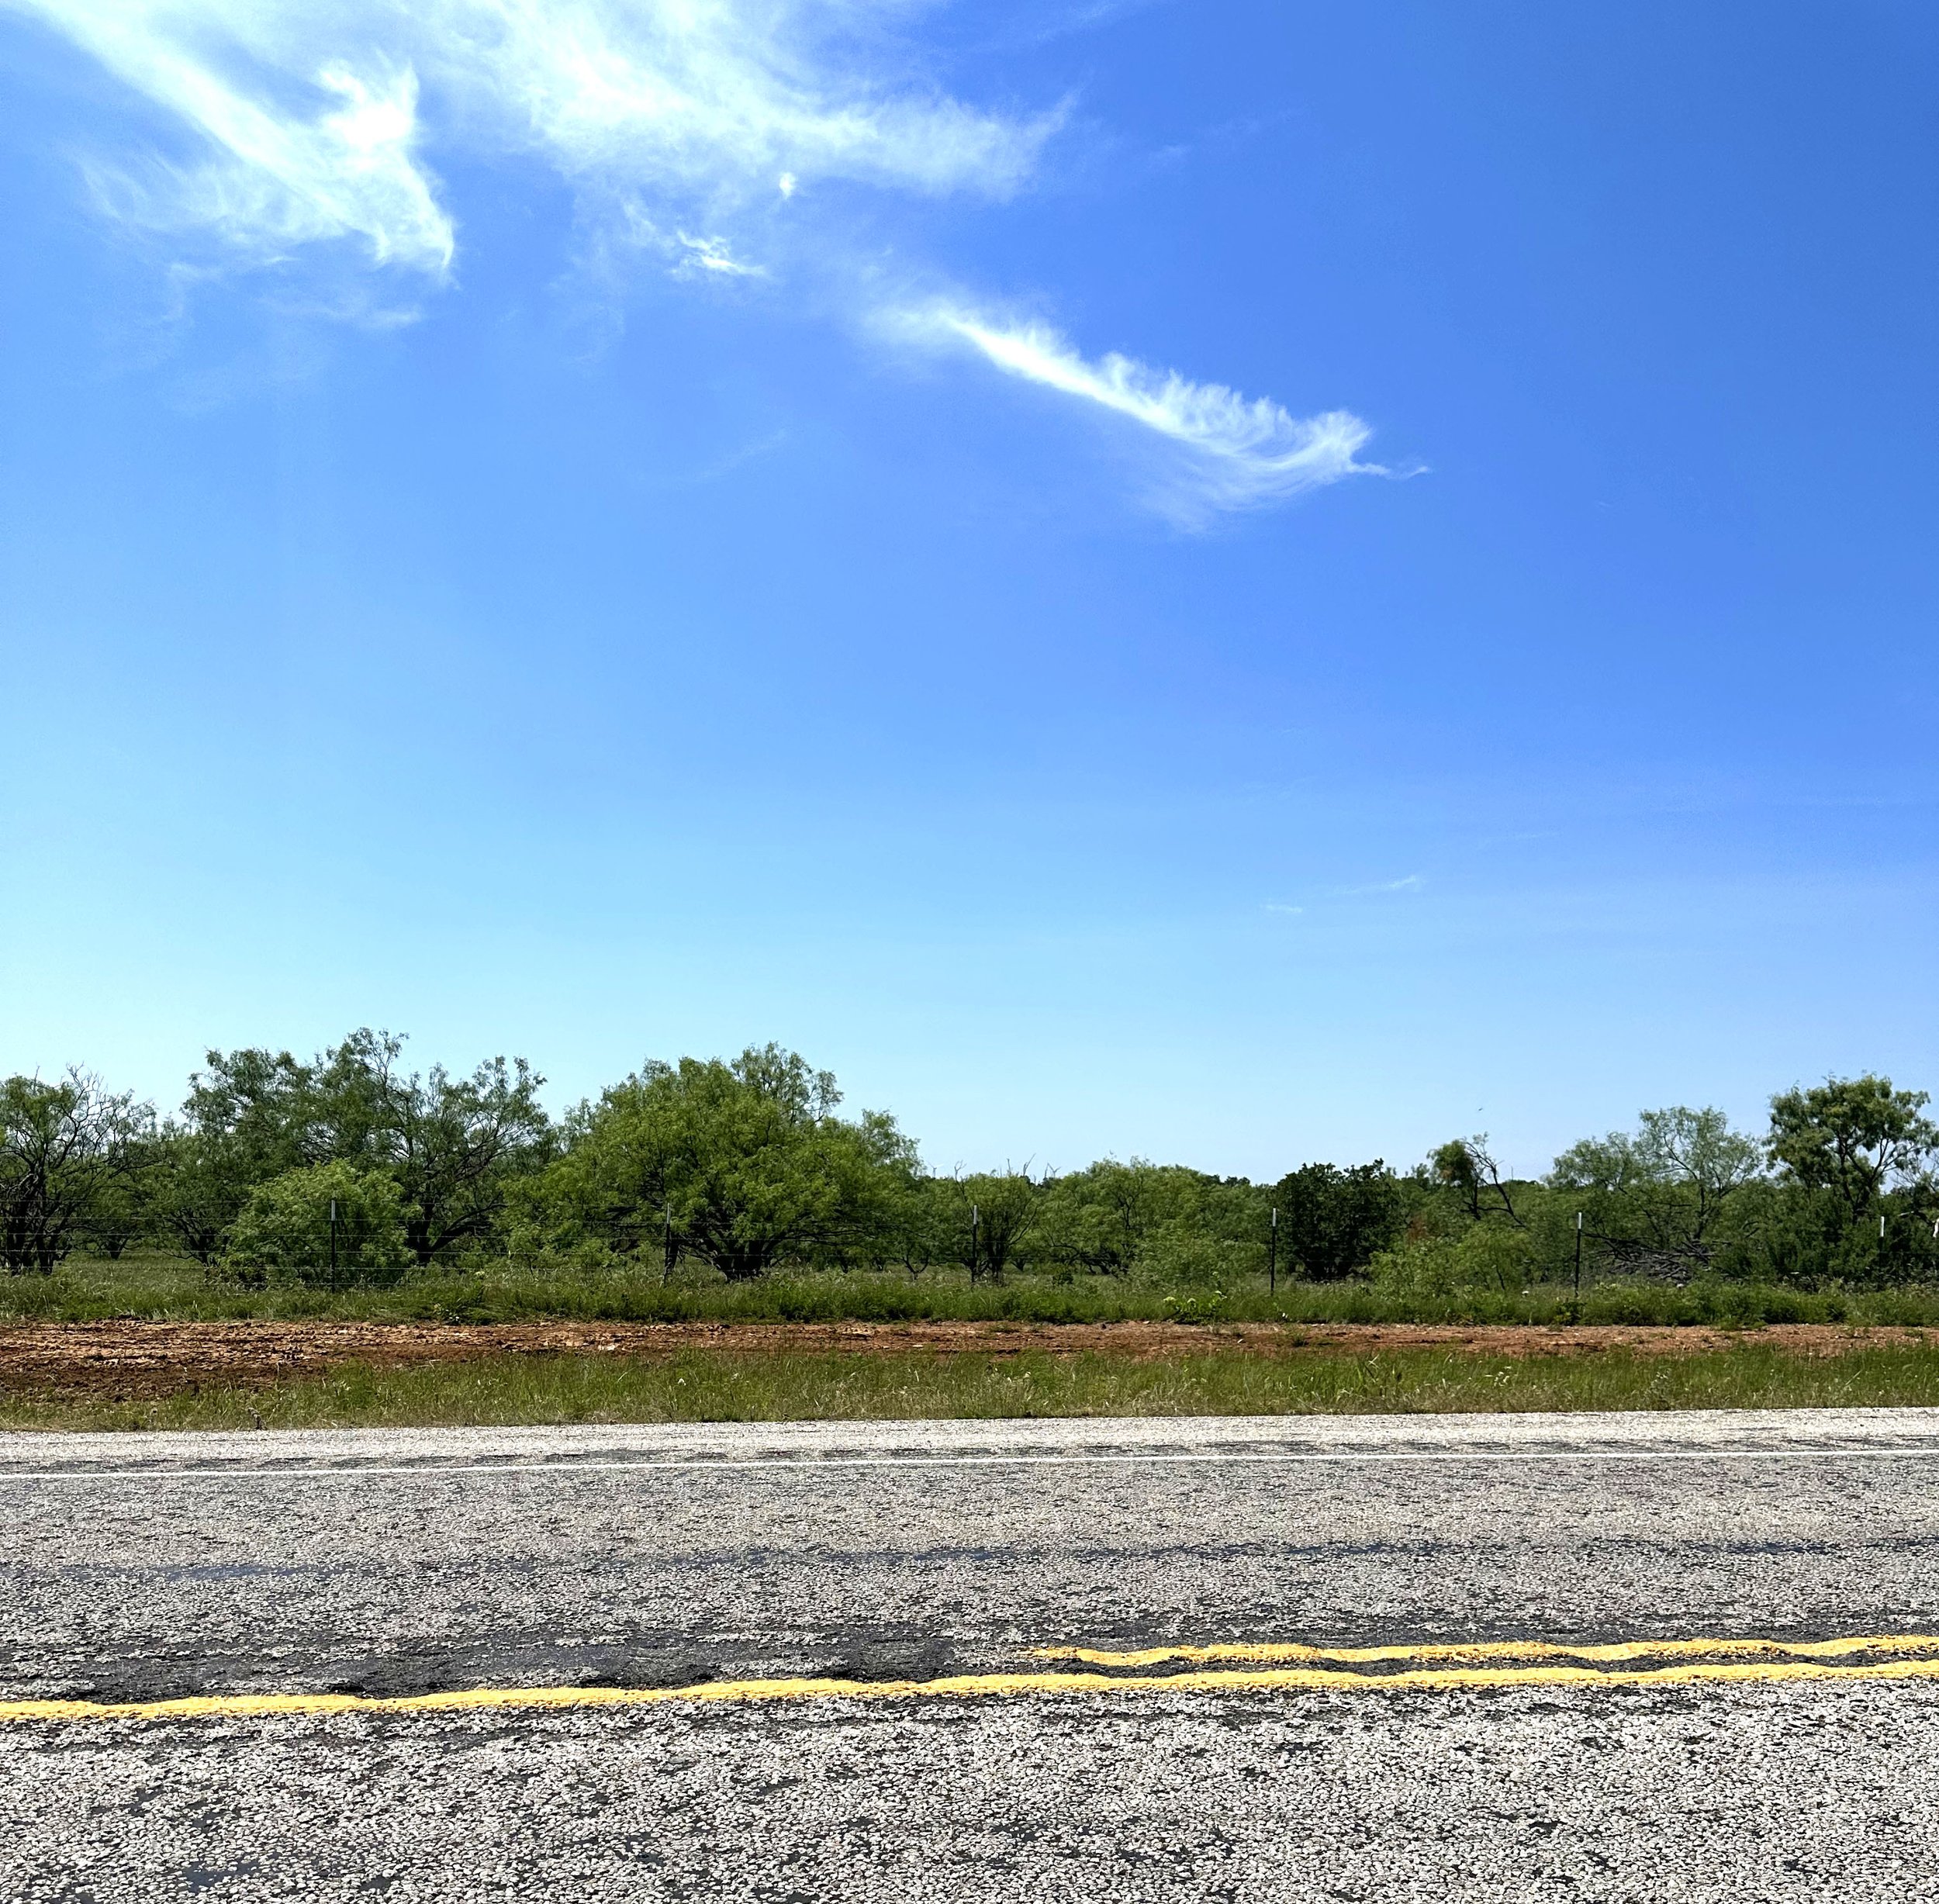
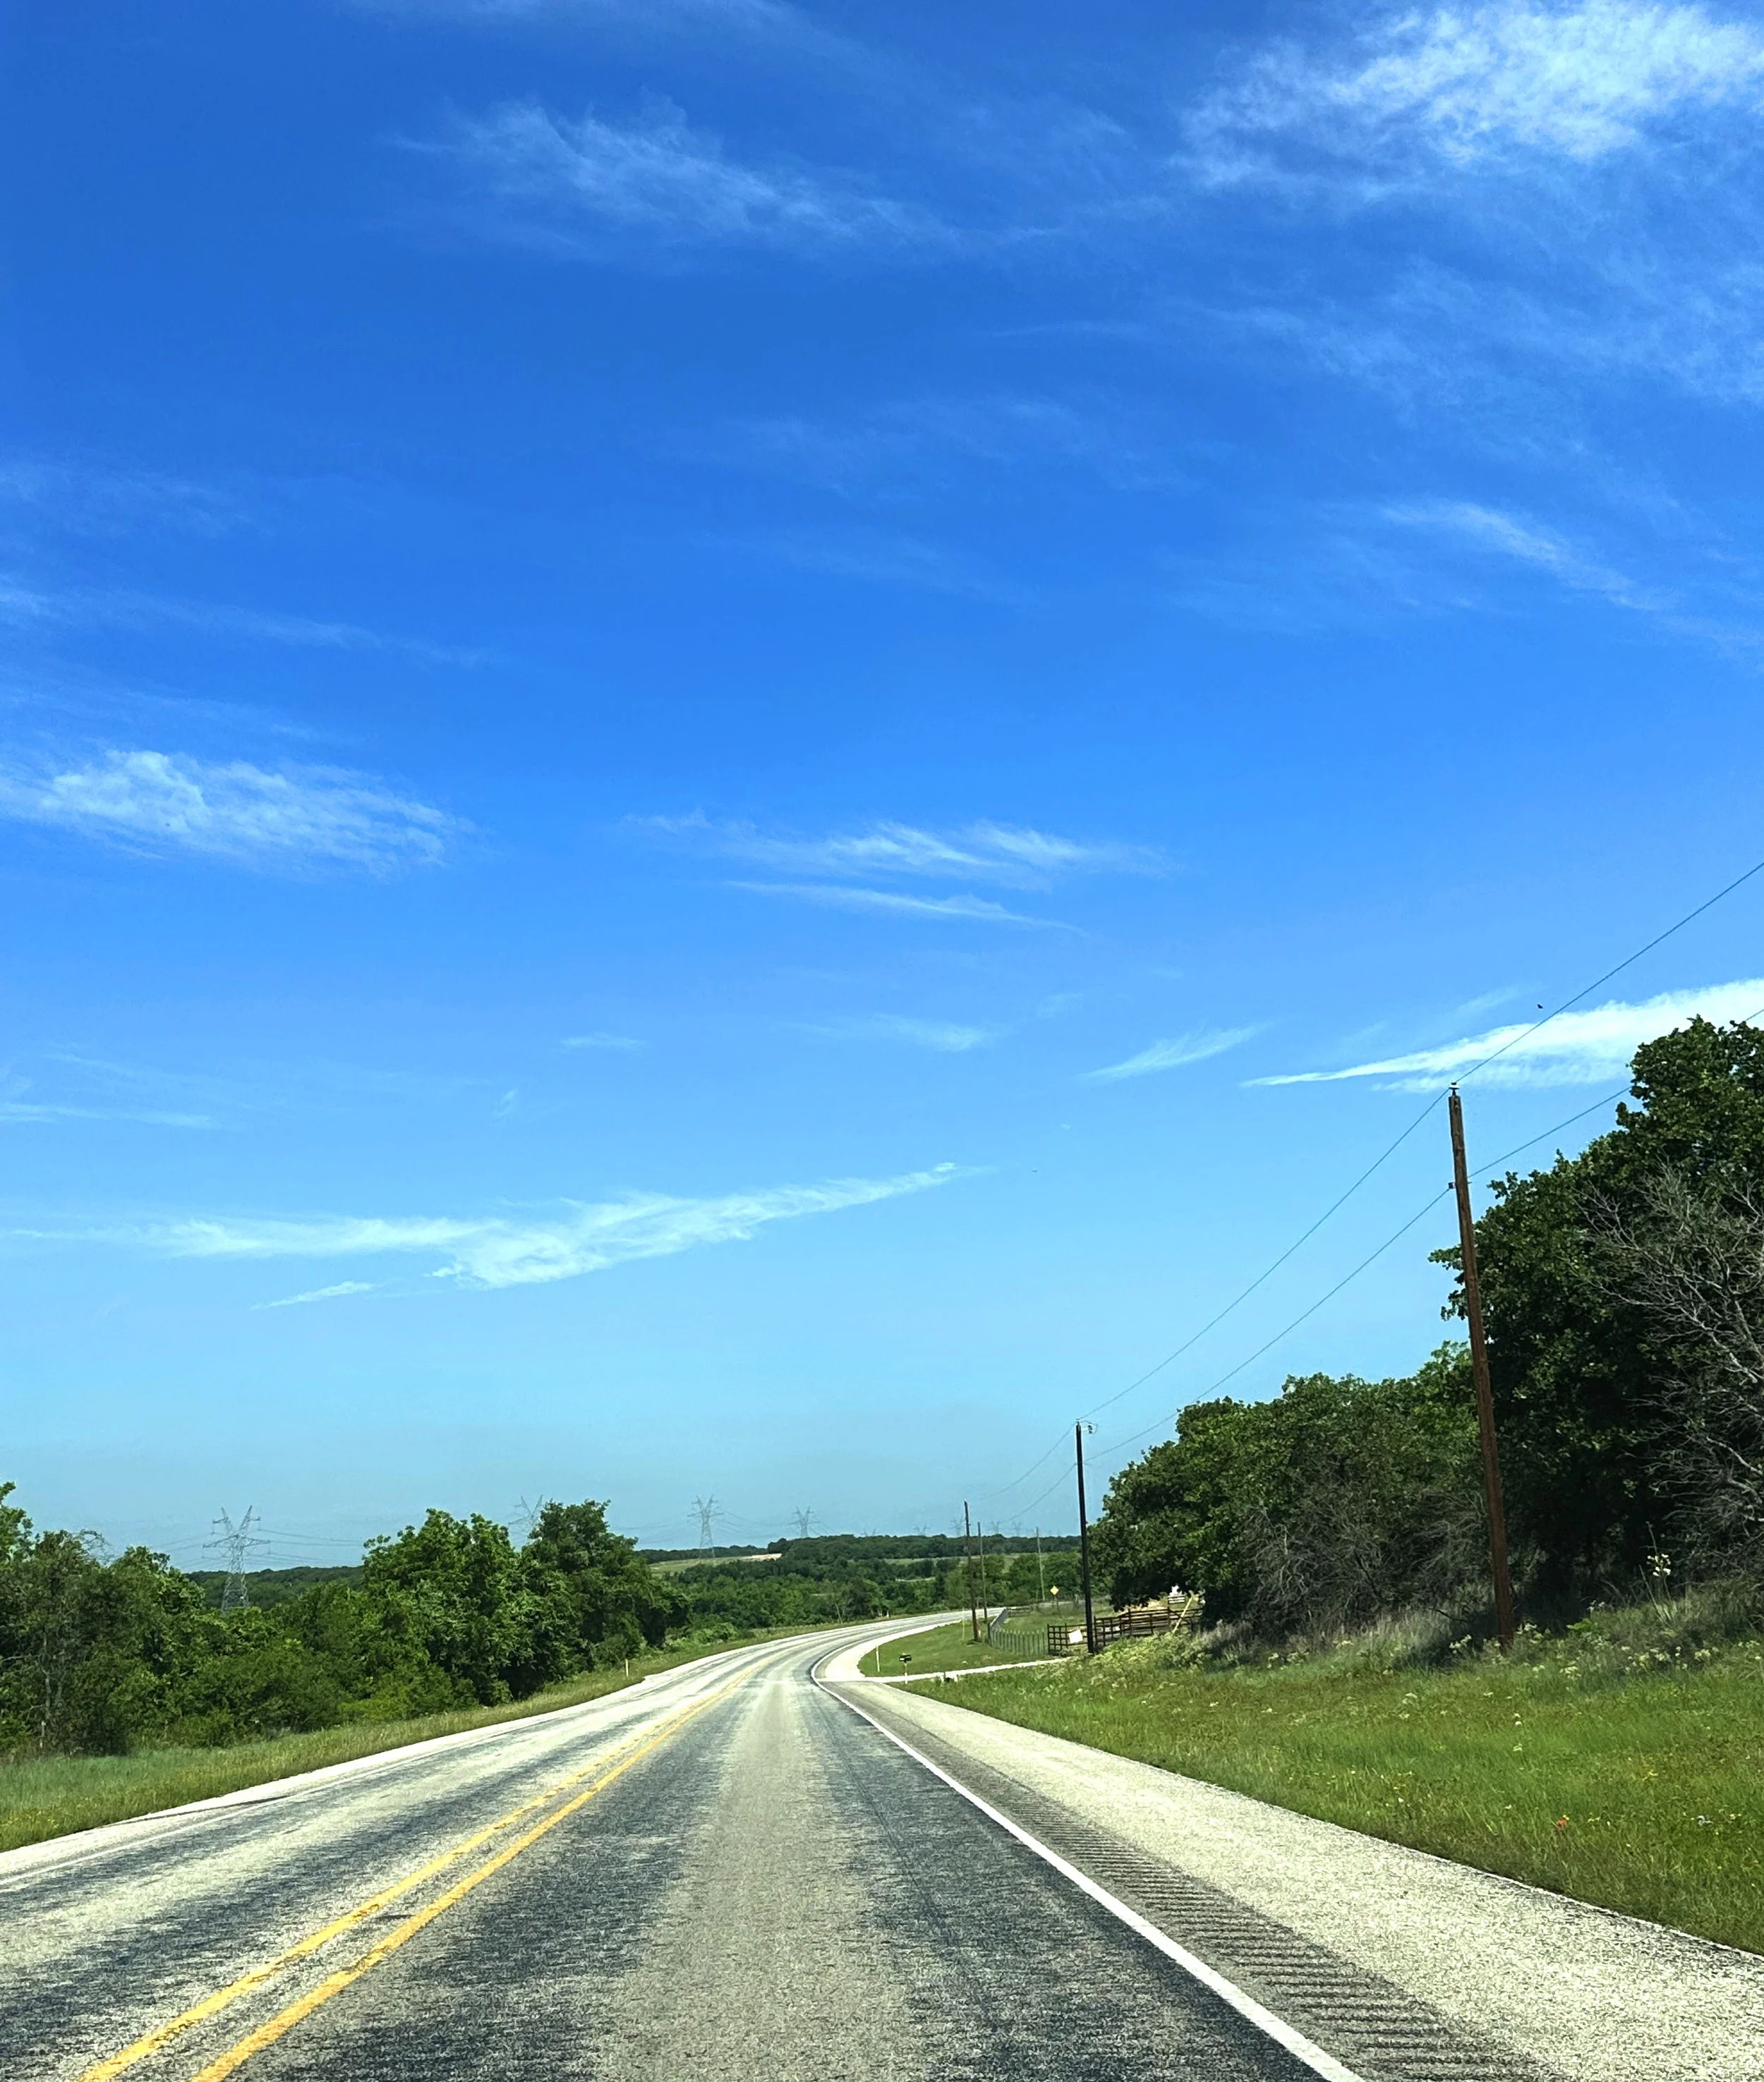
I loved the flatness of the Texas and Oklahoma landscapes. The visibility and expanse was something that I tried, unsuccessfully, to capture as we drove. I loved the shock of red dirt slicing across the landscape. I loved it so much that I collected my first pigment sample on the side of a highway in western Texas!
WHAT MAKES THE DIRT RED?
The reddish color of the dirt in Texas and Oklahoma is primarily due to iron oxide minerals, especially hematite, in the soil. The color is created when the iron minerals are exposed to oxygen and moisture which causes oxidation. Basically, it’s similar to rust!
We see oxidation in other forms too. It’s what made the copper Statue of Liberty turn green and what makes avocado flesh turn brown when exposed to air.
Texas and Oklahoma have the perfect climate for the soil’s iron deposits due to the dry weather and flat open landscape.

The photo above was taken in rural Oklahoma. It is one of my favorite photos from the trip. We spent some time exploring smaller towns off the highway and came across this horse stampede by chance!
While in Oklahoma, we stopped at a rather unique steakhouse that I was very excited to try: Jamil’s. I have had the opportunity to go to quite a few critically acclaimed steakhouses, Peter Luger being one of them! But, this one was really unique. It is the last Lebanese supper-club in Tulsa! Being Lebanese, I had to check this out. I wasn’t disappointed! I highly recommend going there if you ever find yourself in Tulsa!
I was also able to collect two samples of red dirt pigment while driving through!
COLLECTING YOUR MATERIALS:
Just about anything can become paint, even rocks and dirt!
Dirt will create the color you already see. Rocks, however; can be a bit more tricky! Some of the most beautifully colored rocks are not ‘pigment rich’. This means that, when broken up into a dust, they produce a fairly boring color. But, there is a quick test you can do to determine if a rock will give you an interesting color. Take the rock and drag it across cement, asphalt or even another rock. If it leaves a mark, it can be ground into pigment. The mark’s color s is a good indicator on what you can expect once it’s ground up, too!
MATERIAL PREP:
If you are working with rocks, they will need to be broken up into small pieces: gravel size or smaller. This can be done with a hammer. Once they are broken up, you can use a mortar and pestle to turn them into a rough powder. Or, you can use a blender, like I did!
Once the pigment is ground up, siphon the powder through a mesh strainer. This will help remove any larger chunks of dirt or rock that were not ground up. Set this aside so you can make more pigment later.
Now that these steps are complete, we can create a mineral pigment. It is similar to creating a lake pigment but without mordants.
NOTE: I recommend doing this outdoors - it creates a lot of dust!
WHAT IS A LAKE PIGMENT?
A lake pigment can be made from plants, insects, and more! The term ‘lake’ refers specifically to the process of creating the pigment by using a water filtration method to isolate the pigment-rich particles.
If you’re working with plants and other similar dyestuff, you can add a mordant like alum or calcium carbonate to the lake pigment after it’s been filtered. This will cause an interesting chemical reaction (fizzing) that will result in the formation of an insoluble pigment.
This chemical reaction helps produce vivid, intense colors that are lightfast, too!
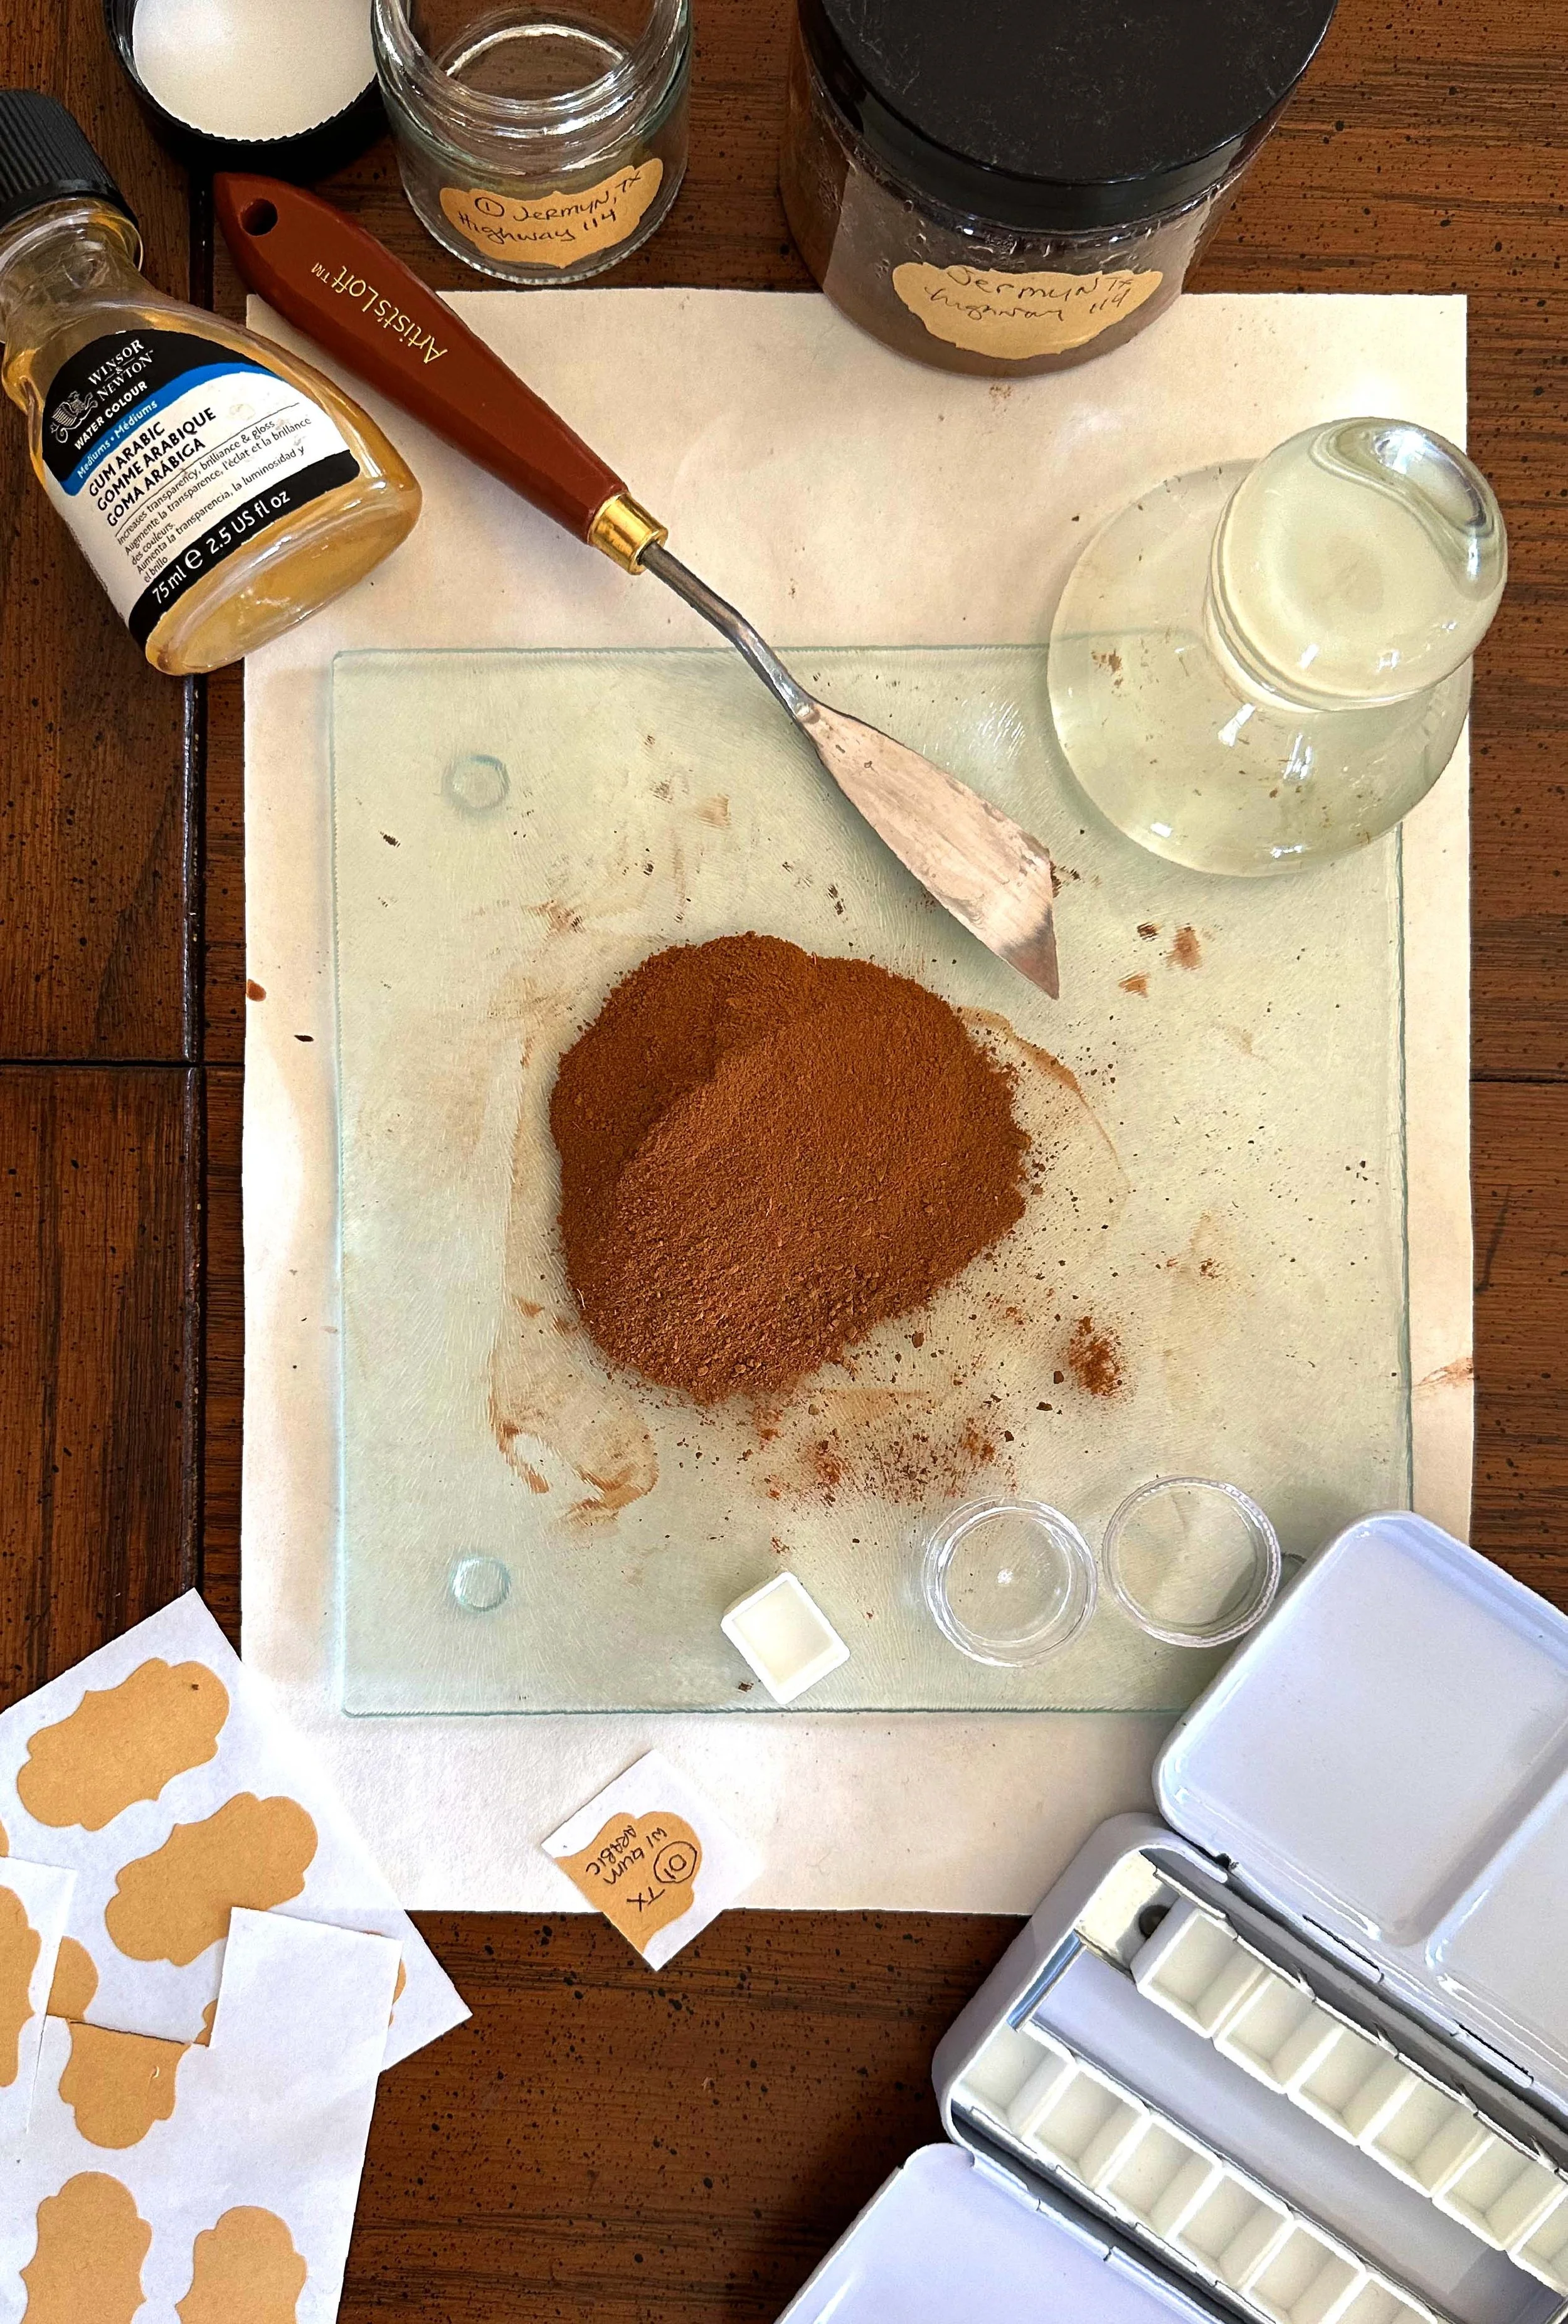
SUPPLIES NEEDED:
You will need to have an extra set of utensils that you will not longer use for cooking food or food consumption when making dyes and pigments.
I recommend collecting the following:
a mortar and pestle
a Magic Bullet Blender or similar
funnels
measuring spoons
glass bowls
coffee filters
a hair tie
mesh strainer
various small jars to hold the final mixture (plastic or glass)
palette knife
glass cutting board (the Dollar Store has a great selection of these!)
glass muller
It’s best to use supplies made out of environmentally neutral materials like stainless steel and glass for the best results and the most accurate color.
MATERIALS NEEDED:
dirt or rocks (a few tablespoons, ground up into a powder)
a binder of your choice (I used gum arabic to create a watercolor binder)
water
For more on binders, check out my blogpost: Making Paint with Eggshells.

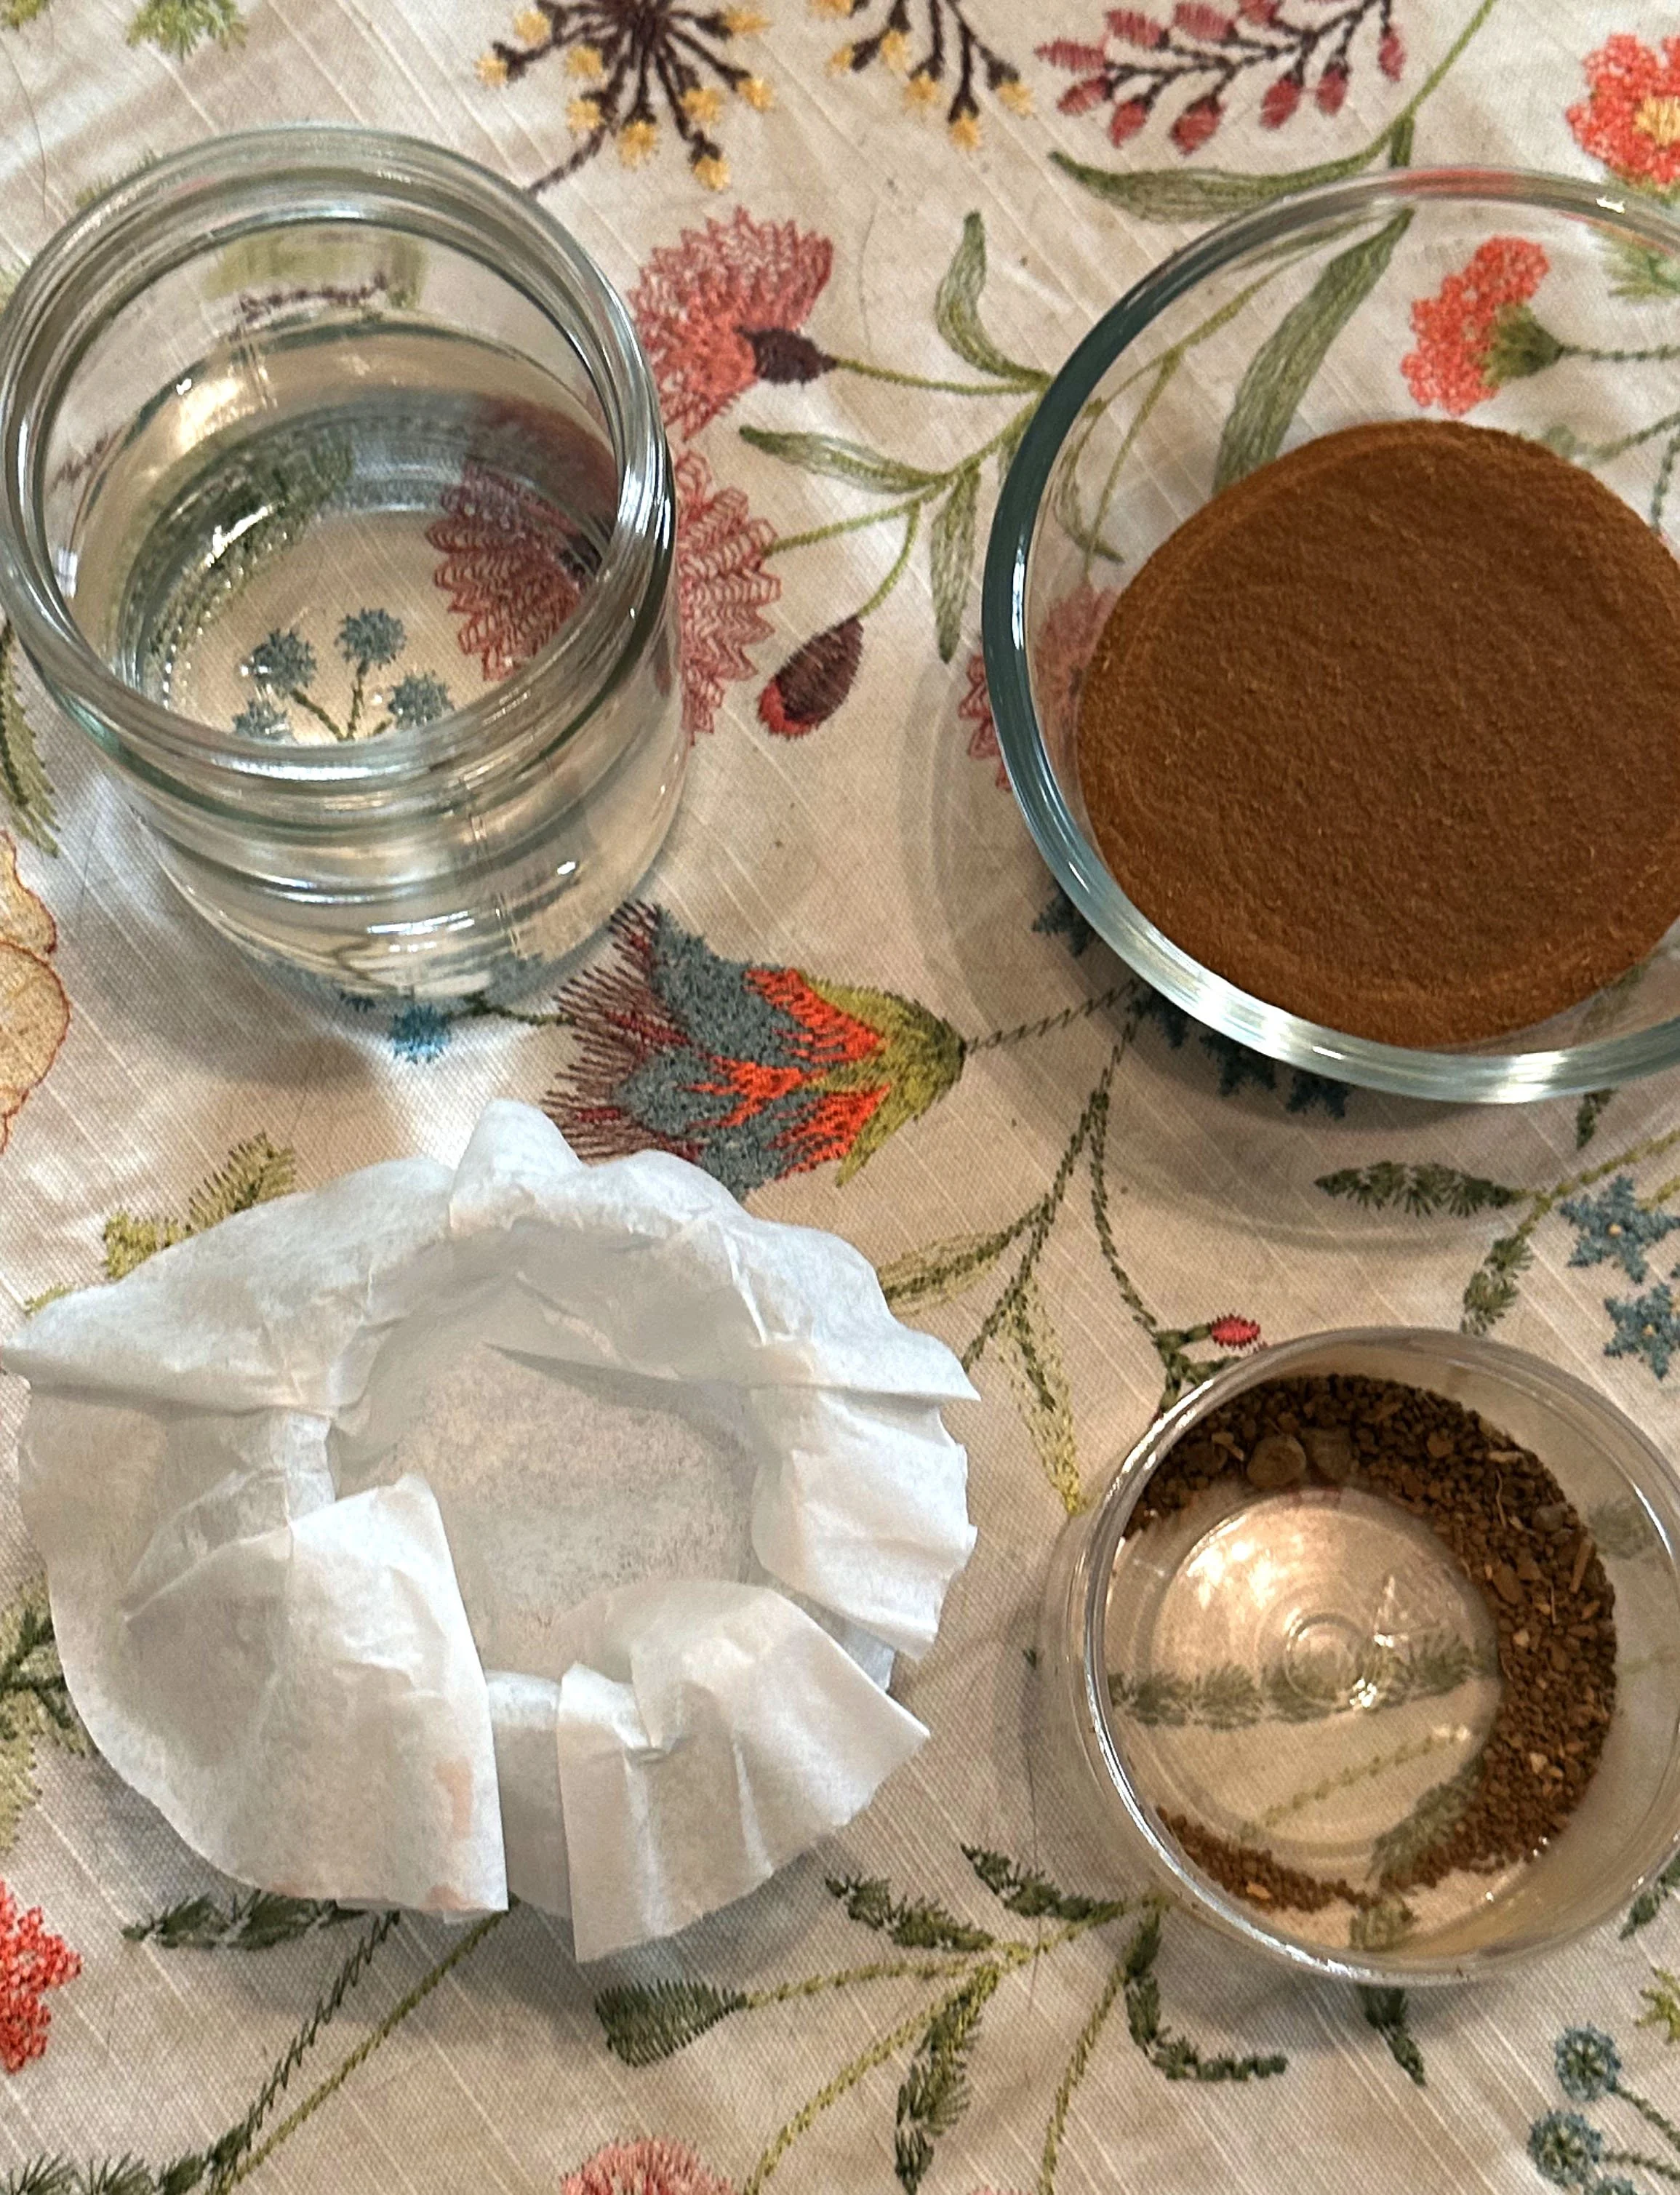
MINERAL PIGMENT PROCESS:
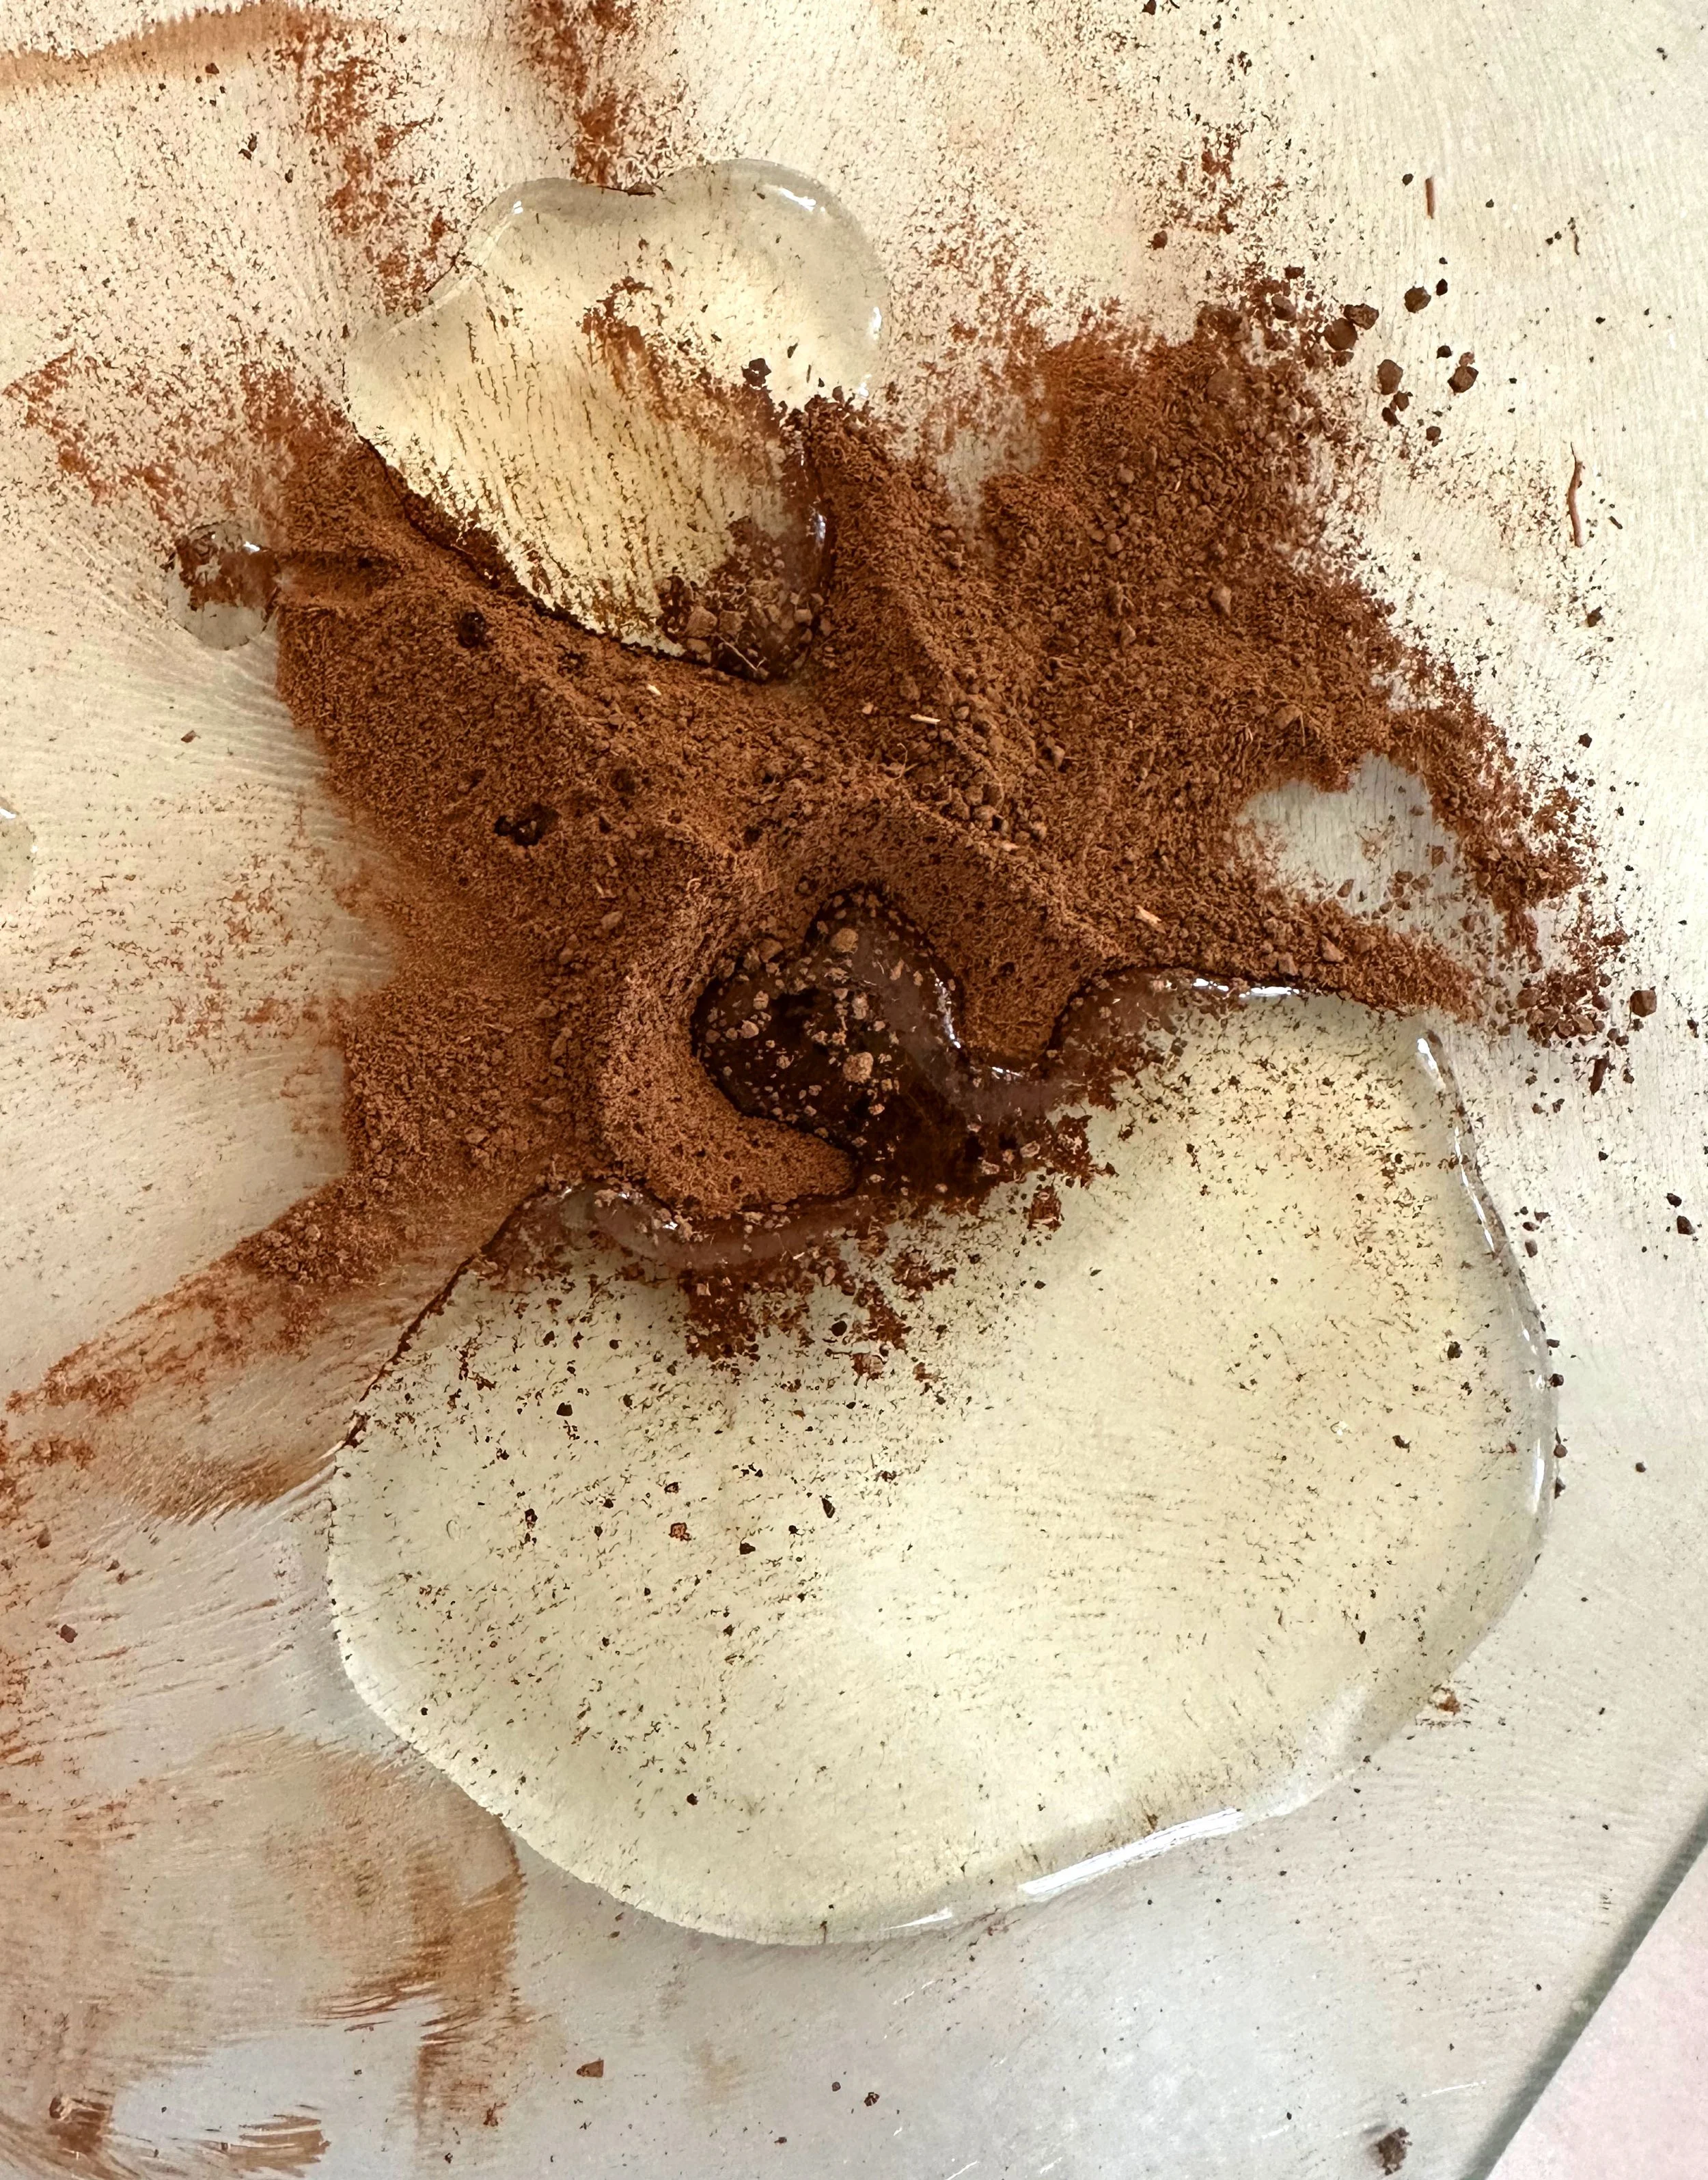
If you haven’t done so already, make sure to grind up the rocks, minerals or dirt into a fine dust using the mortar and pestle or a blender.
Siphon the dust through a fine mesh strainer to remove any large pieces that remain. Save these large pieces just in case you need to make more in the future. We only want to keep the finest particles of dust / pigment for the next steps.
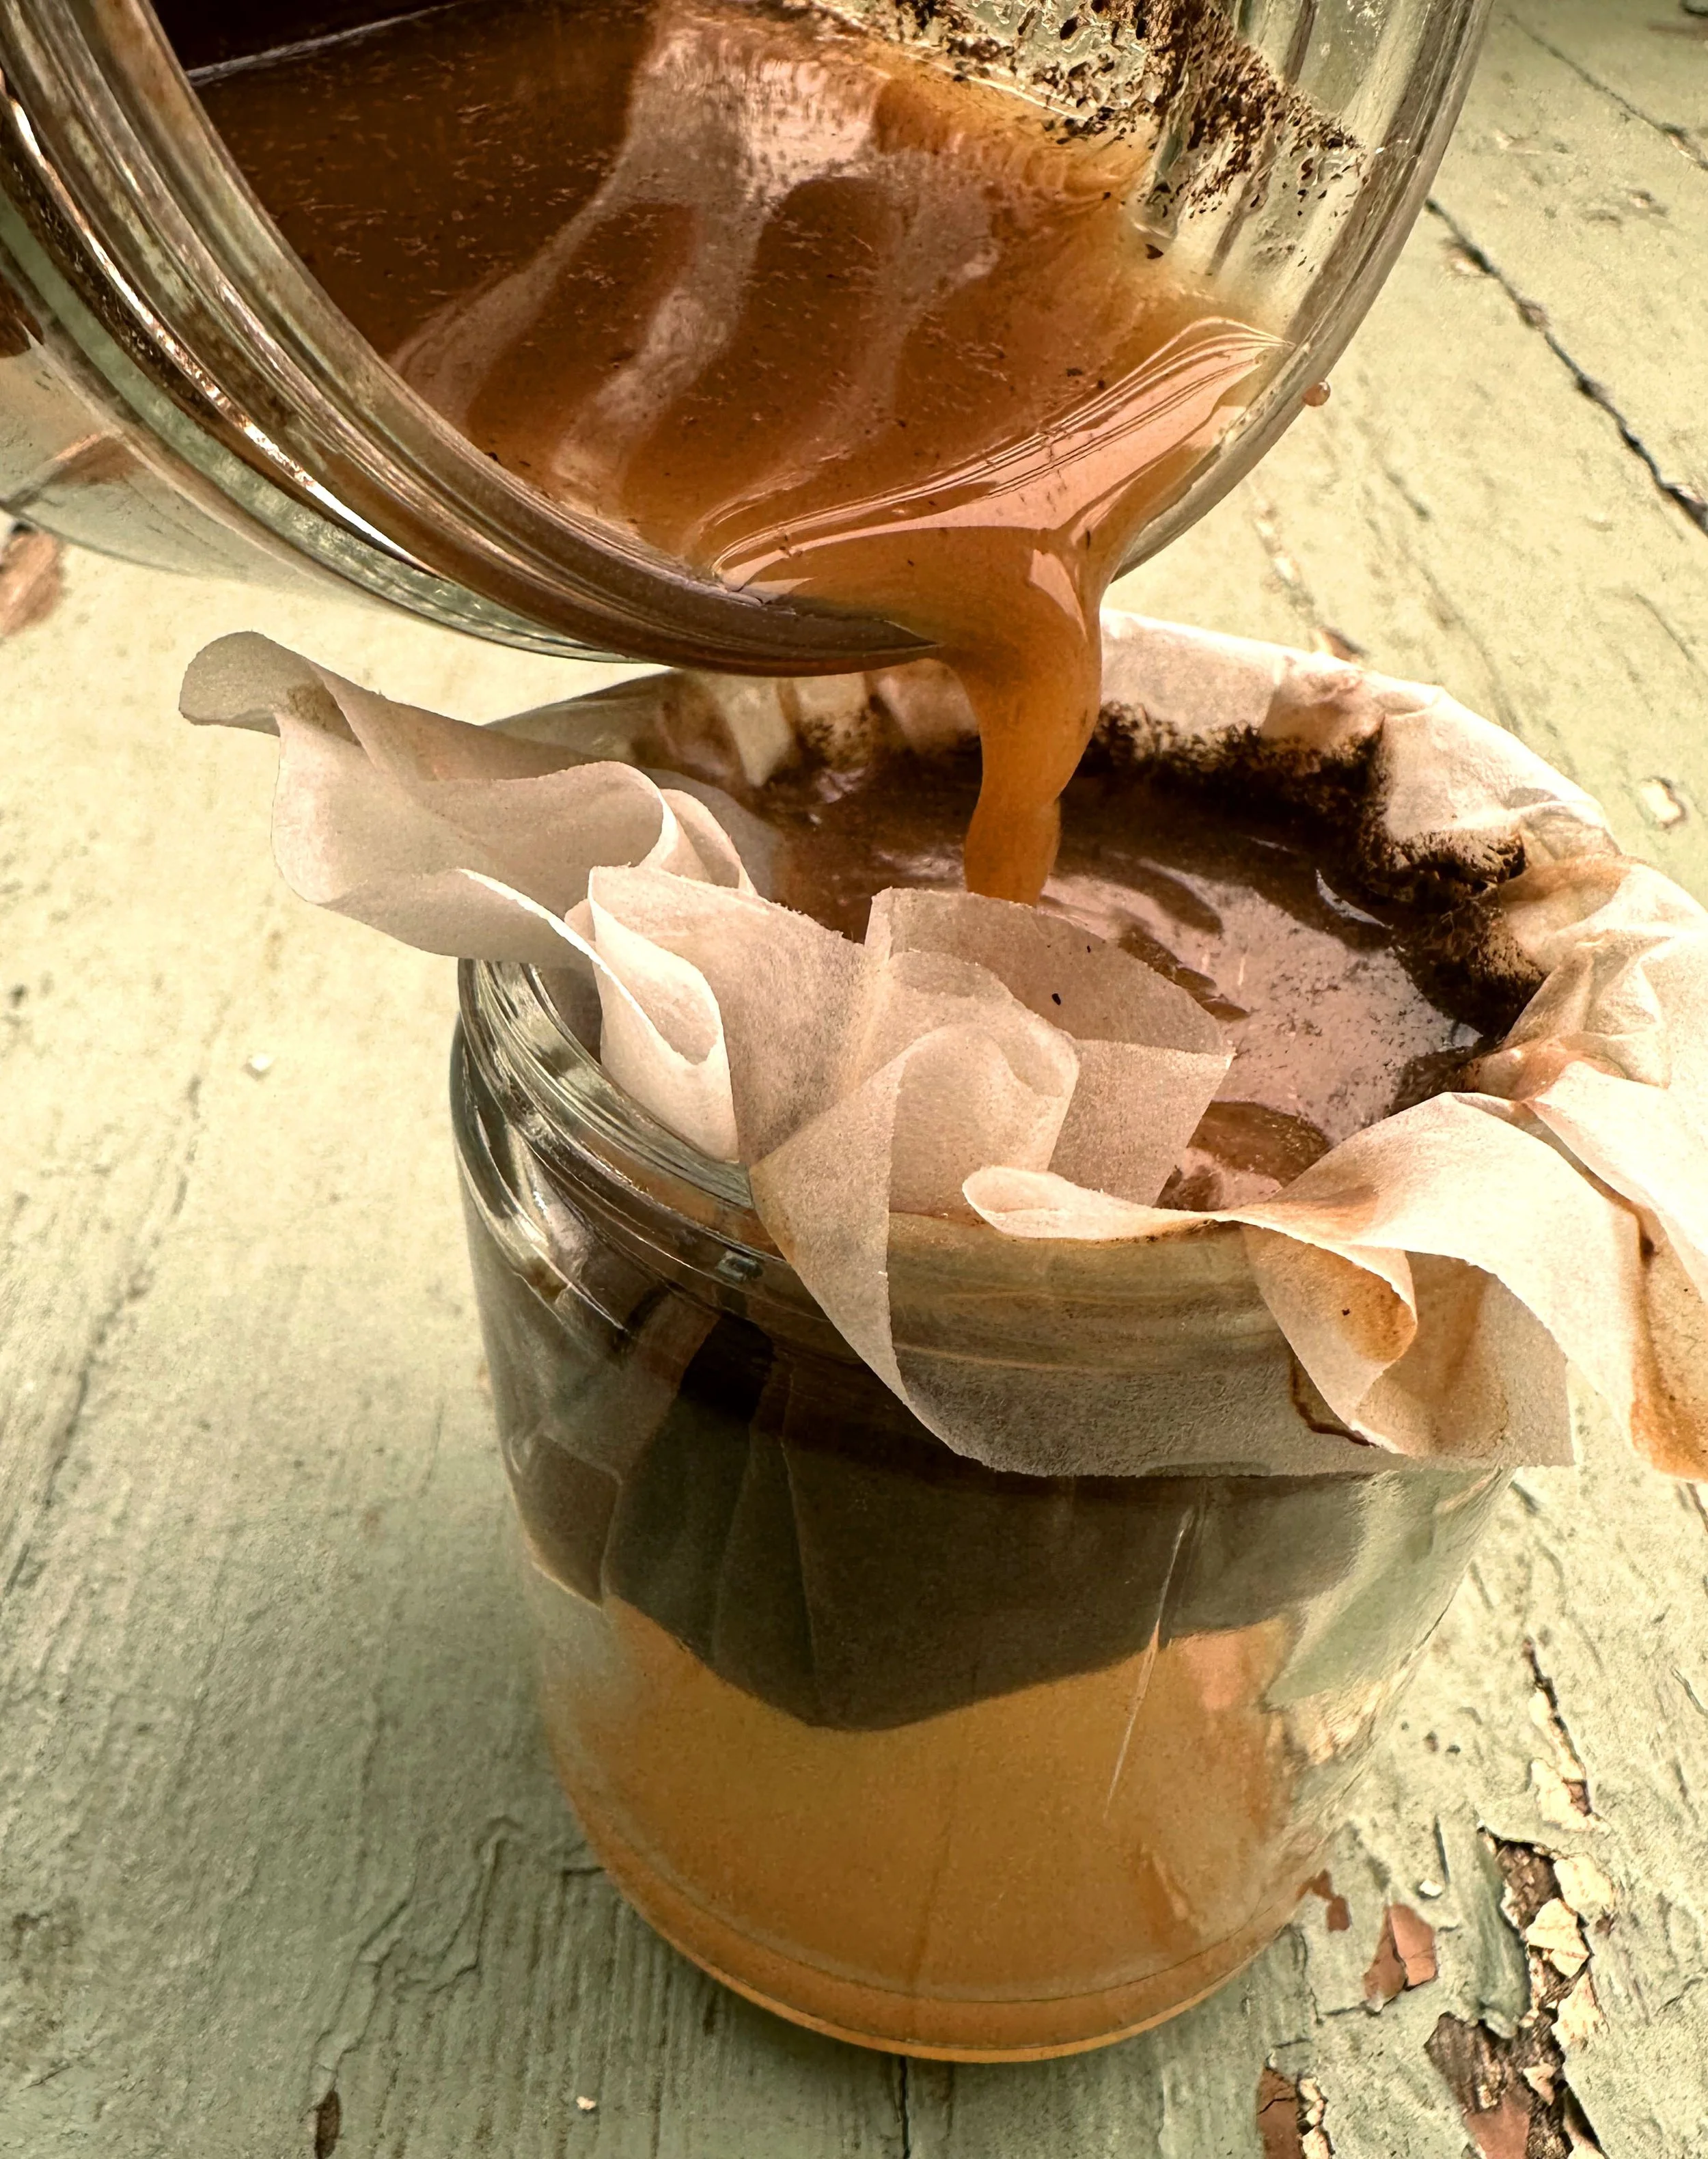
Fill a jar with water and add the dust to it. Stir. The finest particles will float in the water. The heavier particles, that you wouldn’t want to use, will sink to the bottom.
Add a coffee filter to the top of another, empty jar.
Begin slowly pouring the water mixed with your pigment into the coffee filter. The coffee filter will help separate the water (and filter it, which is interesting to see!) from the fine particles of pigment floating in it!
Continue to add the mixture of water and dirt/rock dust to the coffee filter until there is no water left and only a sludge of sediment remains at the bottom.
For the remaining sediment: you can store this for later use. It will need to be dried and ground again to be effective as a pigment.
Carefully remove the coffee filter and lay the contents out to dry in the sun. This will take quite a few hours, or even days to complete.
PRO TIP: Use a hair tie or rubber band to hold the coffee filter in place. This will help keep the coffee filter holding your pigment from slipping into the jar of filtered water!

TURNING OUR PIGMENT INTO PAINT:
Once our pigment is dried, we can either add a binder to it and turn it into useable paint or we can save it as a refined, dry pigment for later use. I did both of these!
If you’re interested in creating a watercolor paint using your pigment, you will need:
1 part pigment
2 parts binder (I used gum arabic)
I prefer to blend the pigment with a palette knife, slowly mixing the two together until the correct consistency is met. Larger pieces of pigment can be broken down with the muller, too.
Your finished pigments can be stored in a recycled makeup compac, watercolor trays, or other small jars.

I have a 14-tray watercolor case that I plan to fill with each pigment from this inspiring trip!
Stay tuned for Part 2!