Coffee and Tea Ink
“I wake up some mornings and sit and have my coffee and look out at my beautiful garden, and I go, ‘Remember how good this is. Because you can lose it.” - Jim Carrey
I really feel this quote. It’s essential to take a pause and think about what we have and reflect on how wonderful it is. Things in life our fleeting, I know this more than ever. The project I am creating these inks and watercolors for is directly inspired by this concept.
My love of coffee is something I shared with the two most important men in my life: my dad and my papap. I grew up with my maternal grandparents and mom, but saw my dad on Tuesdays and Sundays (eventually just Sundays when I got older and was in school). Every morning I would wake up to the smell of coffee in the kitchen and the sounds of my papap puttering around the kitchen and listening to the Cleveland’s oldies station: Magic 105.7.
He would have a cup of coffee ready for me in front of my chair in the kitchen. We would sit together and drink coffee while reading the newspaper. I would read the Funny Pages while he read the more serious topics.
My dad would also have coffee ready for me when I woke up. He also had EGGOS with maple syrup and powdered sugar to go with it or pancakes with chopped apples and walnuts. I am not the biggest fan of EGGOS anymore. But I still make his pancakes once in a while!
Now, when I make myself a coffee in the morning, I spend time reflecting on what I need to do that day and take some extra time to read or catch up on the news. I am not a big fan of routines in general, but this is one I am not willing to part with.

COLLECTING AND PREPPING INGREDIENTS:
Better start drinking some coffee or tea! It didn’t take me long to collect a large amount. You can collect used coffee grounds or use dry coffee grounds that are past their expiration date.
Coffee can, eventually, grow mold. Especially spent coffee grounds that have been steeped and are wet. I kept my used coffee grounds sealed in a Ziploc bag in the freezer.
I followed this same process with tea. I froze it within the bag and all.
NOTE: used coffee grounds and used tea leaves are also a fantastic addition to your garden or compost!
SUPPLIES NEEDED:
You will need to have an extra set of utensils that you will no longer use for cooking food or food consumption when making dye. It’s still best practice to have two sets of supplies: for cooking and for ‘other’.
I recommend collecting the following:
12 qt pot with lid
measuring cups
measuring spoons
funnels
mesh strainer
various glass jars to store dye liquid
pH strips.
stainless steel tongs
large spoon
paper and fabric strips for testing
It’s best to use supplies made out of environmentally neutral materials like stainless steel and glass for the best results and most accurate color.
For pH strips, I recommend these.
MATERIALS NEEDED:
coffee grounds, I recommend about 3-4 cups total OR several used bags of tea equaling 2-3 cups
1 to 2 quarts of water
1/2 cup of cleaning vinegar
1 tablespoon of salt
OPTIONAL: wintergreen oil, clove oil or whole cloves
OPTIONAL: iron mordant
OPTIONAL: gum arabic (if this will be used as an ink or watercolor)
NOTE: I used a variety of different types of tea: herbal, Japanese Brown Rice Tea, Earl Gray, chamomile and more. If you want more control over the result, I recommend using one type of tea.
A NOTE ON MORDANTS:
Coffee does have some evidence of tannins, which is a naturally occurring mordant. But, it has half as many as tea does! Adding alum will help adhere the coffee or tea dye to fabrics more so, but isn’t necessary. Iron is a great mordant to add if you want to ‘sadden’ the color.
For more on mordants/color modifiers, check out this post on creating dyes with turmeric.
A NOTE ON COLOR MODIFIERS:
For this coffee and/or tea recipe, I used vinegar and salt instead of a mordant like alum. Vinegar and salt help brighten the color but they do not help it ‘bite’ to fabric. I intend to use these tea and coffee-made color as an ink or watercolor, not as a fabric dye. Please adjust the recipe to include 1-2 tsp of alum if you plan on using it as a fabric dye. Or, pre-mordant your fibers with alum before adding them to the dye bath.
PROCESS:
For the coffee recipe, add the coffee grounds to the water. For the tea recipe, add the tea leaves to the water, bags and all!
simmer for up to 60 minutes. Make sure to stir every 10-15 minutes.
once the desired color is reached, take the mixture off heat.
leave the mixture overnight so that the color can continue to strengthen. I added a piece of fabric to see how the color would absorb over a long dye period.
the next day: strain all contents into a bowl. If you would like to experiment with mordants, split the contents into two separate bowls.
OPTIONAL: In bowl #2: add a pinch of iron to start. Stir this in. Continue adding small amounts of iron until the desired color is achieved. A small amount of iron will “sadden” the color. For both the coffee and tea, the the color will become gray immediately, with very little ferrous sulfate *(AKA iron) used! I truly added a pinch to it, and that may have been too much!
OPTIONAL: add gum arabic if this will be used as an ink or watercolor. I recommend 2-3 drops per 2 oz. bottle, but it’s up to you!
the dye/watercolor/ink is ready for use! Use it now, or store it later!
REMINDER: if you choose to store it for later, make sure to sterilize your containers and add 1 drop of wintergreen or clove oil per oz. Or, you can add 1-2 whole cloves per oz to reduce mold growth.
NOTE: the tea-based process created a beautiful fragrant smell, almost sweet. The coffee, however, made my house smell like 20 coffee shops all at once. I still loved that smell, but if you’re sensitive to it, it may be best to simmer the coffee grounds outside.
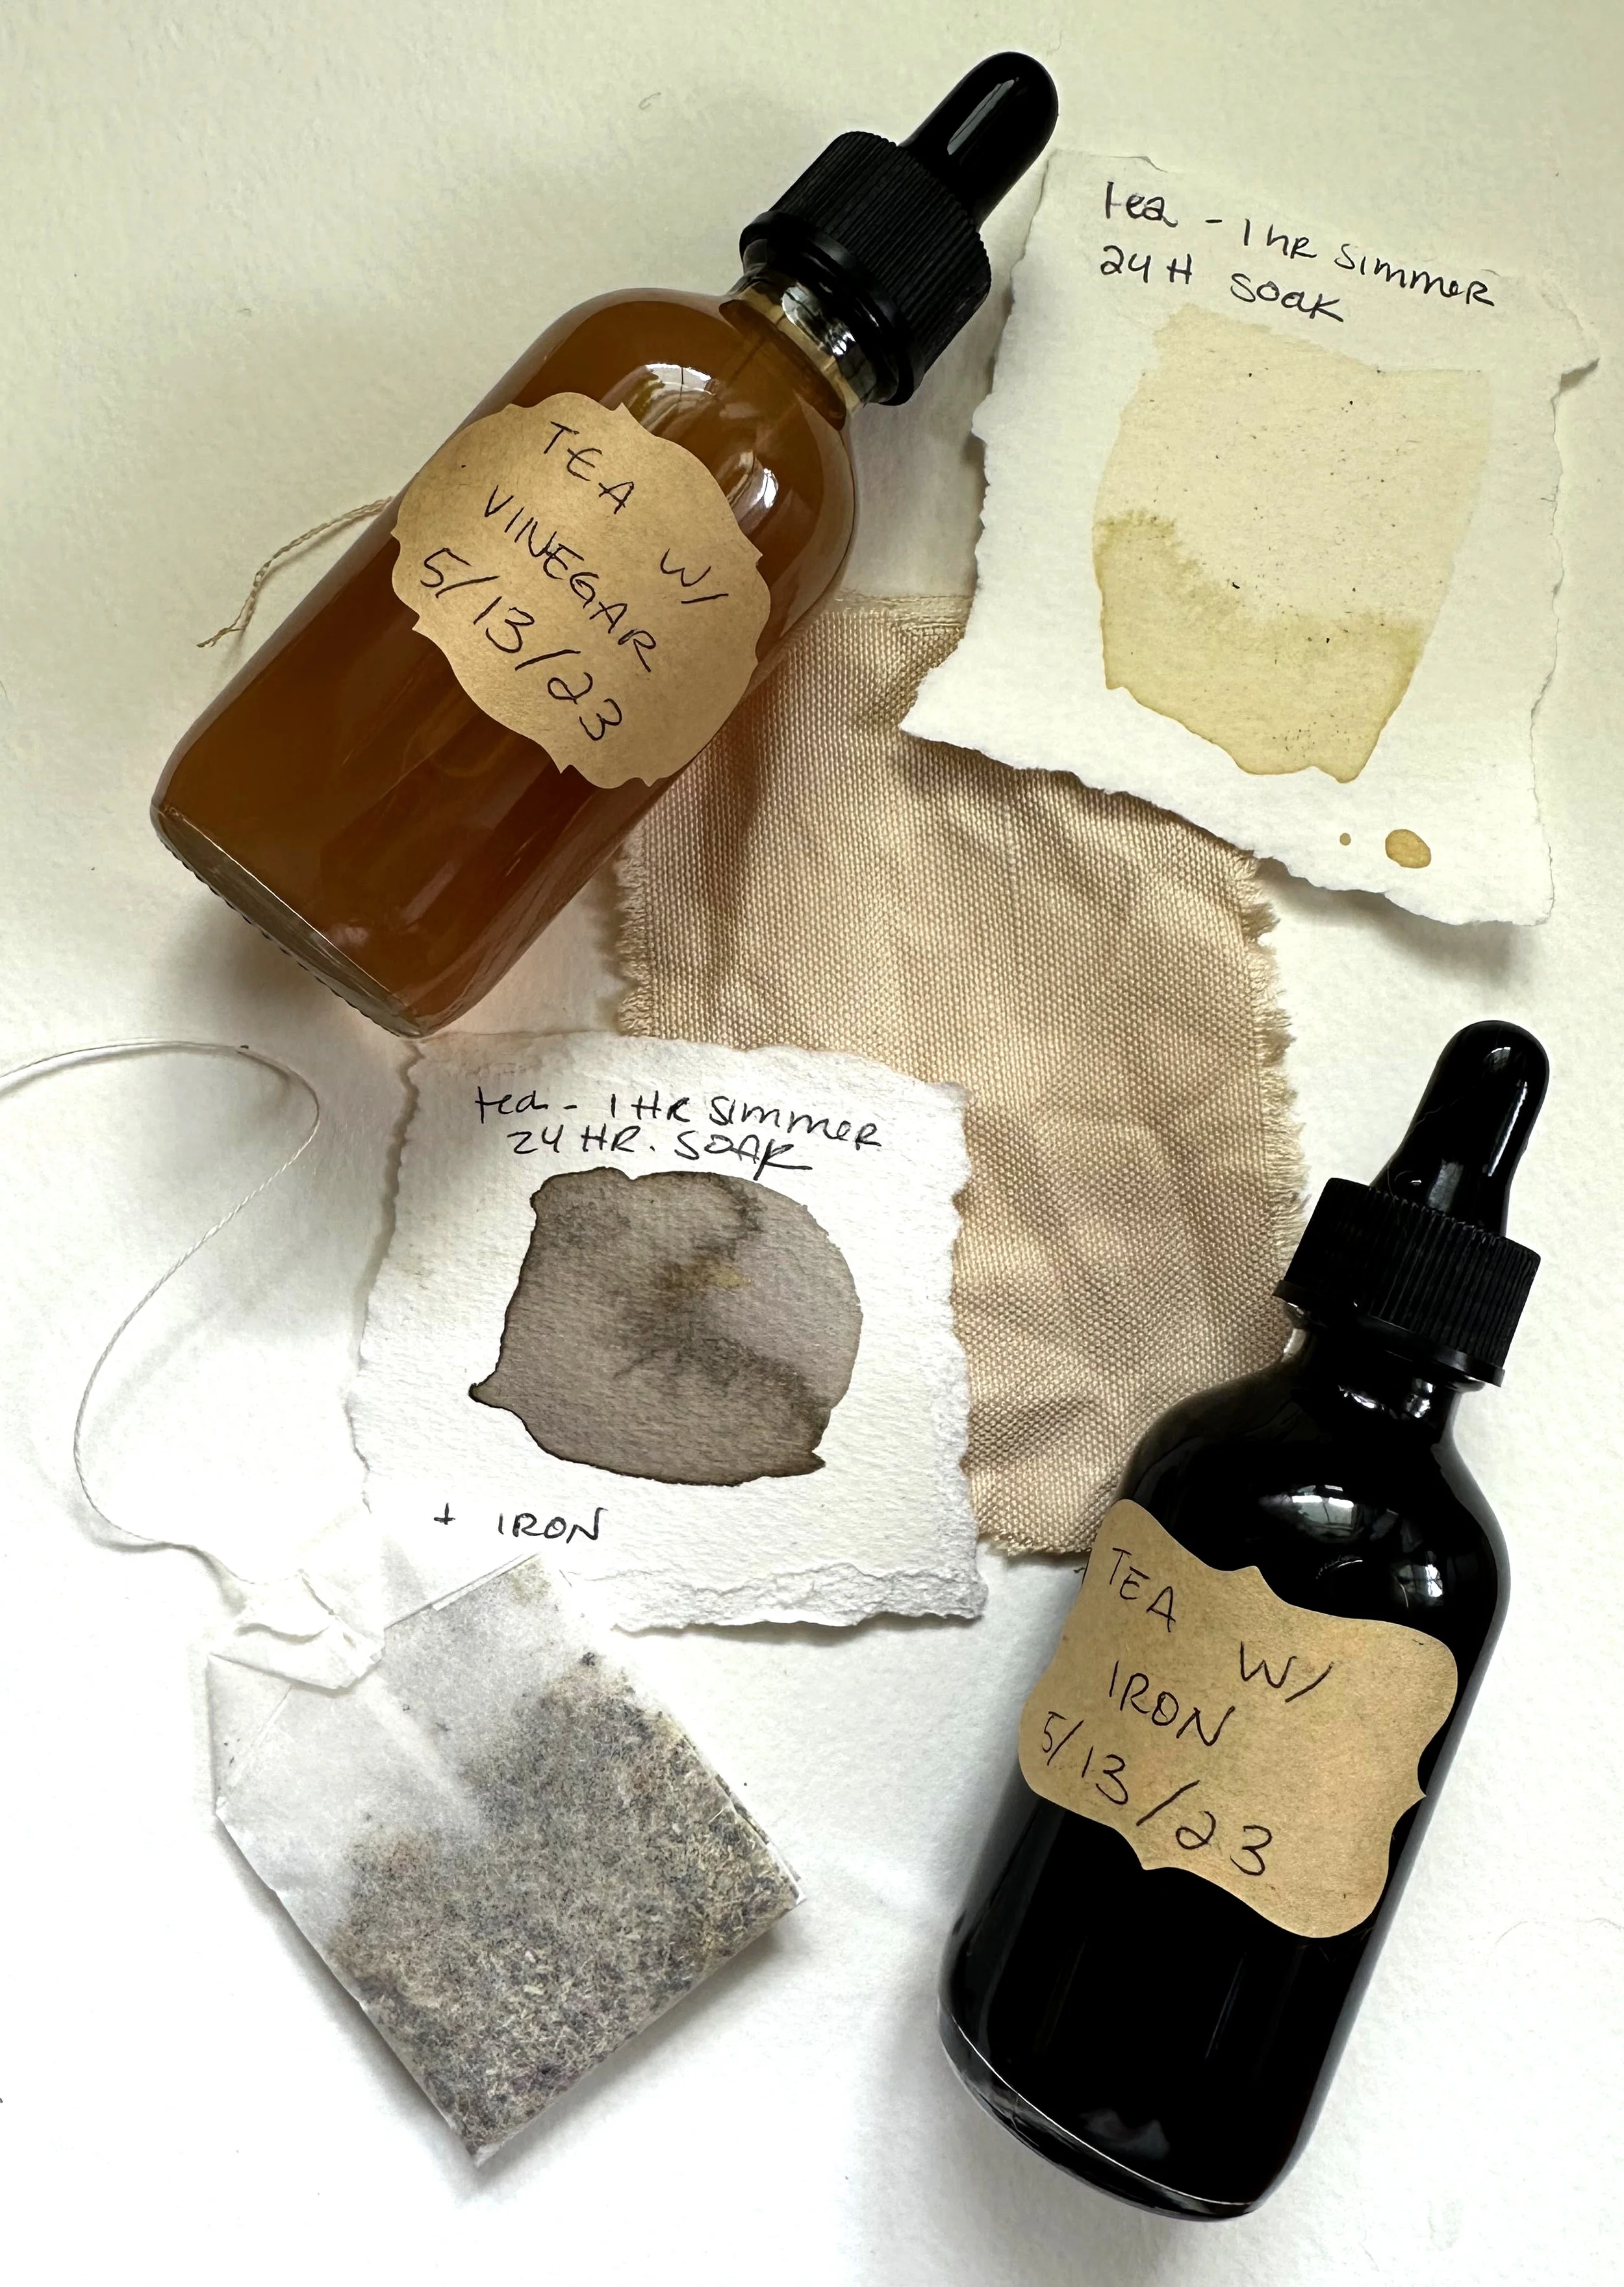
I have been struggling to find the right grays for my film. I have so many beautiful reds, yellows and browns but gray was really lacking. The addition of iron to both of these had a very surprising and pleasant effect! I am looking forward to using all four of these colors in my upcoming film: Sundays!