Onion Skin Ink
“Calvin: Why are you crying mom?
Mom: I’m cutting up an onion.
Calvin: It must be hard to cook if you anthropomorphize your vegetables.”
— Bill Watterson, The Complete Calvin and Hobbes
I cry every time I chop onions.
So do a lot of people, but I think I am more sensitive to most. Why does this happen? It is a chemical reaction! When cutting the onion, it releases lachrymator (a chemical compound that is a part of the amino acid family) that causes the nerves around the eyes to become irritated.
Some people are more sensitive than most. I think that I fit in that category.
I have tried every method: freezing the onion, refrigerating the onion, cutting the onion while running cold water from my faucet, and more. Nothing has worked! Yes, I know that onion goggles exist! But, I wear glasses. Anyone that wears glasses can attest: wearing glasses over top of glasses sucks. And, isn’t effective anyway.
But, that doesn’t stop me from cooking with them. My husband and I both love onions. Onions are also a staple in one of my favorite cuisines: Lebanese food. So, we use them a lot.
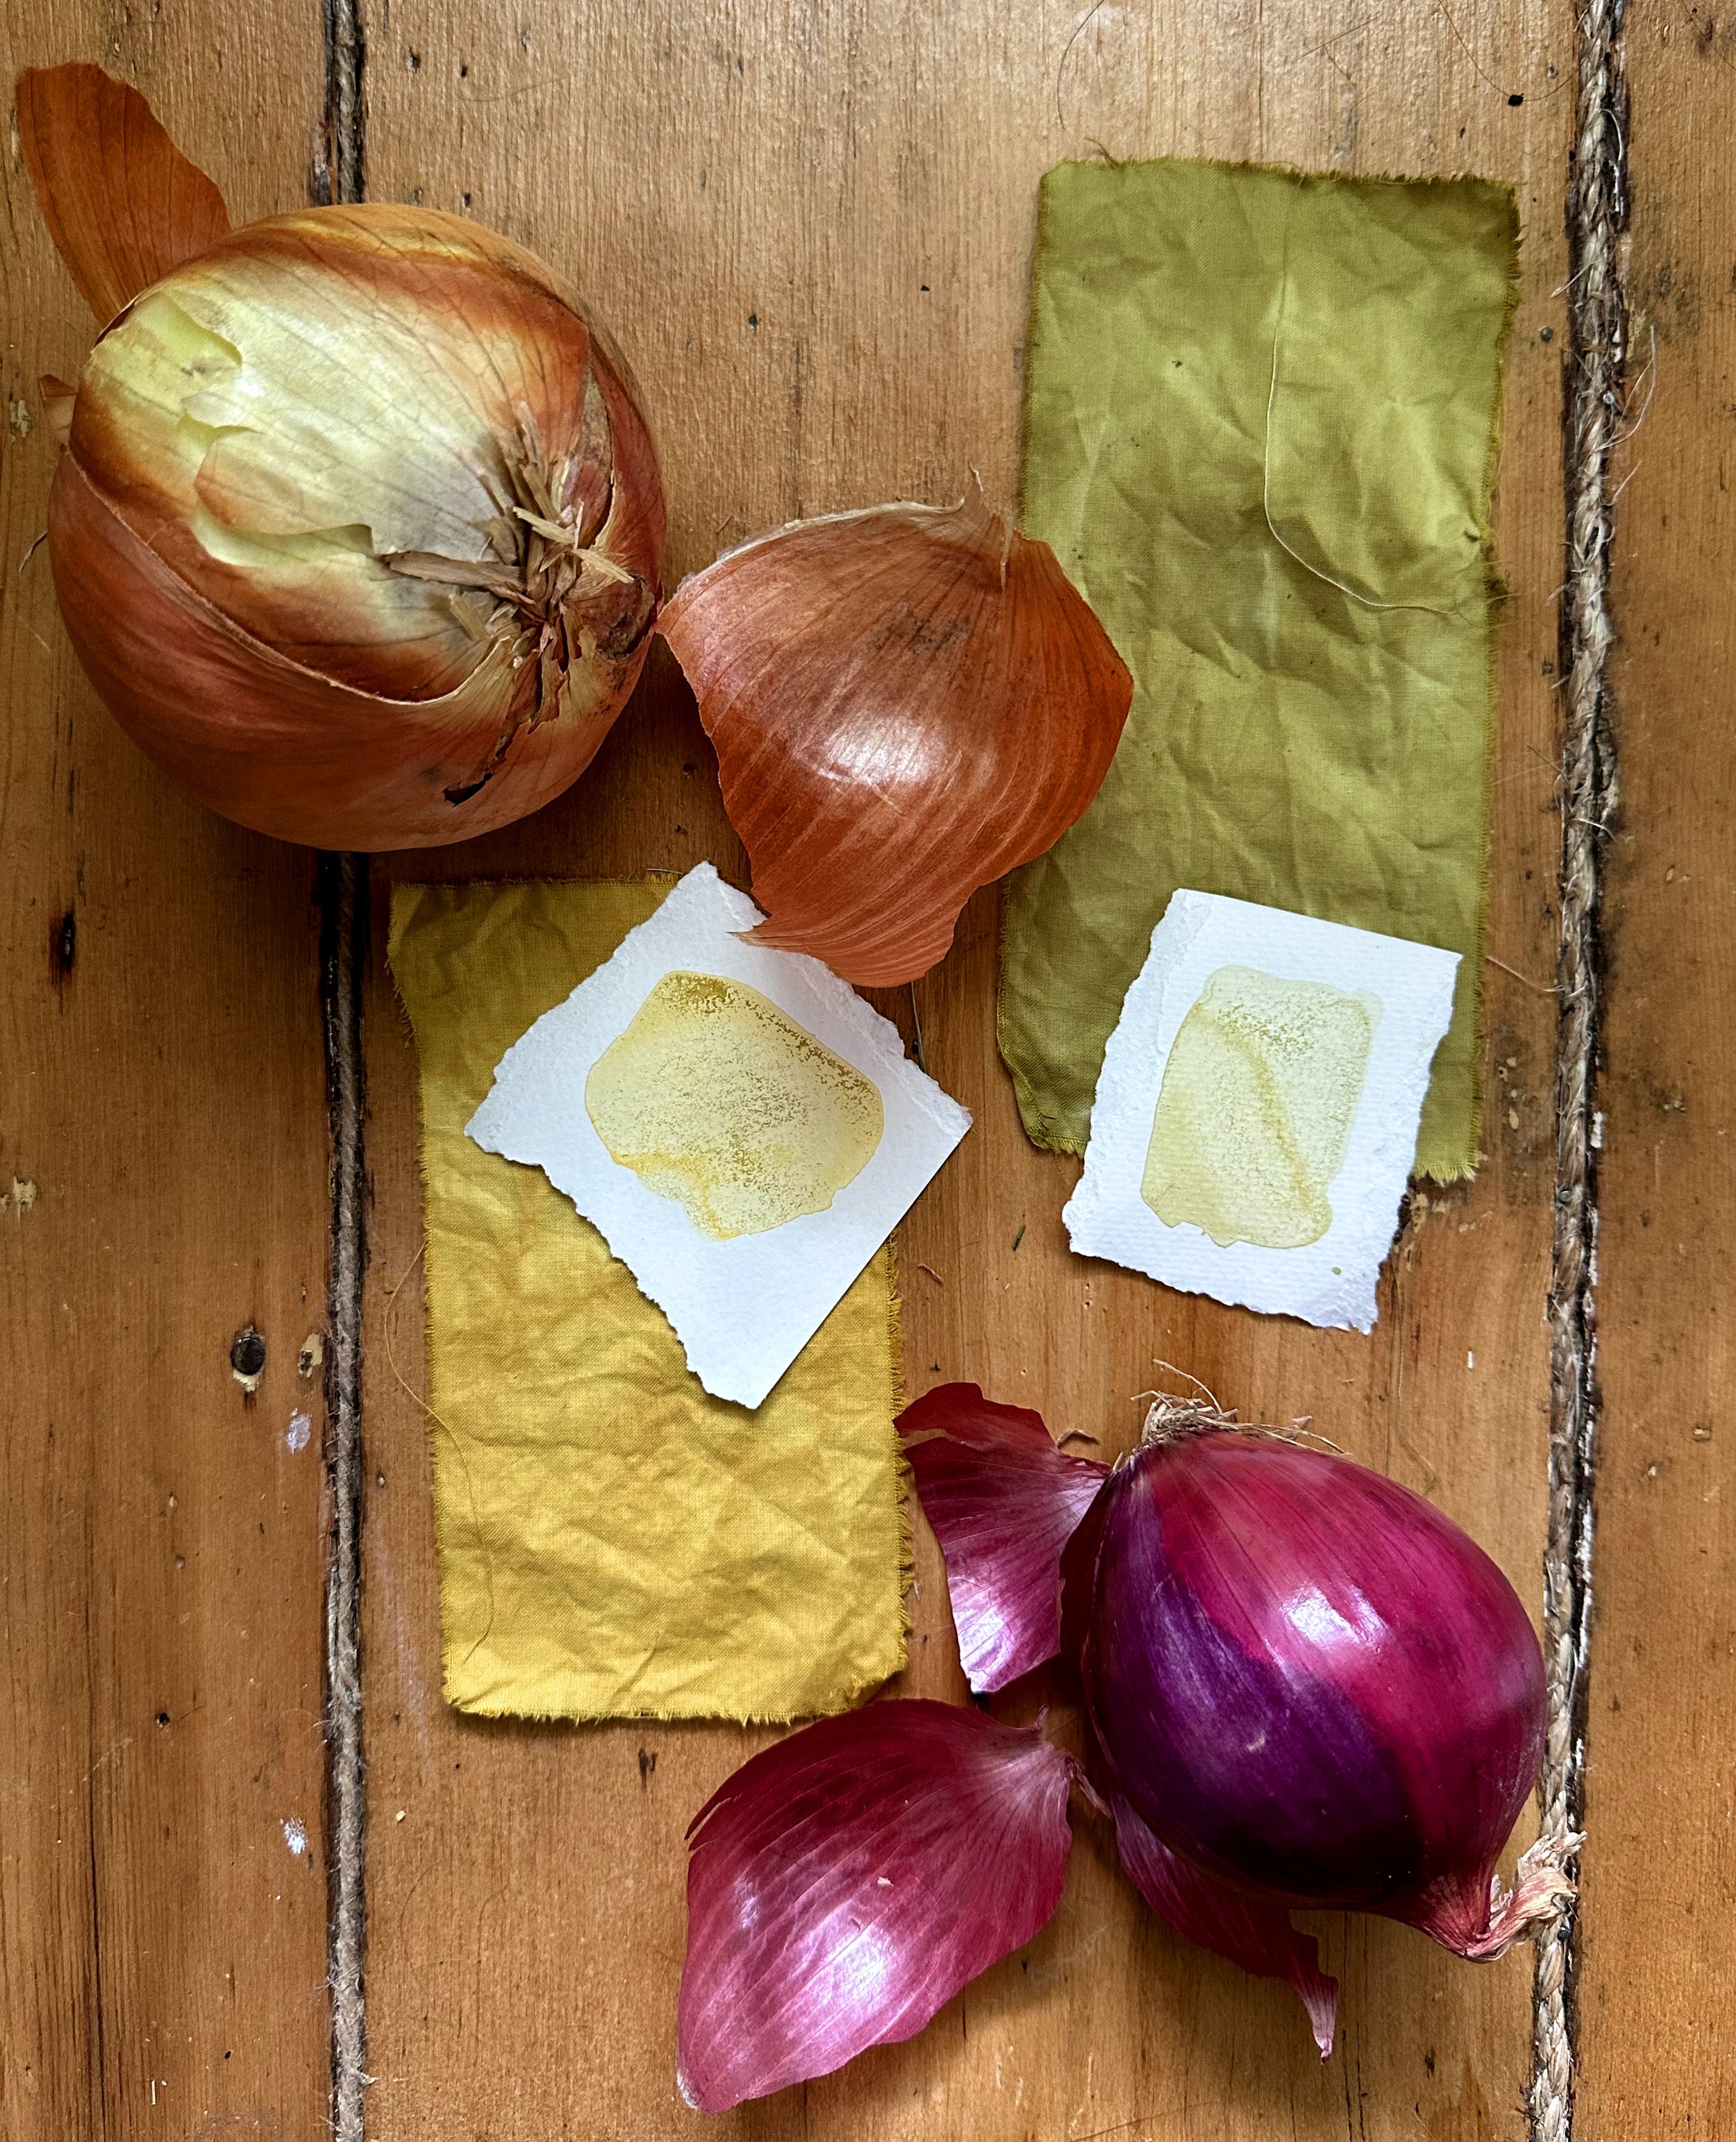
Onion skins can be used to create a beautiful, saturated dye / ink / watercolor!
Yellow onion skins will produce a beautiful yellow-orange while red onion skins will produce, surprisingly, an olive green:
COLLECTING AND PREPPING INGREDIENTS:
Better start cooking with some onions! I’ll admit, our new Costco membership came in handy here.
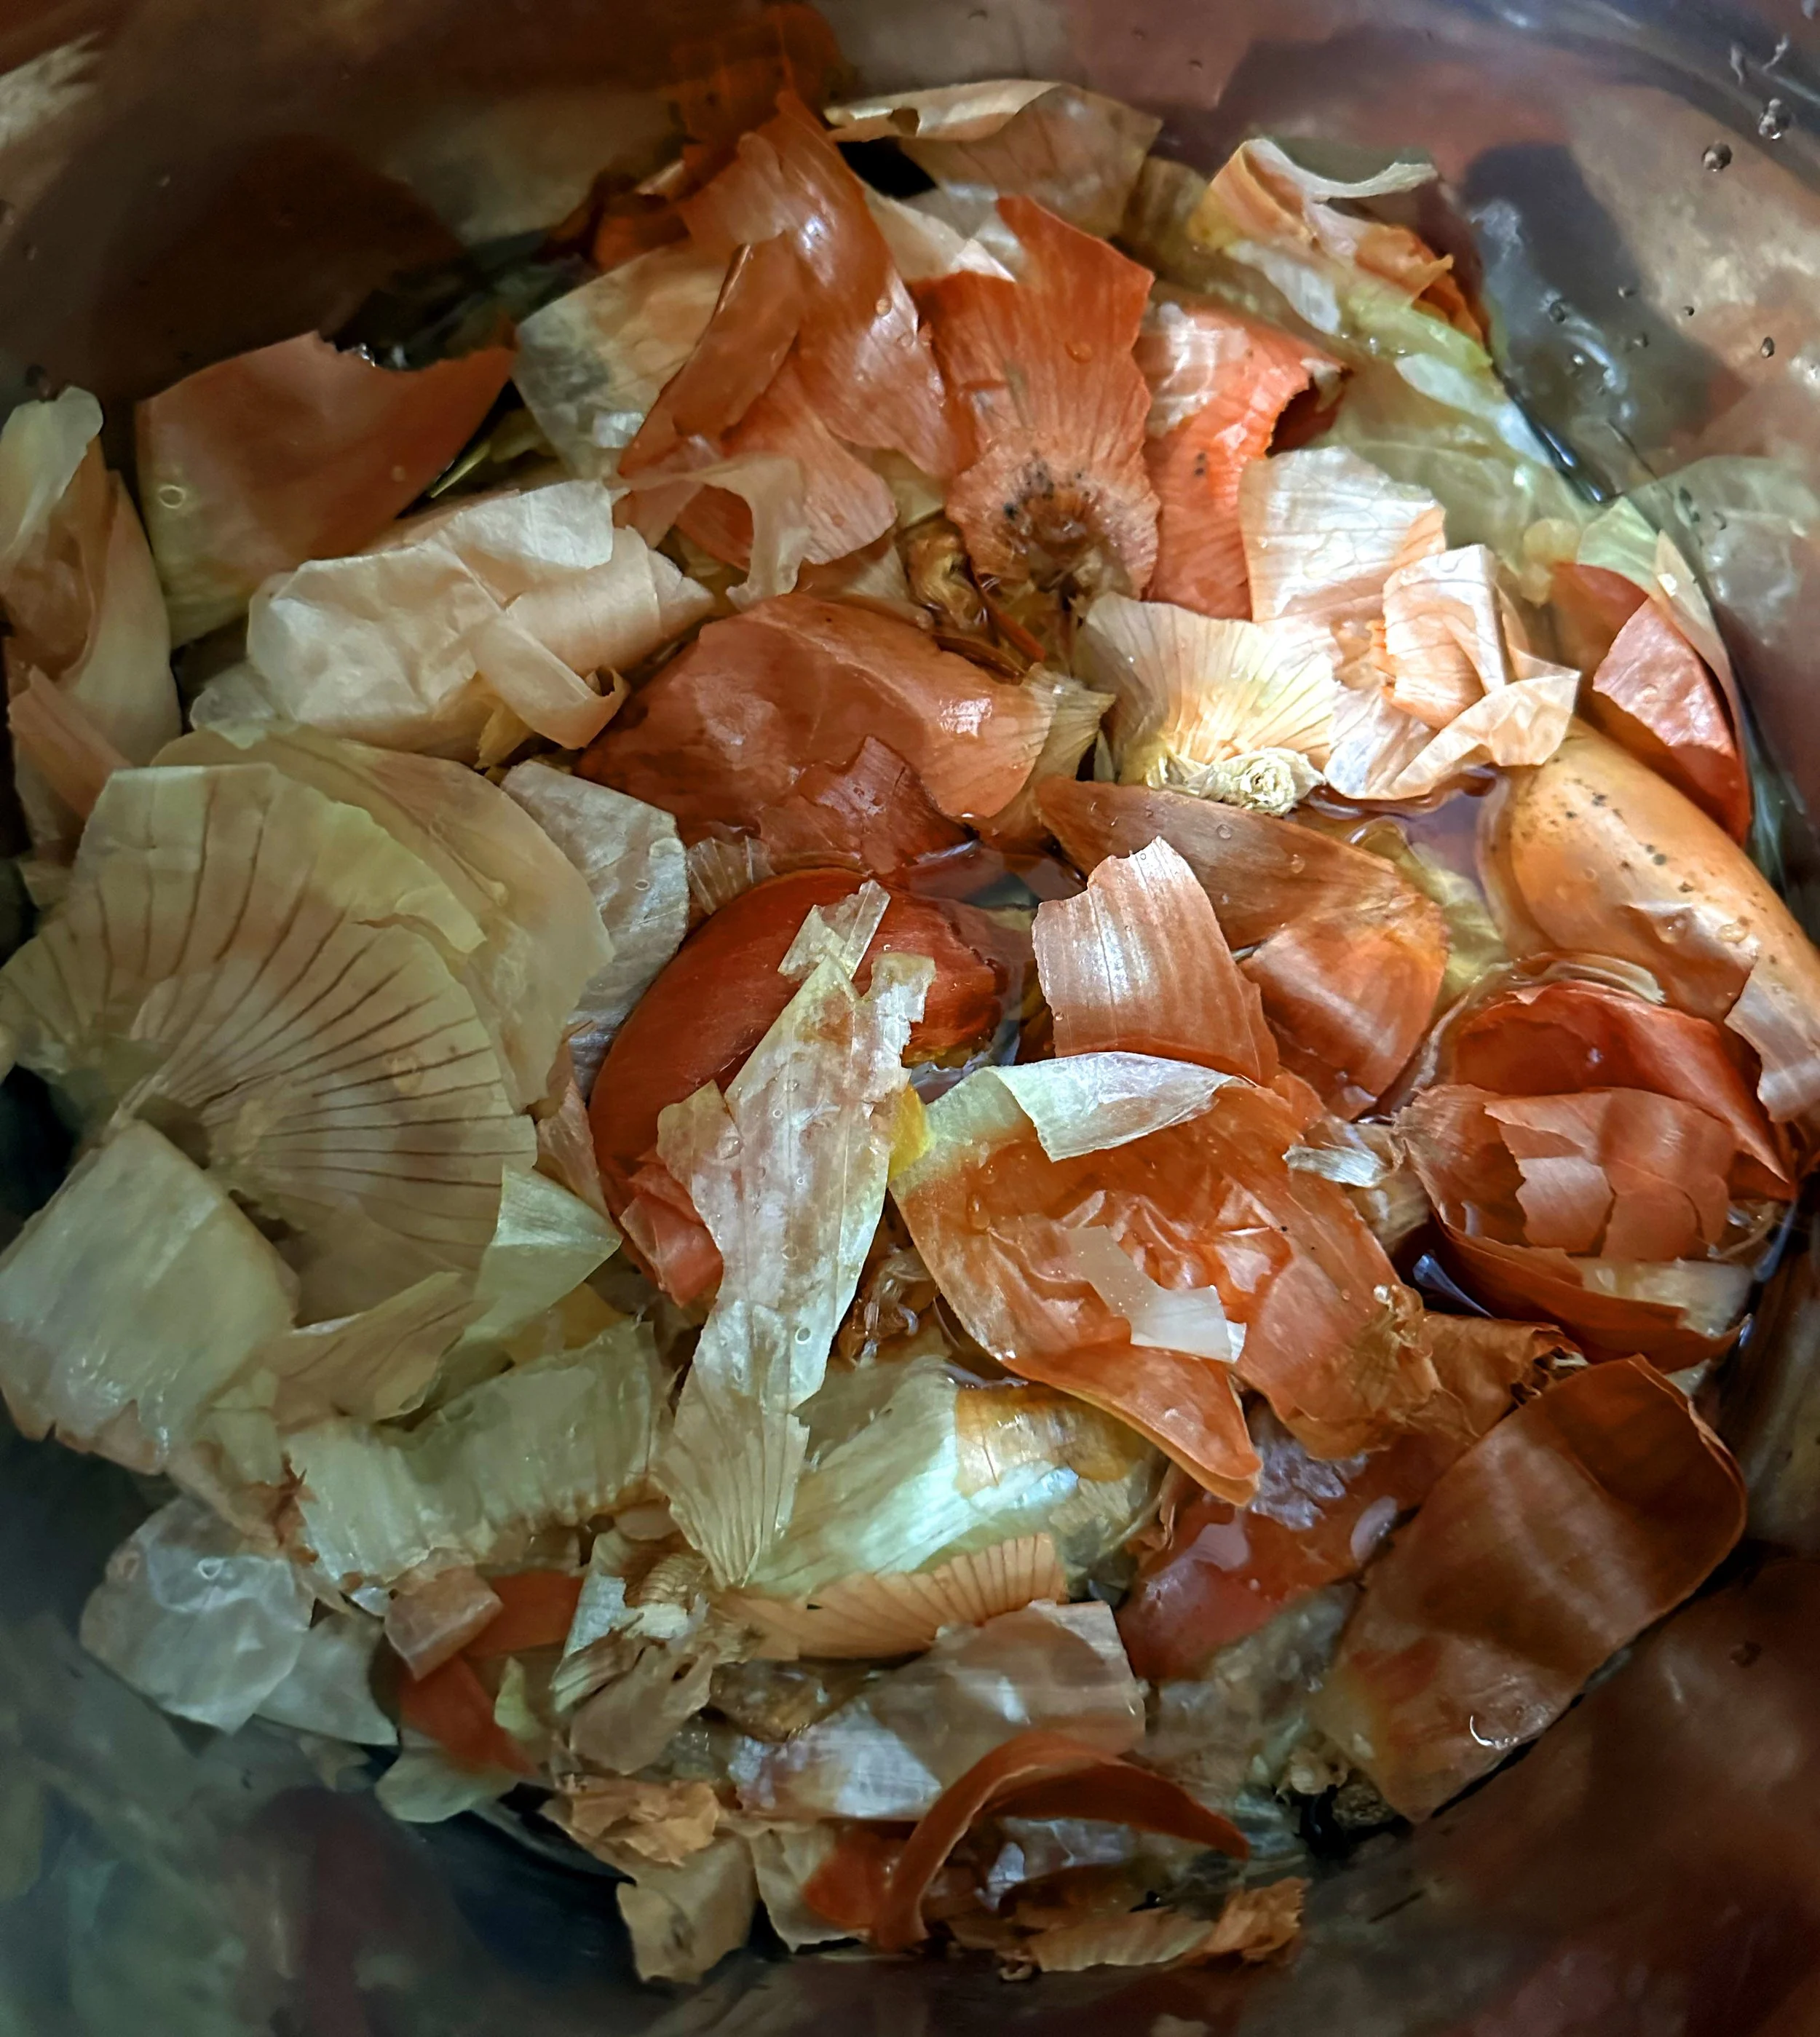
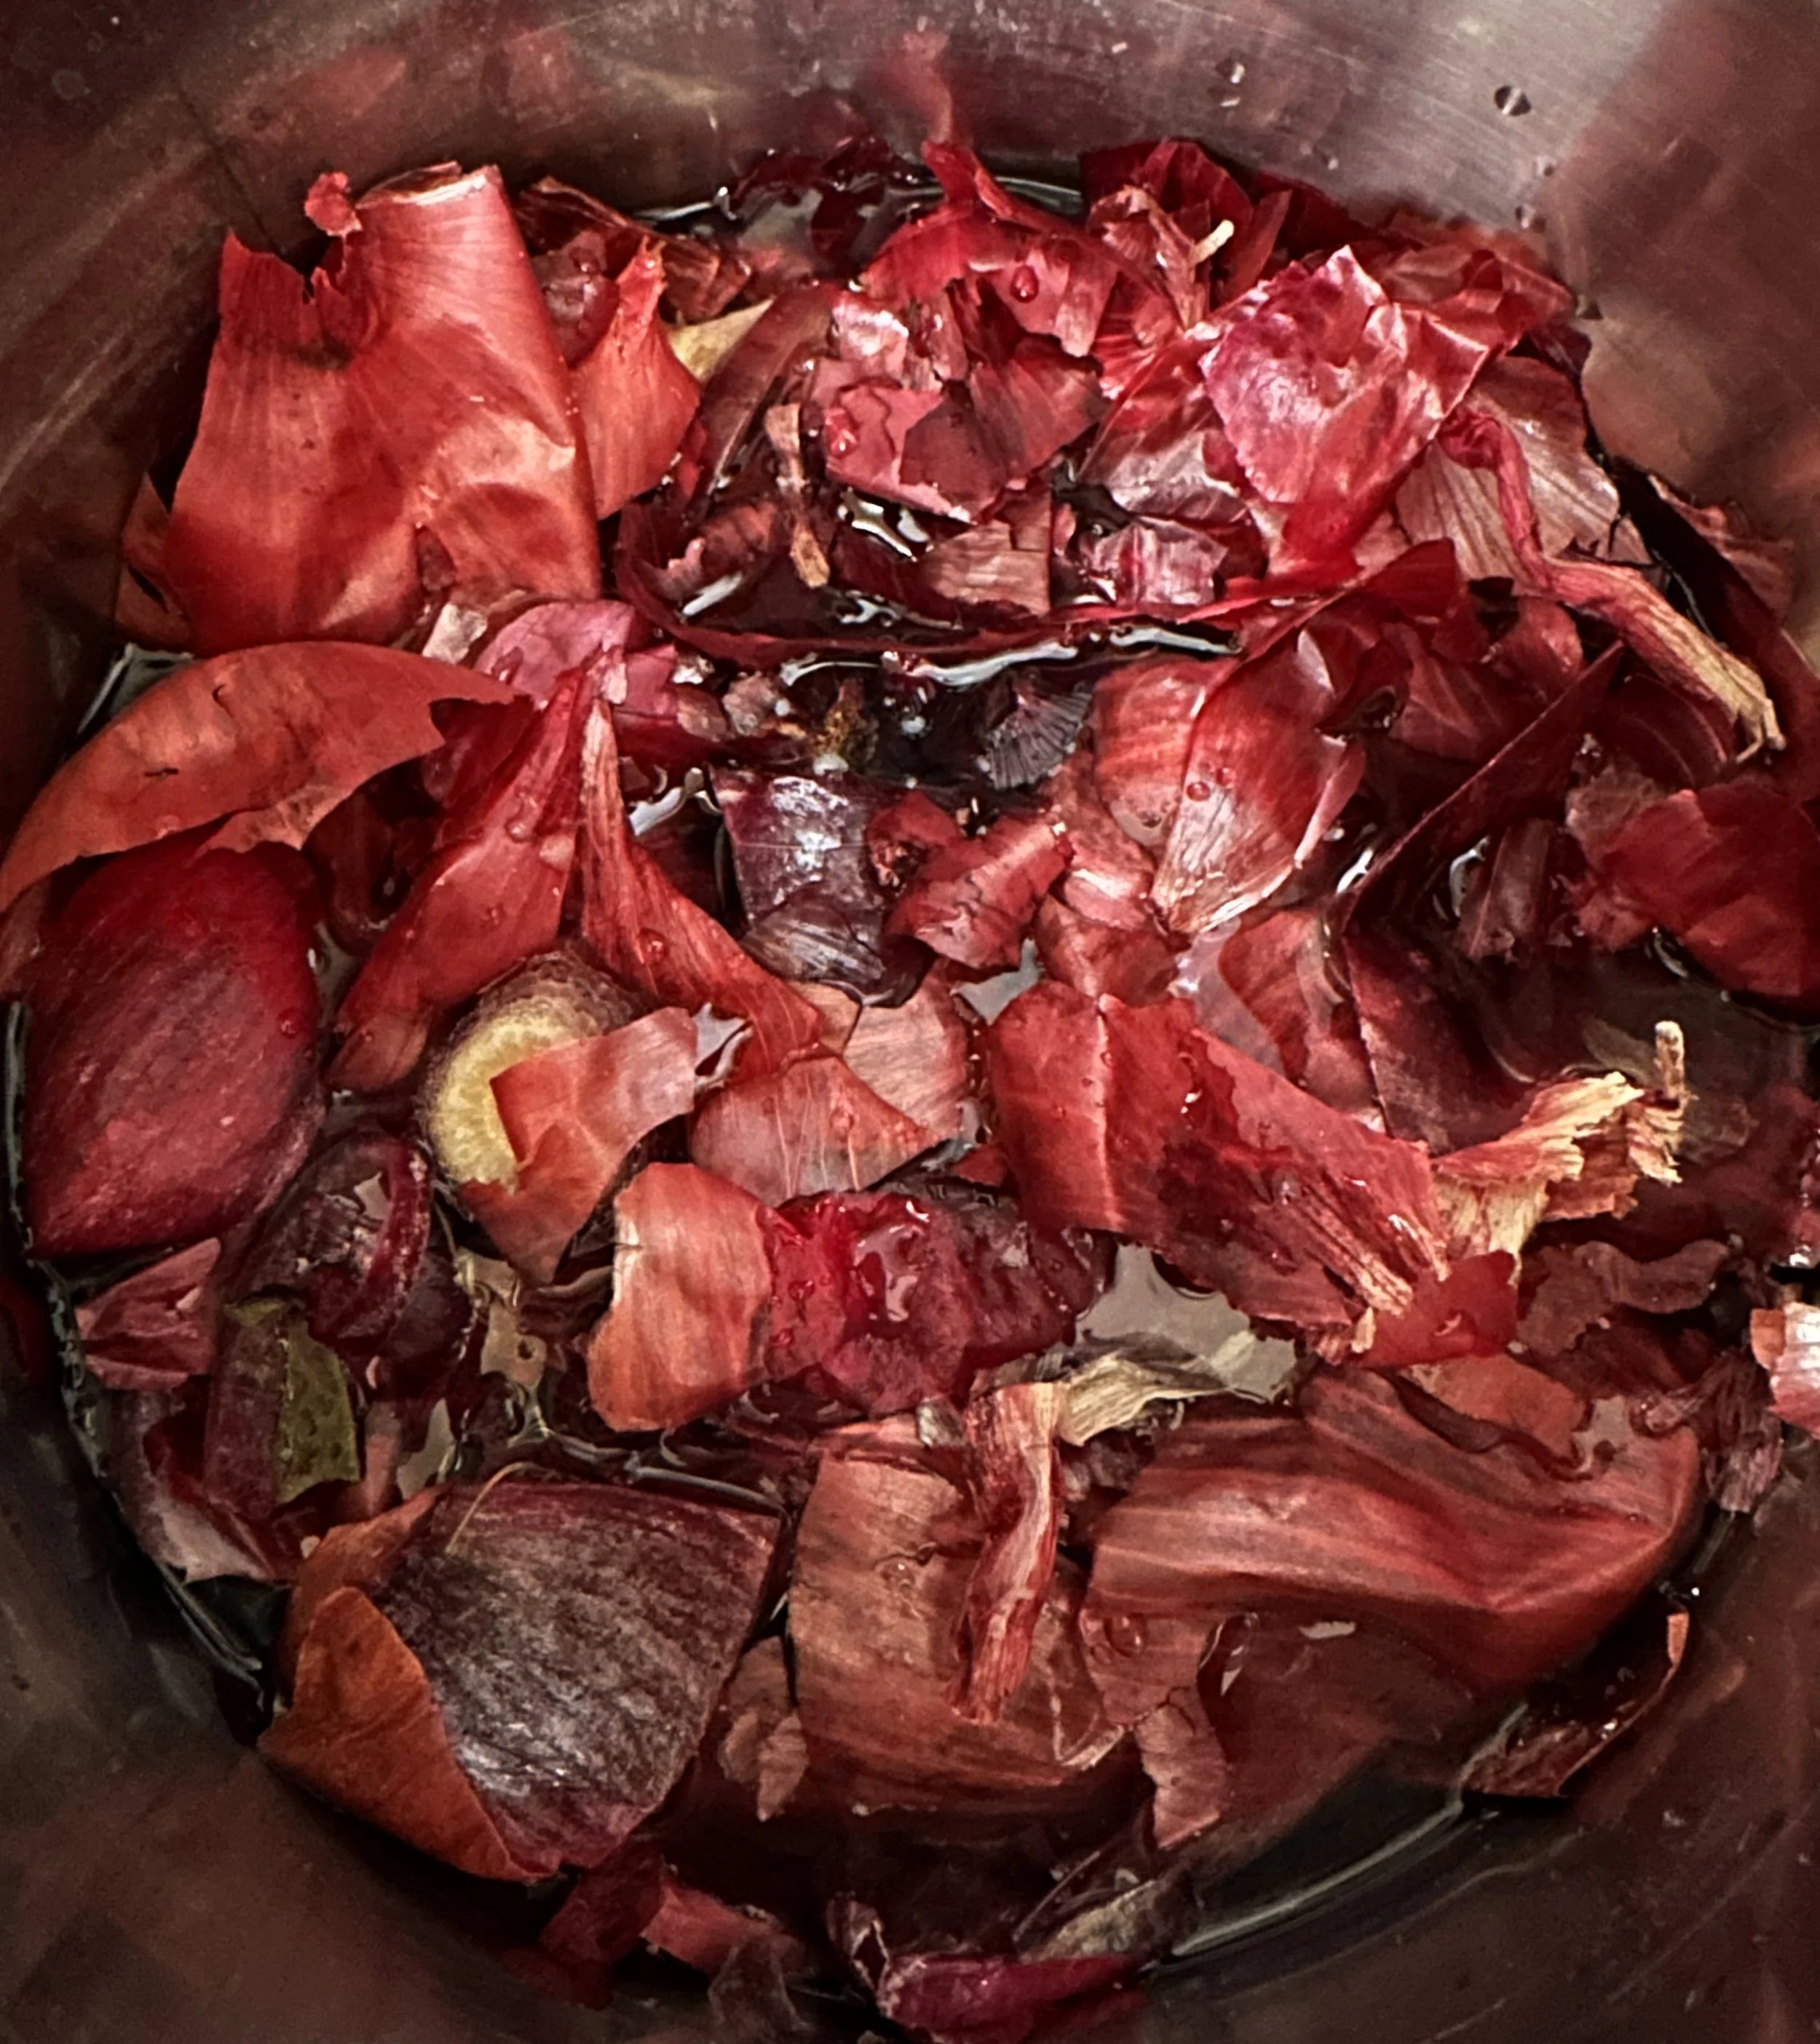
Only the skins need to be saved, although a few stray onion slices found their way into my scraps collection!
STORAGE TIP:
You will need about 1-3 cups of onion skins for the dye. Which… is a lot of onions! I recommend storing the scraps in a Ziploc bag in your freezer until you’re ready to use them. They don’t need to be unthawed either. Just dump them into the water to start!
SUPPLIES NEEDED:
You will need to have an extra set of utensils that you will no longer use for cooking food or food consumption when making dye. It’s still best practice to have two sets of supplies: for cooking and for ‘other’.
I recommend collecting the following:
12 qt pot with lid
measuring cups
measuring spoons
funnels
mesh strainer
various glass jars to store dye liquid
pH strips.
stainless steel tongs
large spoon
paper and fabric strips for testing
It’s best to use supplies made out of environmentally neutral materials like stainless steel and glass for the best results and most accurate color.
For pH strips, I recommend these.

MATERIALS NEEDED:
onion skins. I recommend between 1-3 cups of either yellow or red.
1 to 2 quarts of water
OPTIONAL: wintergreen oil, clove oil or whole cloves
OPTIONAL: alum or iron mordants
OPTIONAL: gum arabic (if this will be used as an ink or watercolor)
A NOTE ON MORDANTS:
Onions, both red and yellow, have a naturally occurring mordant: tannins. Adding alum will help adhere the onion dye to fabrics moreso, but isn’t necessary. Iron is a great mordant to add if you want to ‘sadden’ the color.
For more on mordants/color modifiers, check out this post on creating dyes with turmeric.
PROCESS:
add the onion skins to 1-2 quarts of water.
simmer for up to 60 minutes. Make sure to stir every 10-15 minutes.
once the desired color is reached, take the mixture off heat.
leave the mixture overnight so that the color can continue to strengthen. I added a piece of fabric to see how the color would absorb over a long dye period.
the next day: strain all contents into a bowl. If you would like to experiment with mordants, split the contents into two separate bowls.
OPTIONAL: In bowl #1: leave as is. Or, add 1 tsp or more of alum. This will not do anything to the dye color, but will make the onion a little more colorfast / lightfast as it is used on fabric, paper and more.
In bowl #2: add 1/4 a tsp of iron to start. Stir this in. Continue adding small amounts of iron until the desired color is achieved. A small amount of iron will “sadden” the color. For yellow onion, the color will become more mustardy to a khaki brown. For red onion, the color will become an army green to gray-brown.
add gum arabic if this will be used as an ink or watercolor. I recommend 2-3 drops per 2 oz. bottle, but it’s up to you!
the dye/watercolor/ink is ready for use! Use it now, or store it later!
REMINDER: if you choose to store it for later, make sure to sterilize your containers and add 1 drop of wintergreen or clove oil per oz. Or, you can add 1-2 whole cloves per oz to reduce mold growth.
NOTE: this is a particularly odorous process. It is best to create this one outside!

A note: red onion skins can also produce a warmer red tone, if mixed with an acid modifier like vinegar. I did not test this though.
A lot of onion-induced tears produced these four colors yet they are my favorite so far!
